Learn TYPO3
The Administrative Area of TYPO3, commonly referred to as the Backend, is reputed as intuitive and user-friendly. However, as with every new and undiscovered thing, it could seem obscure and complicated. To avoid that unpleasant situation in which our customers can become overwhelmed and frustrated, we have decided to dedicate this tutorial to an introduction and overview of the backend in question.
The following lines are devoted to the task of getting your familiar and confident working your way around the TYPO3 Backend and optimizing the efficiency of your workflow.
To access your TYPO3 Administrative Area, you have to "/typo3" after your domain name, i.e., "yourdomain.com/typo3" where "yourdomain.com" stands for your own domain name.
Upon entering the URL address mentioned above, you are presented with the TYPO3 Admin Login page, which looks as shown in the following screenshot example.

All you have to do is enter the username and password you have specified during the installation process and click on the "Login" button.
At this point, you should be logged into the Admin Area Interface. As you have probably noticed, it consists of several sections and, most importantly, two navigation bars.

Now we expect you to have a brief idea of the Interface and be ready to dig into more details on how to find your way around.
For a start, let's take a look at the Top Bar. We are going to explain the purpose of each icon following the exact same order they appear on your end (left-to-right).
![]()
To get to the Page Tree and have a visual idea of what we are referring to, please access the Pages module from the Module Menu.
The middle section is the Page Tree, and it represents the hierarchical structure of your website pages. "Congratulations" is the root page, which holds all child pages of one or several TYPO3 installations. Each level can be expanded by clicking on the corresponding arrow icon. Needless to say, the purpose of the Page Tree is to allow you to navigate through your website content and perform any desired changes with ease.
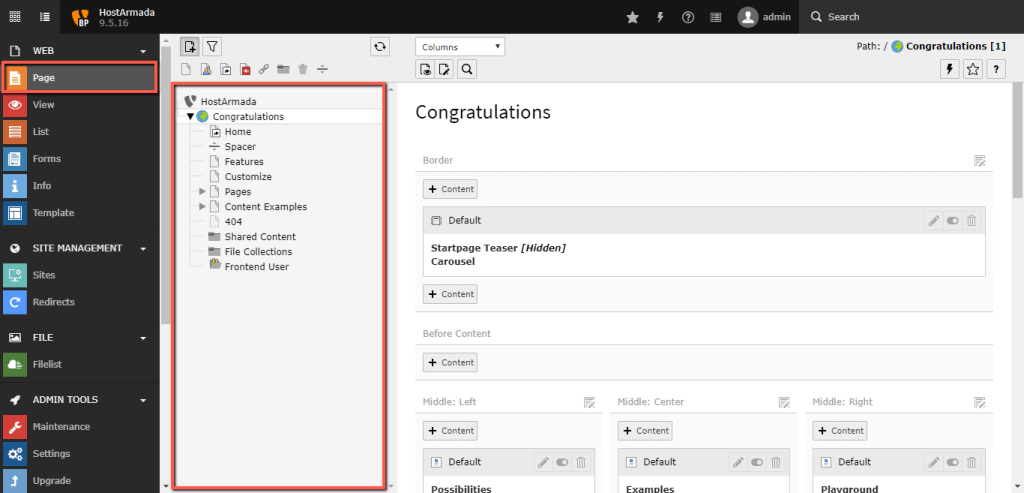
As we previously pointed, Page Tree is going to persist in several areas of your Backend, such as Lists, Forms, Templates, etc.
The section on the right side of the Page Tree is the Content Area, which is in detail explained in our How to create pages in TYPO3 tutorial.
This is all there is to know concerning the workaround within the TYPO3 Backend for now. We hope it is all clear, and you know how to navigate through it efficiently. Of course, this was just an overview to get you familiar with the interface, and you can find detailed instructions on how to make the most of these features in our TYPO3 tutorial series. As usual, we would like to thank you for trusting our guidance.

Sebahat is a young and bright woman who has become an invaluable part of our team. She started as a Customer Care Representative, mastering that role and, along the way, growing into a tech-savvy individual who is well acquainted with every support layer of the company. Driven by her aim to improve our customers’ experience constantly, she is committed to enhancing the extraordinary support we deliver.
Learn more about TYPO3 in the other tutorials that we have: