
Depending on the complexity of your website, you might need to create multiple users and grant them specific permissions and roles. Fortunately, WordPress comes with a powerful built-in User management system that allows you to gain full control over your users. This system supports multiple user roles, which define the user permissions, and therefore, determine what they can and cannot do on your website. The roles provided by default in WordPress are:
In the following lines of this tutorial, you will learn how to create, configure, and further manage your WordPress Users.
To begin, we will need you to log into your WordPress Admin Dashboard. You can do that by accessing your domain followed by "/wp-admin", i.e., "yourdomain.com/wp-admin", where "yourdomain.com" stands for your actual domain name.
Once logged, please navigate through the left-hand side menu bar to Users > All Users.

Upon doing that, you will be redirected to the "Users" page, where you will be presented with a list of all the existing users on your website.
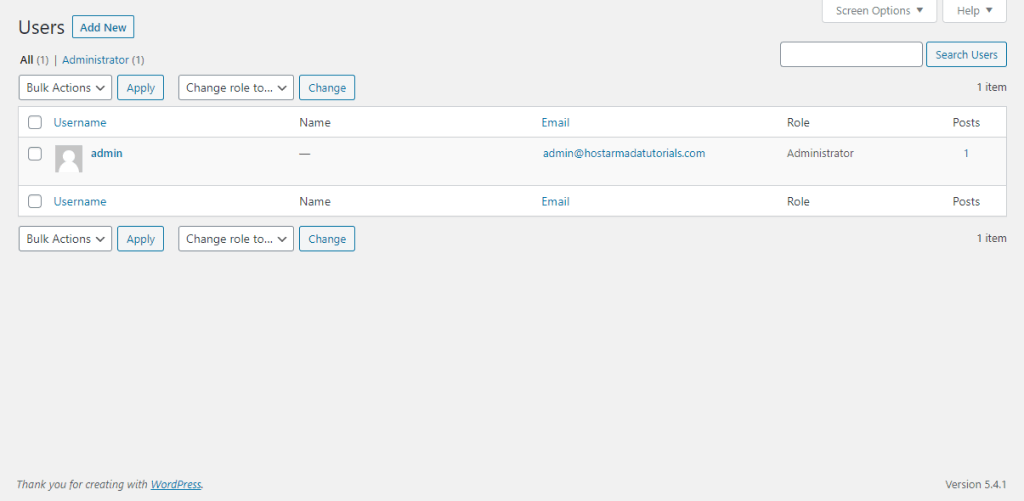
In the next steps of this tutorial, We are going to overview the "Users" page, so you can get familiar with its interface and effectively operate with it.
As you can see, the users' table consists of a few columns representing essential data, such as the username, names, email address associated with the account, the role, and the number of posts created by the user.
At the top of the page, you can see a few links (e.g., "All", "Administrator", etc.) allowing you to list the users sorted based on their role. Each link indicates how many users are assigned to the corresponding role.
Beneath the links, you will find the bulk actions applicable to all users displayed at the current page. They include deleting the selected users and changing their current roles.
You will also notice the search tool, which comes extremely handy when you have a vast number of users.

Now that you are familiar with the Users interface, you are ready to step into performing the most common actions, such as creating, editing, and deleting users.
At a certain point, you might need to create a new user for one reason or another. Fortunately, in WordPress, this is an effortless and straightforward task. To begin with, place click on the "Add New" button.

Once this is done, you will be automatically directed to the "Add New User" page, where you will need to specify the required user details. As you will notice, they are all related to general user information and quite self-explanatory. However, we will go over each and every one of them.

Once you specify the required information, please click on the "Add New User" button to finalize the creation.
With this done, your new user is successfully created, and you will find it in the list of users.
On some occasions, you might need to modify an existing user account. This process is no different than creating one. To modify the general details, please locate the user within the list, hover over it, and click on the "Edit" link.

Upon doing that, you will be redirected to a page similar to the user creation page. With the difference that there are few additional options, you can edit for the user's profile.
The first "Personal Options" section allows you to control the appearance of the user account. You can disable the Visual Editor, change the color scheme, enable keyboard shortcuts, and disable the site toolbar.

The following two "Name" and "Contact Info" section contain the general user details you have configured during the user account creation.
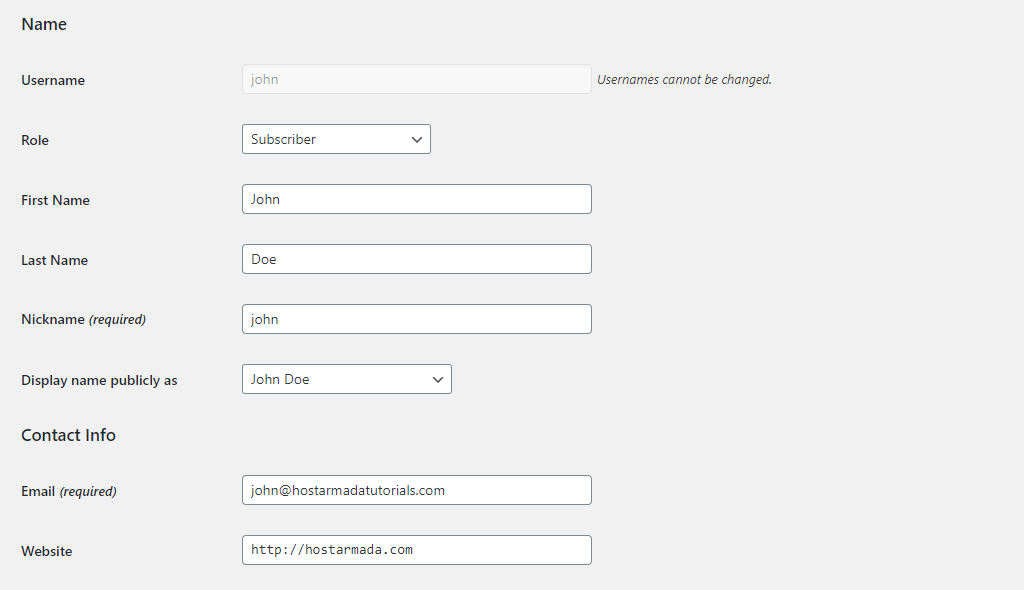
Within the last two "About the User" and "Account Management" sections, you can modify the user bio and profile picture, as well as to change the user login password.
![]()
Once you perform the desired changes, please click on the "Update User" button to apply them.
In case you would like to change the role of particular user(s), you can do so from the list of users. You have to tick the checkboxes corresponding to the users and select the new role from the "Change role to" dropdown. Once this is done, you need to click on the "Change" button to perform the required modification.
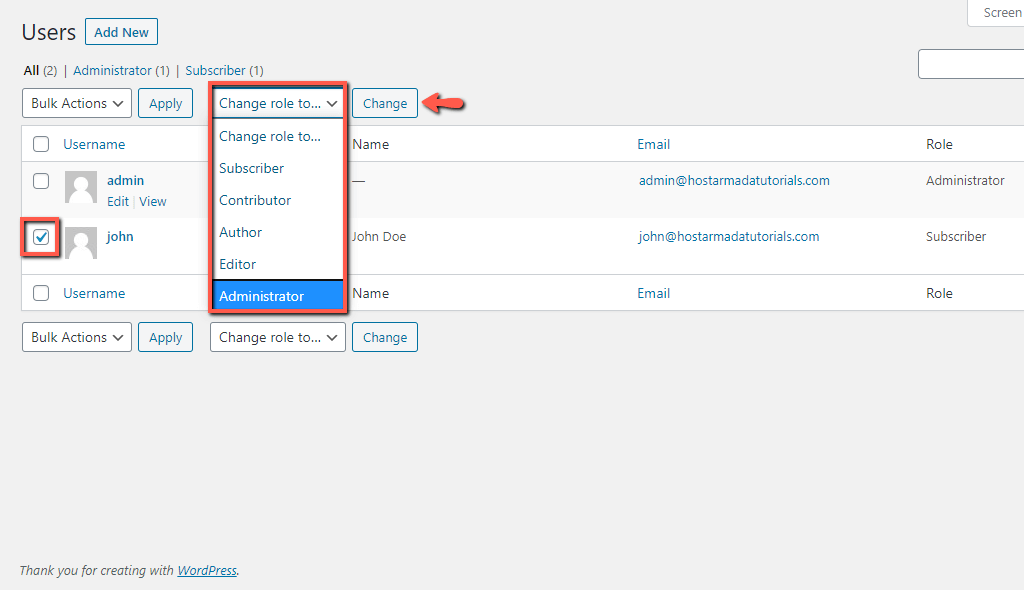
With this done, the role of all selected users will be updated.
In case a user is no longer needed, you can remove it by locating it within the users' list, hovering over it, and clicking on the "Delete" link.

Upon doing that, a warning message will appear, and you will need to click on the "Confirm Deletion" button to proceed further.

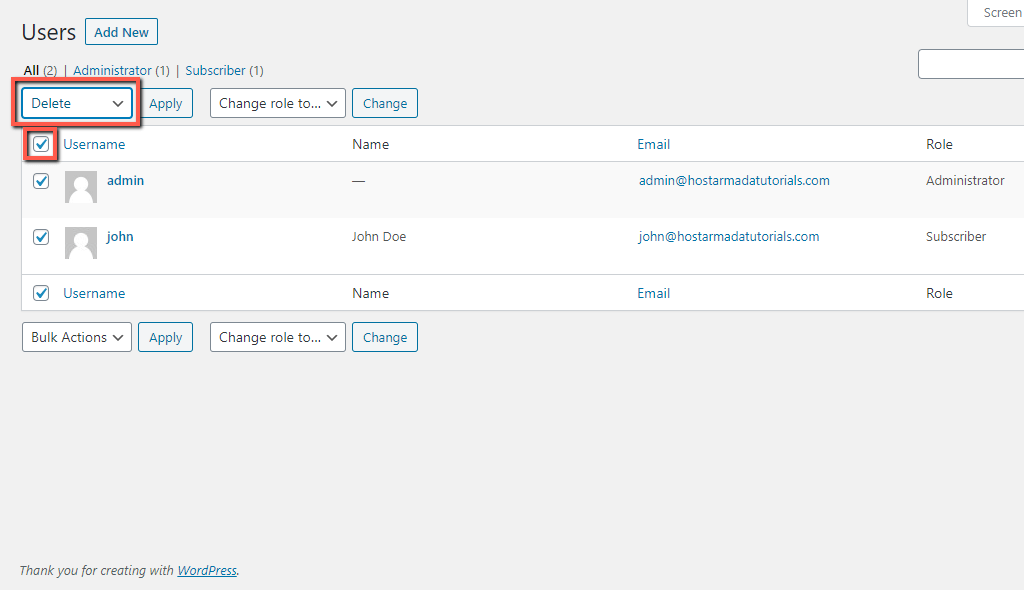
In some cases, you might need to delete several users at once. You can do that by ticking the checkbox in front of "Username" positioned in the heading of the table. This action will mark all users currently displayed on the page. To avoid deletion of unintended users, you simply need to uncheck the corresponding boxes.
When you are ready, please click on the "Bulk Actions" dropdown above the table and select the "Delete" option.
Afterward, please click on the "Apply" button positioned right next to the dropdown menu.
Please note that by default, WordPress always lists only 20 items per page, whether they are posts, pages, users, etc. With this in mind, you are limited to deleting up to 20 users at once, which is not really practical in case you want to remove a lot more. Fortunately, you are able to modify that number and extend it up to 999 items.
To do so, you have to click on the "Screen Options" button positioned at the top right corner of the page. Once it is expanded, please enter the desired value into the "Number of items per page:" field and click on the "Apply" button.
This pretty much sums up the basics of user management. Now you should feel confident in your knowledge and abilities to properly administer your WordPress users. We hope the information in this tutorial was useful, and our explanations clear enough for you to understand.

Sebahat is a young and bright woman who has become an invaluable part of our team. She started as a Customer Care Representative, mastering that role and, along the way, growing into a tech-savvy individual who is well acquainted with every support layer of the company. Driven by her aim to improve our customers’ experience constantly, she is committed to enhancing the extraordinary support we deliver.
Learn more about Wordpress in the other tutorials that we have:
