
One of the most powerful WordPress features is undoubtedly the Theme Customizer, which allows you to make real-time changes to your website. Using the Customizer, you can tweak a wide variety of theme settings in a visual interface. This is a significant improvement of the user experience as you can see the changes immediately applied on your website frontend.
In this tutorial, we will guide you on how to use the Customizer and overview every aspect of your website appearance you can modify using it.
For a start, we will need you to log into your WordPress Admin Dashboard. You can do that by accessing your domain followed by "/wp-admin", i.e., "yourdomain.com/wp-admin", where "yourdomain.com" stands for your actual domain name.
Once logged, please navigate through the left-hand side menu bar to Appearance > Customize.

This action will redirect you to the actual Theme Customizer interface.
Before we begin explaining the Customizer, you should know that each theme comes with an individual set of features and functionalities. Considering that, the settings and options you are provided with might be slightly different. Anyhow, the general idea of using the Customizer is the same, and the instructions you will find should be sufficient in any case.
The Theme Customizer interface will present you with a preview of your actual website on the right end. The left vertical menu consists of a few separate sections, each dedicated to a specific aspect of your site you may customize.
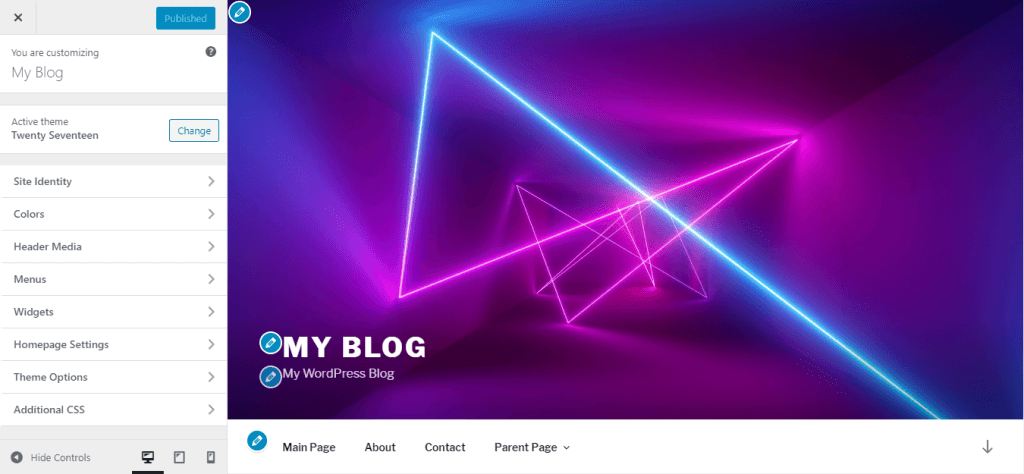
We are going to review each of the sections and briefly explain what exactly you can modify.
To keep it consistent, we will review each of the options available in the left-hand menu following the same order. Please bear in mind that in our example, we will be publishing the changes at the end of the tutorial. If you are looking forward to performing only particular modifications, you need to publish them right away.
The "Active Theme" section indicates the theme you are currently using for your WordPress website. By clicking on the "Change" button, you will be able to change your theme directly through the customizer.

Upon doing that, you will be presented with a list of all themes currently installed in your WordPress instance. In case you want to select a new one, you need to click on the corresponding "Live Preview" button. If you are then pleased with the result, you have to click on the "Activate & Published" button positioned at the top of the left menu.

You can even install new themes directly through the Customizer. You can do that by clicking on the "WordPress.org themes" radio button. Upon doing so, you will be presented with the list of available themes.

To install a new theme, you have to click on the corresponding "Install & Preview" button. After the theme is installed, you have to click on the "Activate & Published" button to save the changes.
The "Site Identity" tab holds the general website information:
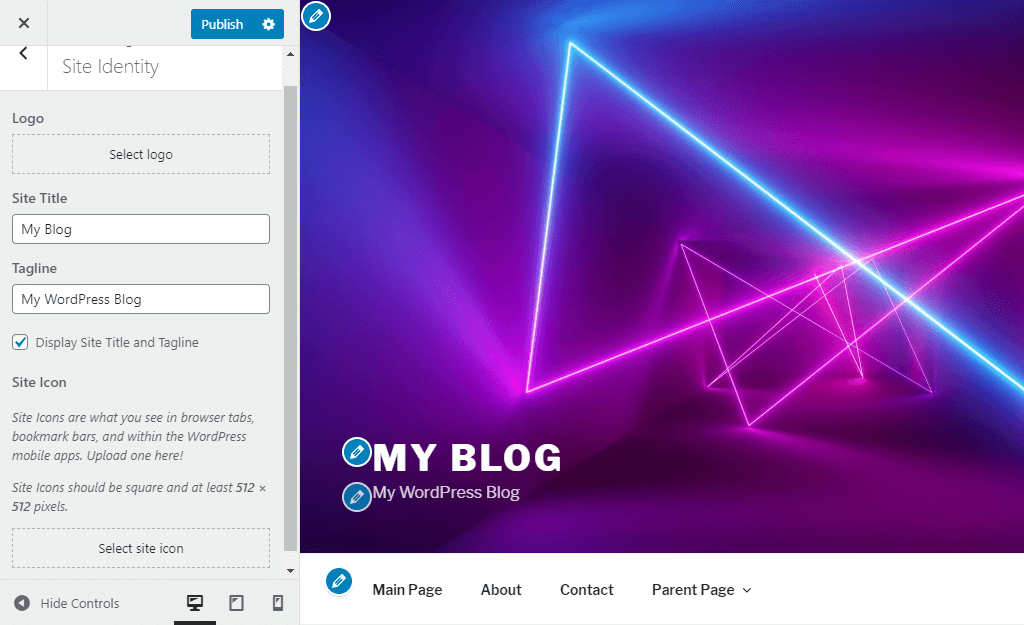
These are among essential settings, as they influence the first impression you will leave to your visitors.
Within the "Colors" tab, you can customize the colors of your website using the color schemes provided by your theme.

If you want to switch back to the default colors, please click on the "Clear" button.
The "Header Media" tab includes settings controlling the Header Image/Video of your website. Please find detailed instructions on this topic in our guide on How to edit the Header Image of your WordPress website.
Within the "Menus" section, you will be able to modify the existing menus on your website, as well as to add new menus.
If you want to check the available menu locations supported by your theme, you can click on the "View All Locations" button.
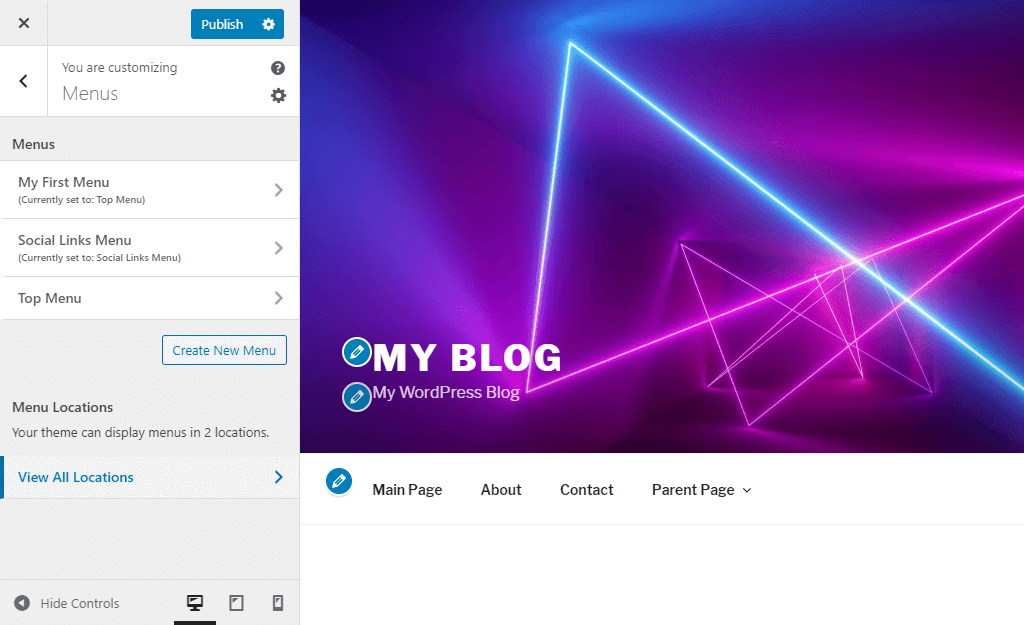
The process of managing menus through the Customizer is not so different than through the WordPress Admin Dashboard. Therefore, we will not dig into an in-depth explanation of how to do that. In case you need further guidance, you can always refer to our How to create and manage the menus of your WordPress website tutorial.
Under the "Widgets" tab, you can customize the widgets supported by your theme. Once you access it, you will be presented with the available widget-ready areas.

If you want to include a new widget to a particular widget area, please click on it and then hit the "Add a Widget" button.

Afterward, the process of configuring the widget is quite similar to the backend. Detailed explanation on what widgets are in general and how to properly set them you can guide in our What is a WordPress Widget and how to add a new Widget tutorial.
From the "Homepage Settings" tab, you can control the type of your home page, and the default home and post pages of your website.

You are also allowed to add new pages on the go if you prefer to so.
From the "Theme Options" tab, you can control the appearance of your website pages determined by the theme.

You are also allowed to add new pages to the corresponding Home Page section if this is required.
From the last "Additional CSS" tab, you are able to include custom CSS code and modify the style of the page.
The code needs to be inserted into the empty panel within the left menu.

This a great way of styling your theme, as it eliminates the need to insert the code into the theme itself and potentially lose your customization when the theme is updated.
At the very bottom right corner of the left menu, you will find three icons resembling different devices. They are intended to preview the appearance of your web page on the corresponding device.

We would recommend you to always take advantage of them when performing visual changes on your website.
Now, once you perform the desired changes, it is vitally important to click on the "Publish" button to apply them. Even though they appear in the preview section right after they are performed, it does NOT mean they are saved. This is one of the great advantages of the Theme Customizer as it allows you to visually preview the changes before actually applying them.

Once this is done, the changes will be successfully applied to the live version of your website.
Congratulations! Now you are familiar with the WordPress Theme Customizer, and you know your way around. We hope after this tutorial, you will realize the great benefits it has over the WordPress Admin Dashboard in particular aspects.

Sebahat is a young and bright woman who has become an invaluable part of our team. She started as a Customer Care Representative, mastering that role and, along the way, growing into a tech-savvy individual who is well acquainted with every support layer of the company. Driven by her aim to improve our customers’ experience constantly, she is committed to enhancing the extraordinary support we deliver.
Learn more about Wordpress in the other tutorials that we have:
