Learn WooCommerce

The most famous E-Commerce plugin for Wordpress will allow you to build an Online Store!

• Last Updated: 01/13/2020
• ( 22 minutes reading )

How to configure WooCommerce Payments Settings

Introduction

The Payment Gateways are core settings for any eCommerce website, therefore their proper configuration is essential for your Online Store’s functionality and success. WooCommerce 3.7.0 comes with four built-in payment gateways to choose from, additional gateways can also be added by using WooCommerce extensions. In this guide, we will review how you can configure your Payment Gateways with just a few clicks. 


Getting Started

In order to begin, please first log in to your WordPress Admin Dashboard and navigate through the left menu bar to WooCommerce > Settings. Afterward, please switch to the "Payments" tab from the top menu bar.


Accessing the Payments Settings page


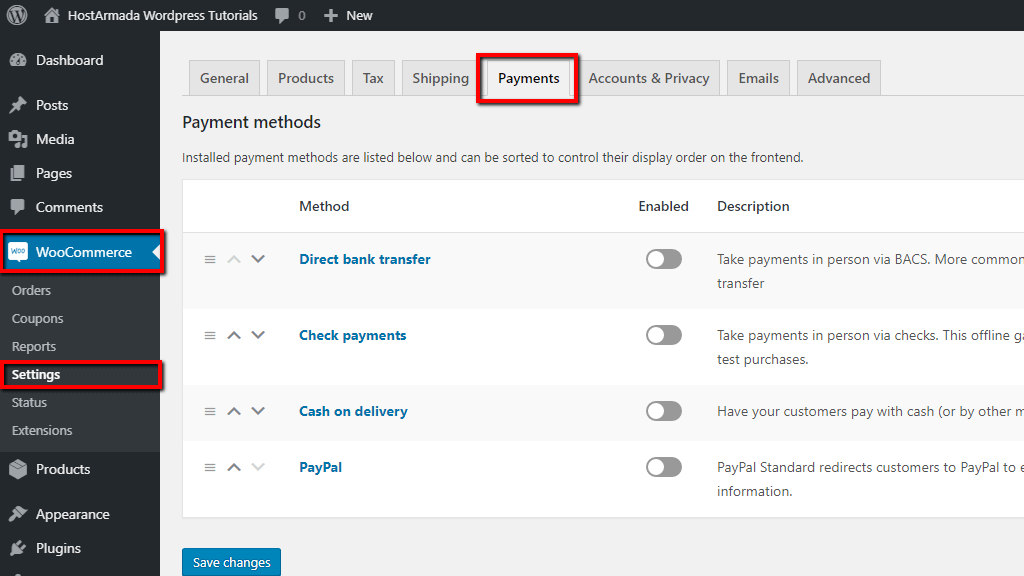
On this screen, you will see listed all the "payment gateways" that are currently installed and which gateways are enabled. 


Organizing Payment Gateways

The order of the payment gateways you see on your backend will be presented to your customers during checkout. Meaning that the first active payment gateway in the list will be considered as a default payment method. 

In order to organize your "shipping gateways", you can either click on the left handler which will allow you to drag and drop the gateways to the desired position or you can use the arrows which will move the gateway up and down.


Organizing Payment gateways


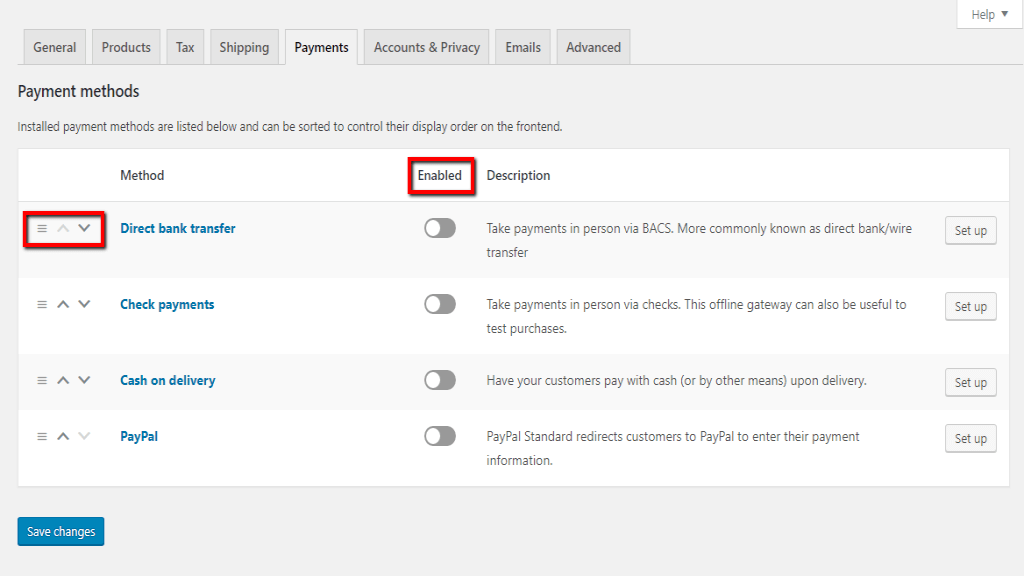
As you will notice at this point all the "shipping gateways" are disabled, in order to enable the gateways you want to use, please click on the "Enabled" toggle next to them. As soon as you set up your preferences, please make sure to click on the "Save changes" button and we can continue further to configure their settings. 


Managing Payment Gateways

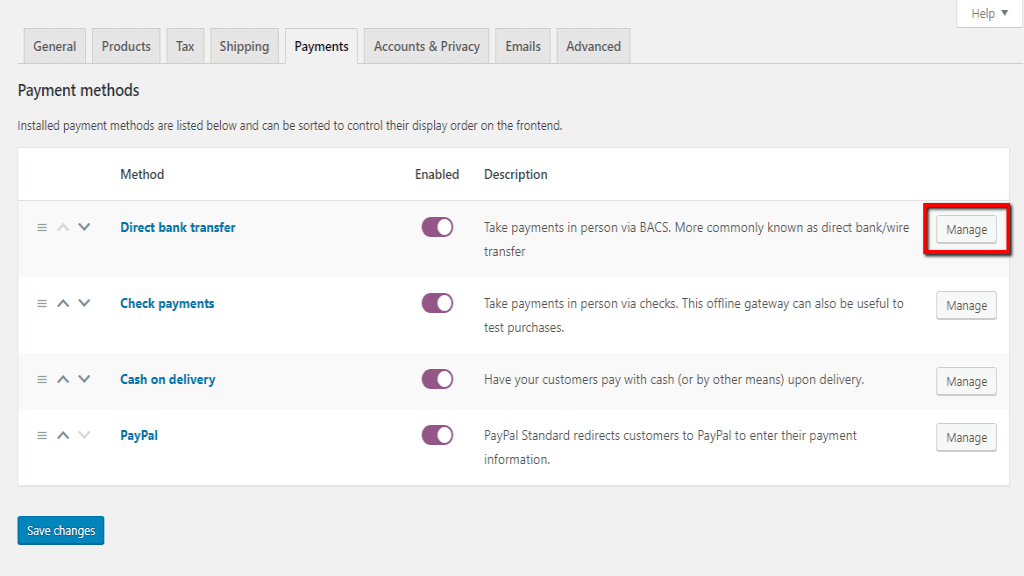
After you have selected your preferred "payment gateways" it is time to configure their specific settings. We will thoroughly review each of the gateways and guide you on how to properly set them up.


Direct Bank Transfer

The "Direct Bank Transfer" or "Bank Account Clearing System (BACS)" is a payment gateway that does not require payment to be made online. Orders submitted with "Direct bank transfer" will be put "On hold" until you manually process them after ensuring the payment was successfully received. The configuration of this option is pretty straightforward and easy to follow.

First, we will need you to click on the "Manage" button (which will appear as "Set up" in case the gateway is not yet enabled) on the right end.


Accessing the Direct bank transfer settings


You will be presented with the "Direct bank transfer" setting screen where you will need to configure the following options. 

  • Enable/Disable - This checkbox option allows you to control whether the "Direct bank transfer" gateway is active or inactive.
  • Title - From this option, you will need to define the title of your gateway which will also be shown on your checkout page. Therefore, it is strongly recommended to use a clear title in order to avoid any customer confusion. 
  • Description - As you will notice this option is already filled by WooCommerce as the bank transfer payment process is pretty much the same, however, if you wish you are welcome to enter a custom text. The gateway description will be shown below the "Title" on your checkout page.
  • Instructions - In this field, you can enter guidance which will appear on the order receipt page and will be sent via email to your customers. 
  • Account details - This is the most important field where you will need to enter your bank information which your customers will use in order to submit their payments. You will have to enter the following details for each bank account you would like to make available for payments: "Account name", "Account number", "Bank name", "Routing number", "IBAN", and "BIC/Swift".


Configuring Direct Bank Transfer Payment


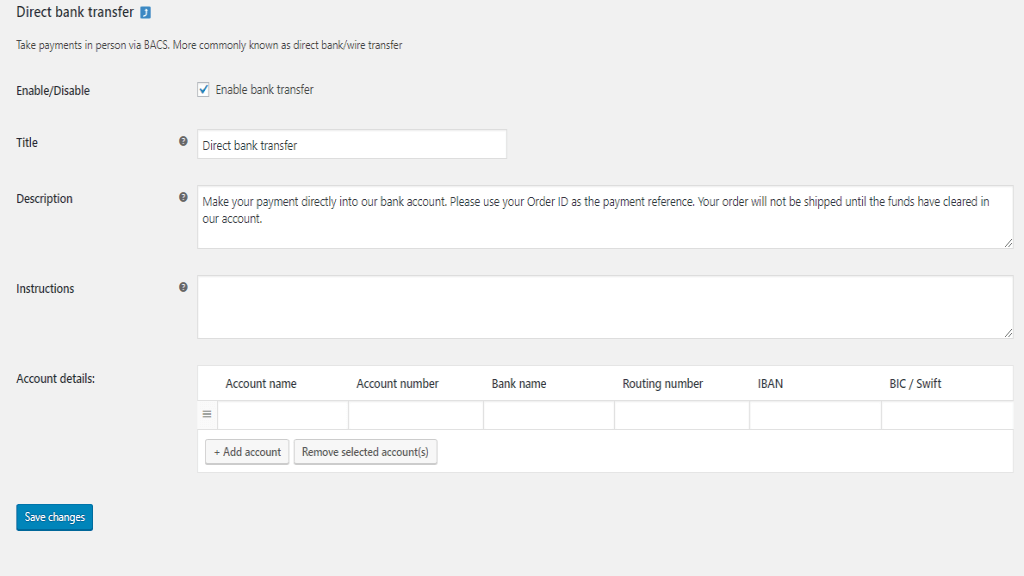
Lastly, just click on the "Save changes" button and you will be all set to start receiving payments from your customers.


Check Payments

Similarly to the "Direct bank transfer" the "Check Payments" gateway does not require an online payment to be submitted. The order will be set to "On hold" status until you successfully receive the payment and process them manually. The configuration of this payment gateway is even simpler compared to the previous one.

Again, we will need you to start by clicking on the "Manage" button which will present a new screen with the gateway configuration options.


Configuring the Check Payments gateway


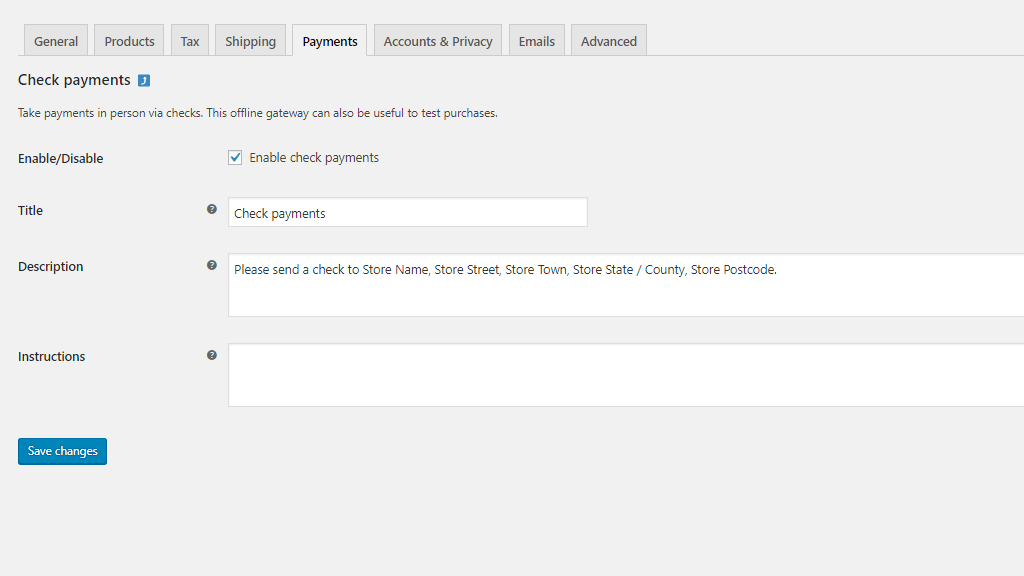
You will notice the options are quite fewer here and we have already gone through them in the previous section.

  • Enable/Disable - Determines whether the payment gateway is active or inactive.
  • Title - The title of the payment gateway which will appear on your checkout page.
  • Description - The information which will be presented to your customers if they select the "Check Payments" payment gateway.
  • Instructions - Your guidance on how your customers are expected to submit the payments which will be presented on the order receipt page and sent via email. 

That is pretty much it. Now, please make sure to click on the "Save changes" button and you will be all set to start accepting check payments. 


Cash on Delivery

The "Cash on delivery" payment gateway does not require a payment to be submitted online either. If a customer selects it for a payment option the order will be set to "Processingstatus until the payment is made upon delivery. As soon as the payment is successfully processed you will have to manually set the order status to "Completed"

Once again, we will need you to begin by clicking on the "Manage" button next to the "Cash on delivery" payment gateway, which will present you with the following configuration details.


Configuring the Cash on delivery gateway


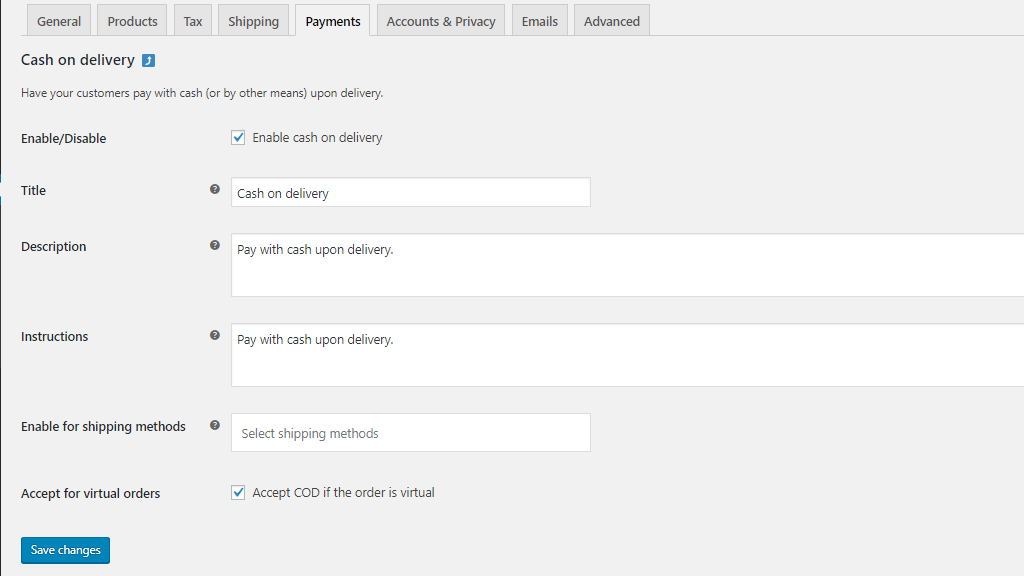
As you will notice the settings are the same like for the previous two payment gateways except the last two options. 

  • Enable/Disable - Determines whether the payment gateway is active or inactive.
  • Title - The title of the payment gateway which will appear on your checkout page.
  • Description - The information which will be presented to your customers if they select the "Cash on delivery" payment gateway.
  • Instructions - Your guidance on how your customers are expected to submit the payment which will be presented on the order receipt page and sent via email.
  • Enable for shipping methods - In case your goal is to enable the availability of this payment gateway only for certain shipping methods you will have to select them from the dropdown menu. Leaving the field blank will enable the gateway for all shipping methods.
  • Accept for virtual orders - In case you would like to accept COD payments for virtual orders (for example, a service that requires personal presence in order to be rendered) please make sure to check the box.

After you are ready, please do not forget to click on the "Save changes" button and you will be ready to start collecting cash upon delivery. 


PayPal 

PayPal is a worldwide used, recognized and trusted payment method. Enabling the PayPal Standard gateway will allow you to accept PayPal payments by redirecting your customers to PayPal’s secure page where their payments will be processed. 

Before we begin, we would like to mention that having a PayPal Business account is mandatory for the configuration of this payment gateway. You can either create a new account or convert an existing personal account by going to paypal.com.

Now, the first step we will need you to take will be to click on the "Manage" button next to the "PayPal" payment gateway. This will present you with a new screen which is divided into a few sections.

Under the first section, you will be able to configure the general settings of the "PayPal" payment gateway. 


Configuring PayPal General Settings


  • Enable/Disable - Determines whether the payment gateway is active or inactive.
  • Title - The title of the payment gateway which will appear on your checkout page.
  • Description - The information which will be presented to your customers if they select the "PayPal" payment gateway.
  • PayPal email - Here you will need to fill your email address which is set up to accept payments in your PayPal account. Ensuring the accuracy of the email address is crucial as configuring an incorrect email address may lead to unsuccessful payments or processing payments to the wrong account.


Advanced Options 

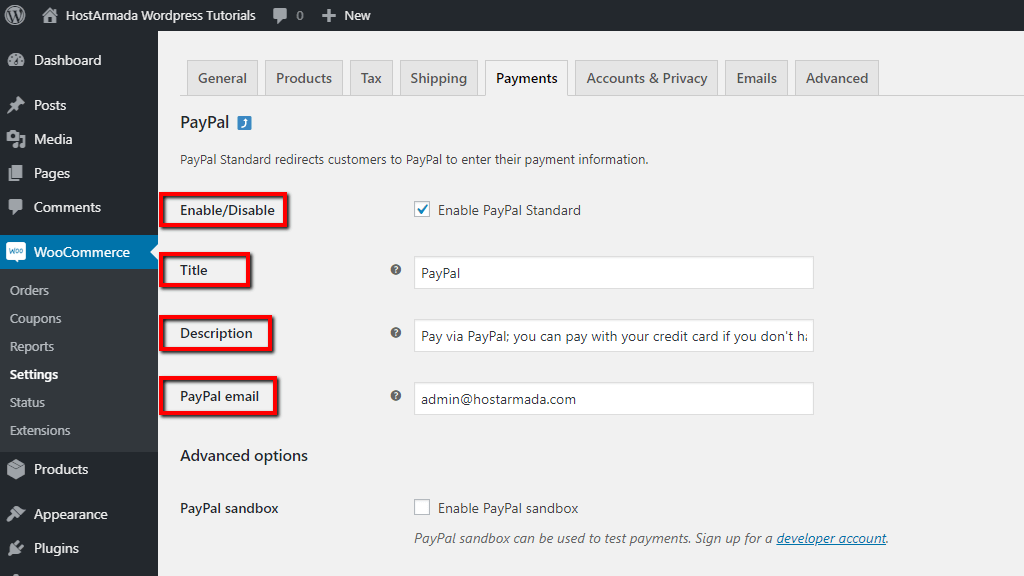
The first options you will see under this section will allow you to enable two useful testing and debugging tools.


Configuring PayPal Advanced options


  • PayPal sandbox - This is a great tool for staging websites that will allow you to accept test payments and ensure everything works seamlessly before going live. The "PayPal sandbox" mode requires a "developer account" which you can create via PayPal sandbox. As soon as you finish your tests and you are ready to go live, please make sure to disable the "PayPal sandbox" option as either way no payments will be taken from your customers.
  • Debug log - Enabling this tool will collect PayPal logs into a specific file on your hosting server. Particularly useful for debugging any issues you might experience. The logs will be available at WooCommerce > System Status > Logs > PayPal log

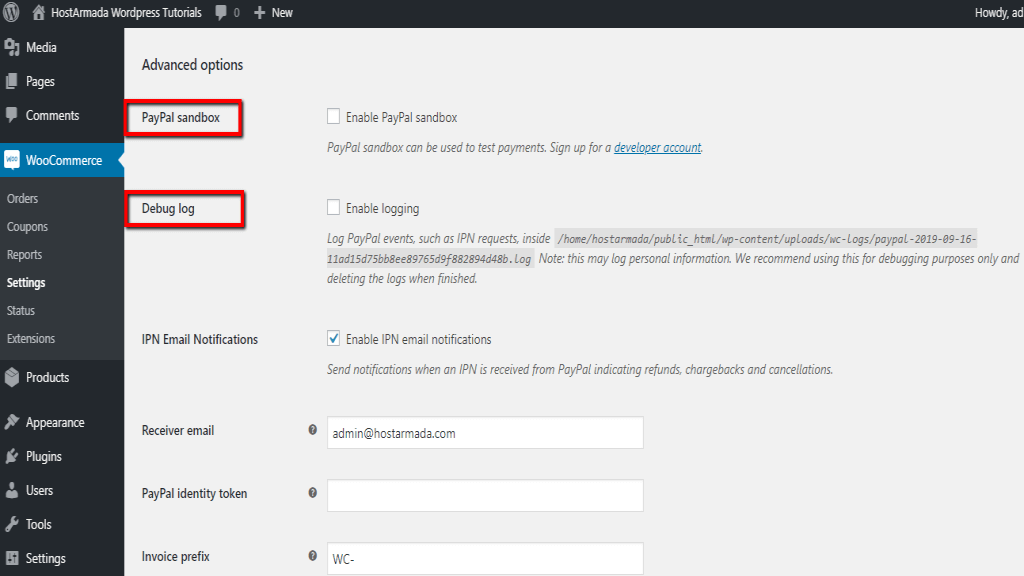
Moving forward you will notice the following options which are related to your PayPal management preferences. 


Configuring PayPal advanced preferences


  • IPN email notifications - From this option, you can enable the Instant Payment Notification (IPN) notification (such as payment confirmations, refunds, chargebacks, and cancellations) which will be sent to a second email address depending on your preferences.
  • Receiver email - Here you will need to enter an email address for the IPN requests, in case it is different from your original PayPal email address.
  • PayPal Identity token - If you happen to experience IPN issues and you need to verify payments you can use this option. You will need to enable the "Payment Data Transfer" option in your PayPal account. In order to do that, please navigate through Profile > Profile and settings > My selling tools > Website preferences > Update. On that page, you will be able to locate your "Identity Token" which you will need to copy and paste in WooCommerce.
  • Invoice prefix - The invoice prefix is important for people who use one PayPal account for multiple stores. If this is the scenario, you will need to ensure each of your Online Stores is set up with a unique invoice prefix as PayPal will not allow duplicate invoice numbers.
  • Shipping details - In case you are using PayPal to create shipping labels for you, you might prefer to enable this option as it will set WooCommerce to send PayPal customer shipping details instead of billing.
  • Address override - This option prevents address information input into your store from being changed. Although you might want to enable it, it is recommended to keep this option disabled as it might cause setting errors. 

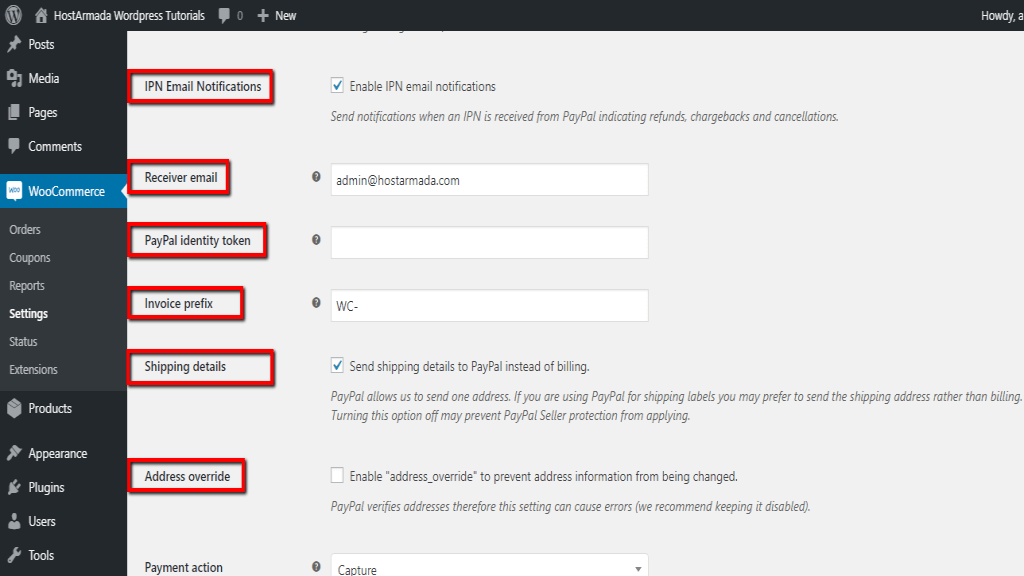
Next, you will notice three options related to the customer checkout process. 


Configuring PayPal advanced checkout settings


  • Payment action - This setting will allow you to choose from the dropdown menu whether you would like to "Capture" payments immediately or "Authorizepayments only. Selecting the "Capture" option will charge your customers right after they input their payment details, where the "Authorize" option will not charge your customers upfront and you will need to manually process the order and capture the funds.
  • Page style - Allows you to select a custom page style for the PayPal checkout screen. In order to use this option, you will need to fill in the "Page style" name which you have set up under your PayPal account.
  • Image URL - This option will allow you to use a custom logo on the PayPal checkout page. You will need to resize your logo to 150x50px, upload it, and enter the image source URL into the field.


API credentials

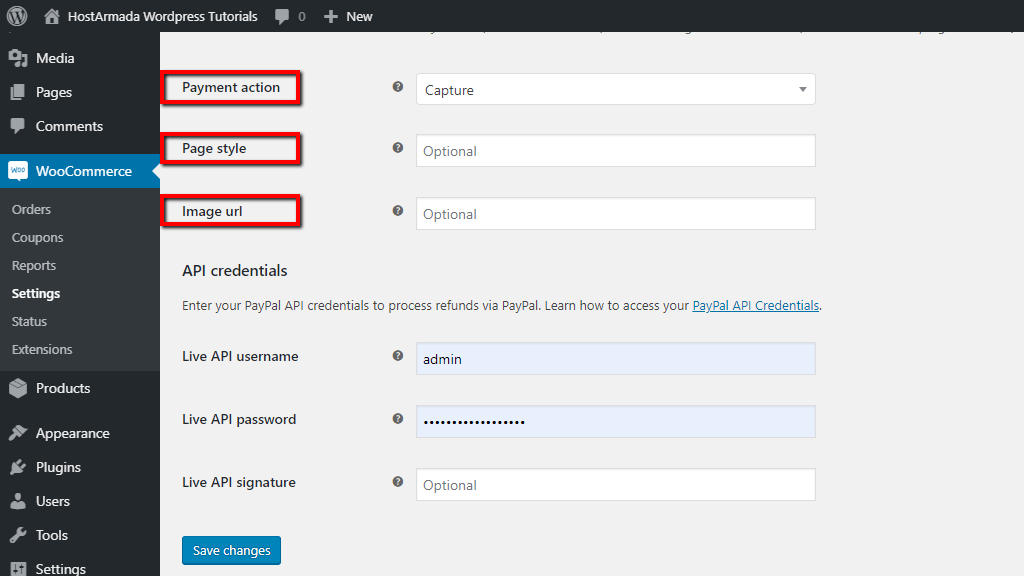
Configuring your API credentials is required in order to be able to process refunds to your customers directly from WooCommerce. If you prefer you can manage refunds from PayPal, however in this case you will need to manually edit your orders and charge their status from WooCommerce.

You can find those credentials by navigating through your PayPal account > My Selling Tools > API Access > NVP/SOAP API integration (Classic) > API signature. You can review the PayPal official documentation by clicking here.


Configuring PayPal API credentials


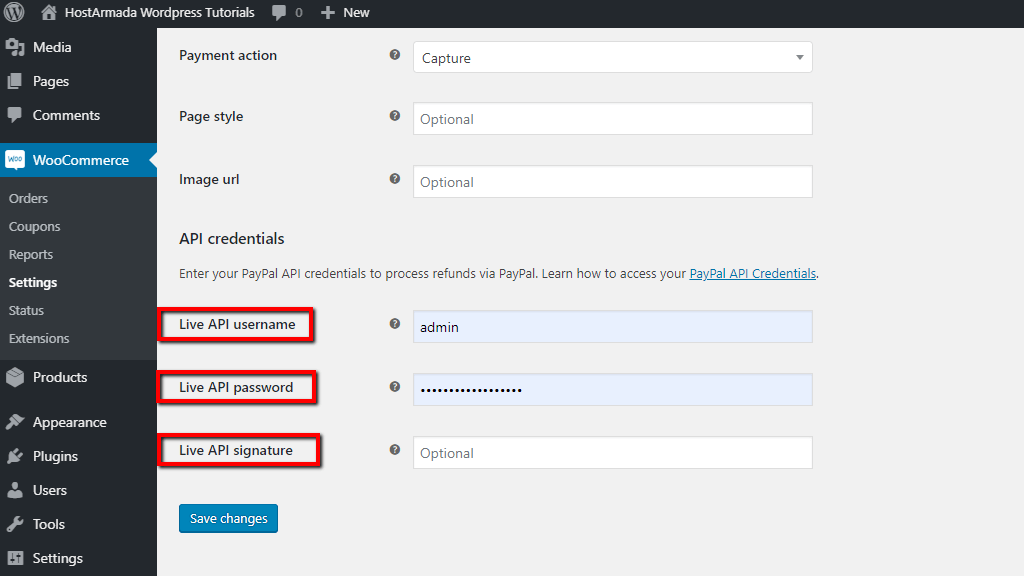
All you need to do is just to fill your "Live API username", "Live API password" and "Live API signature"

Once you are ready, please click on the "Save changes" button you will be ready to start accepting PayPal payments on your Online Store.


Congratulations! Now you have your payment gateways successfully configured and you are ready to start processing online payments on your eCommerce store. We hope that following our instructions helped you easily configure your settings and you did not have any difficulties. In case something was not clear or you happen to need further guidance, please do not hesitate to reach out to our Support Team.


...
Sebahat
Content Marketing Specialist

Sebahat is a young and bright woman who has become an invaluable part of our team. She started as a Customer Care Representative, mastering that role and, along the way, growing into a tech-savvy individual who is well acquainted with every support layer of the company. Driven by her aim to improve our customers’ experience constantly, she is committed to enhancing the extraordinary support we deliver.