
Effective order management is an essential part of the administration of any Online Store. Therefore, you should be confident in your knowledge and abilities to properly handle your customers’ orders. Fortunately, WooCommerce provides intuitively and easy to control order management. In the following lines, we will review all the specifications of the process of handling your customers’ orders.
In order to start, please log in to your WordPress Admin Dashboard and navigate through the left menu bar to WooCommerce > Orders. You can also access the “Orders” page by directly clicking on “WooCommerce”.
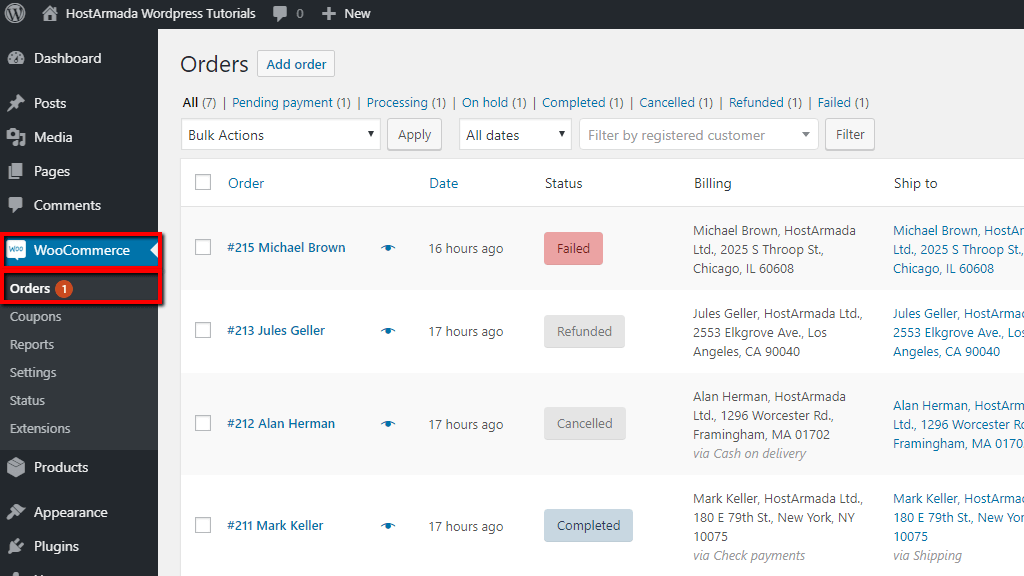
This is the page where you will be reviewing, managing and processing all your current orders.
The “Orders” page displays a list of all the orders submitted on your Online Store. Each order row contains useful information such as the Order ID, date of purchase, order status, shipping details, total order amount, and additional actions. By expanding the “Screen Options” panel located at the top right corner you will be able to control which details are shown, as well as how many orders are displayed per page. You will have to tick the checkboxes for the options you wish to be shown on each order row, enter the number of orders listed per page and click on the “Apply” button to save your preferences.
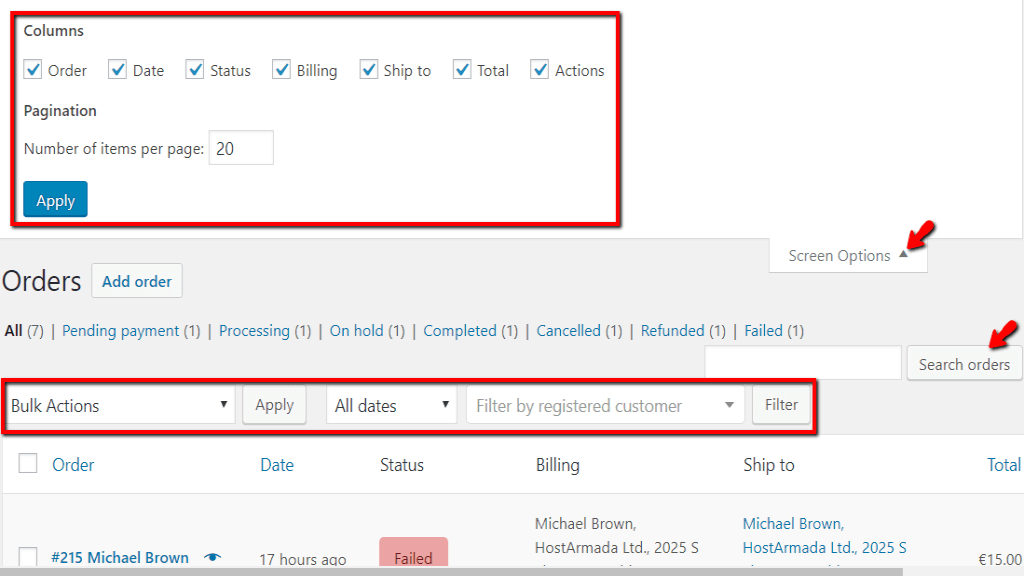
The “Bulk Action” dropdown menu will provide you with a few options to bulk edit order statuses or move them to the trash. In order to perform the action, please select it from the dropdown menu, then either tick the checkbox in front of “Order” to select all orders or individually select the orders from the list by ticking the checkbox in front of each of them. Then hit the “Apply” button and the action will be performed for all selected orders.
From the “All dates” dropdown menu you will be able to filter your orders by pulling up orders from certain months.
You can also search for registered customers by entering their names or email addresses and clicking on the “Filter” button.
You also have a general search which you can use to pull up orders by using different criteria, such as order ID, product name, company name, etc. You will have to just enter the keyword in the field and hit the “Search orders” button.
From the heading line, you will be able to arrange your orders in ascending or descending order by “Order”, “Date”, or “Total”. You will have to just hover over the option and click on the triangle pointing up or down.
Now, let’s take a closer look at the orders list - the information contained in each row and the actions you can perform.

The “Order” colon displays the Order ID and the customer’s name.
From the blue “Eye” icon you can preview the order. If you click on it, a modal window will open displaying order ID, order status, billing and shipping details, items ordered, payment method, and option to change or edit order status.
The “Date” colon shows when the order was submitted.
The “Status” colon displays the Order status.
If you hover over any of the order statuses, you will be presented with notes describing the last actions performed for this order.
The “Billing” colon displays the Billing address of the customer.
The “Ship to” colon displays the customer Shipping address and the selected shipping method.
Under the “Actions” colon you will be presented with shortcut buttons that will allow you to directly mark the order as “Processing” or “Completed”.
Let’s now head into a given order and see how to edit or review it. Please click on the order you wish to edit and you will be presented with the order details screen.
From the “Order Details” section you can review the order number, payment method, order status, customer assigned to the order, billing and shipping details.
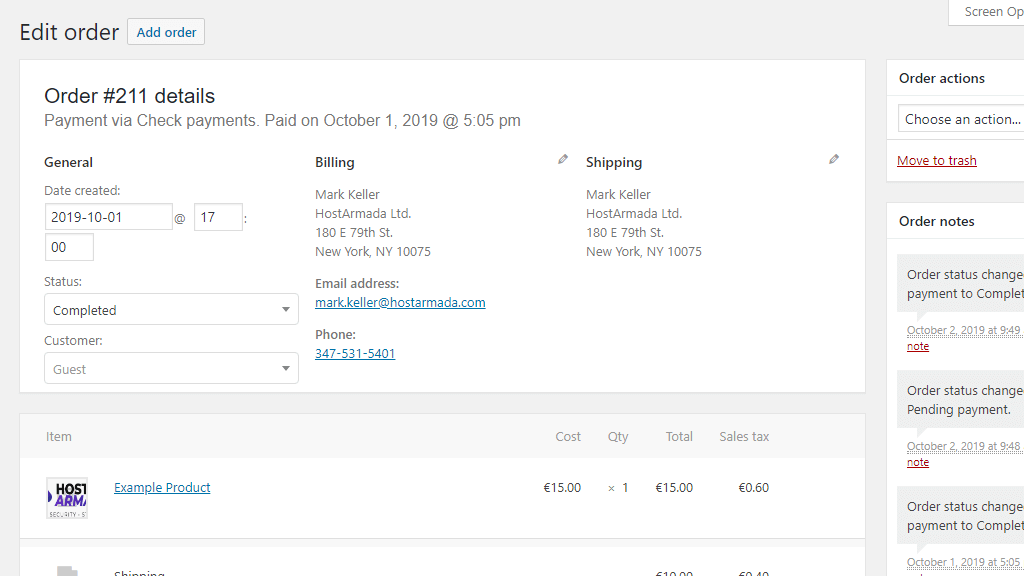
Under the “General” section you will be able to see and edit the date and time when the order was submitted. Below you will see the Order “Status” which can be changed from the dropdown menu. Under the “Customer” field you will be able to see whether the order is submitted from a guest or an existing account. In case the order is submitted from one of your existing customers, you will have an additional “View other orders” button which will allow you to review previous orders from the same customer. The “Billing” and “Shipping” details are also editable by clicking on the corresponding “Pencil” icon.
The next “Item” section displays the products in that order, their cost, quantity, total, as well as any taxes and shipping rates applied to these products.
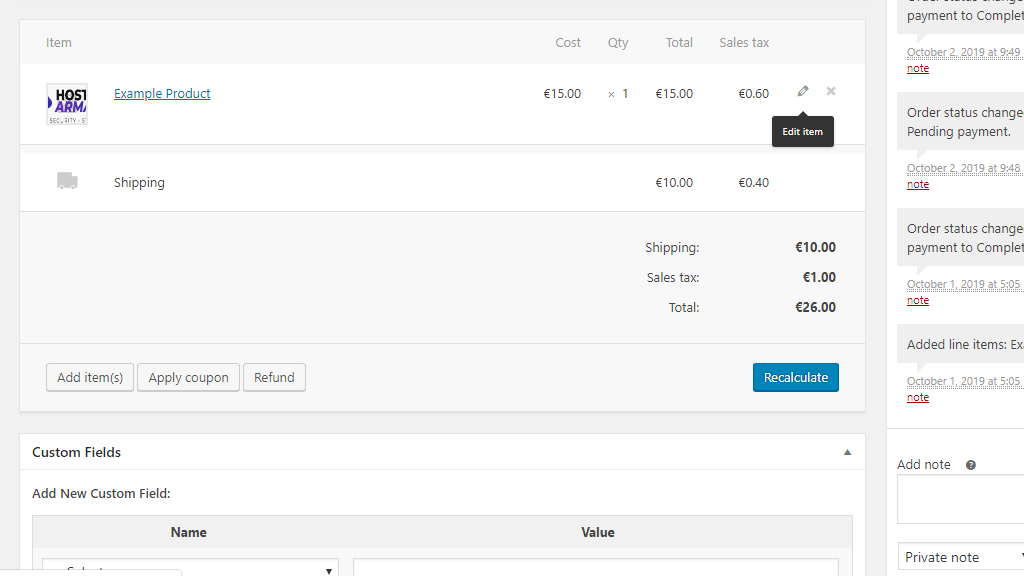
Please note that this section is editable only for orders in “Pending payment” and “On hold” statuses. If you wish to edit a given item, please click on the “Pencil” icon and you will be presented with “Add meta”, “Add Product(s)”, “Add shipping”, and “Add tax” actions performable for this item. Once you are ready, just hit the “Save” button, please. You can also add additional products to this order by clicking on the “Add item(s)” button, include a coupon code from the “Apply coupon” button, and “Refund” the order if needed.
Under the following “Custom field” section you will be able to add custom meta fields. You will have to select among the default options from the dropdown menu or enter a custom one from the “Enter new” button, give it a value and then click on the “Add Custom Field” button.
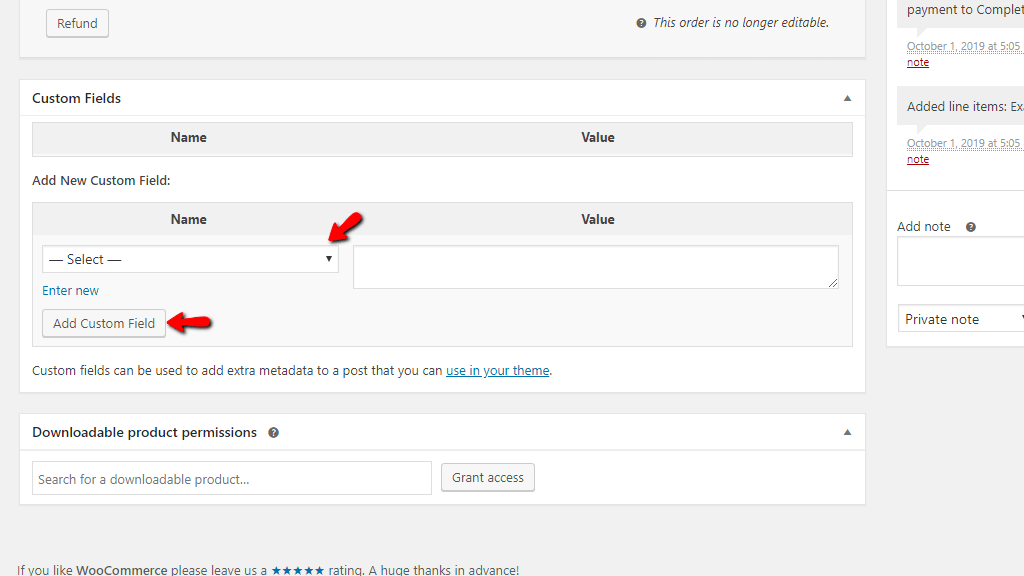
The last “Downloadable product permissions” section will allow you to add or remove permissions as needed per this order.
Now, we will need you to move your focus on the “Other actions” and “Other notes” sections at the right end of the page.
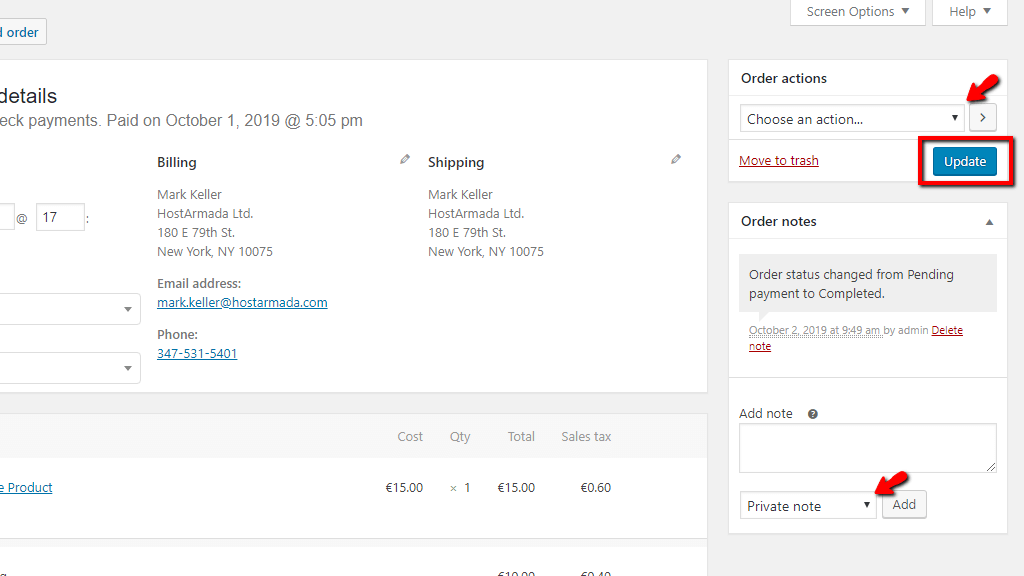
From the dropdown menu available under the “Order actions” section you will be able to select and initiate the following actions: “Email invoice/order details to customer”, “Resend new order notification”, and “Regenerate download permissions”. After selected, please make sure to click on the arrow button next to it in order to initiate the action. You can also delete this order, in case it is no longer needed by clicking on the red “Move to trash” text.
Under the “Order notes” section you will see displayed all changes previously performed on this order. You can also write two types of notes from this section. “Private note” is intended for store managers and will be only visible from the website’s backend. “Note to customer” is intended for your customer, it will be sent to them and it will appear under their order if they access it.
Finally, if you have performed all the necessary changes, please click on the blue “Update” button in order to successfully save them.
That is all you need to know concerning the management of your store’s orders. We hope you have found the information useful and our instructions easy to follow. We would like to thank you for trusting our guidance and to welcome you to contact us in case further help is needed.

Sebahat is a young and bright woman who has become an invaluable part of our team. She started as a Customer Care Representative, mastering that role and, along the way, growing into a tech-savvy individual who is well acquainted with every support layer of the company. Driven by her aim to improve our customers’ experience constantly, she is committed to enhancing the extraordinary support we deliver.
Learn more about WooCommerce in the other tutorials that we have:
