
CuteFTP offers a range of FTP Client solutions that will allow you to securely transfer files from your local computer to your web hosting account and vice versa. CuteFTP allows you the flexibility to remotely manage, edit, and monitor your web files. In this guide, we will walk you through the process of configuring the client and connecting it to your web hosting account.
Before we step into the configuration process, we would like to mention that at this point you are expected to have the CuteFTP client already installed on your local computer.
If you have not done that, please go ahead and download the software from CuteFTP’s official website which you can directly access from here. At this point, a 30-day free trial is available and you can safely test their services without purchasing a license. Please note that we can not guarantee the trial will be available in the future.
Afterward, you will need to gather the FTP details required to connect to your hosting account:
If you are HostArmada client you will be able to find the required details in the welcome email containing all the important information of your hosting account with us. You can review the email directly from your Client Area by clicking on the email icon located at the top menu bar. In case you have any difficulties finding the details, please make sure to submit a ticket request to our support team and they will gladly provide you with them.
Now that you have CuteFTP successfully installed on your local computer, you are ready to begin with the configuration. When you open the client, you will notice two tabs on the left-hand side: “Local Drives” and “Site Manager”. The first one will display your local computer’s folders and allow you to navigate through them. The second tab is where you will organize and manage your FTP connections.
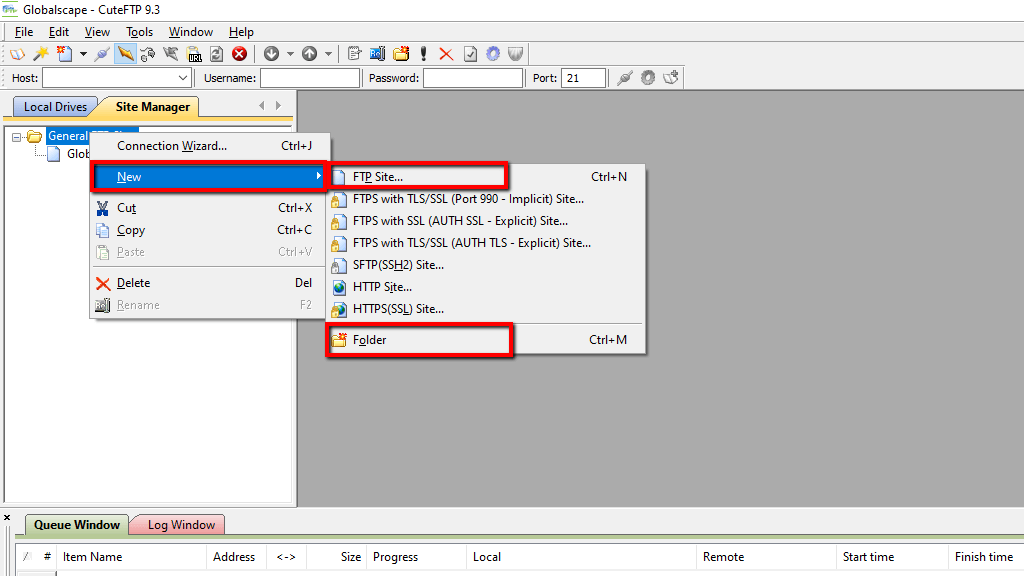
Please, right-clicking on “General FTP Sites” located under the “Site Manager” tab. If you are planning to use CuteFTP to manage multiple FTP connections, you will be able to create separated folders by clicking on New > Folder and keep everything tidy and organized. Alternatively, you can directly click on the “FTP Site” option and begin with the configuration process.
Once you are ready and you have clicked on the “FTP Site” option you will be presented with a new pop-up window where you will need to enter the required configuration details.

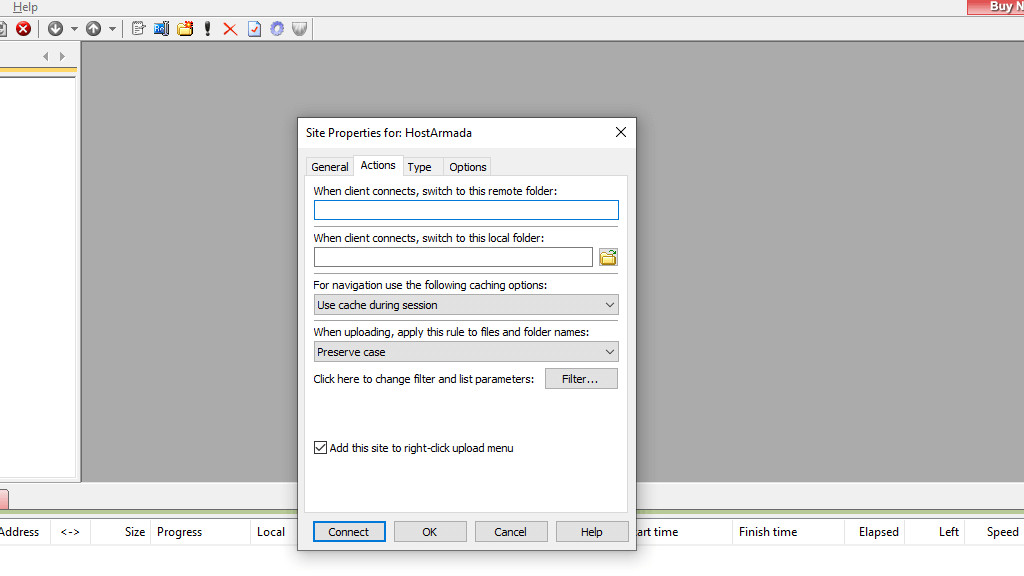
As you will notice there are few additional tabs that will allow you to configure specific settings for the FTP connection. From the “Actions” tab, you can determine a specific folder under which you will be automatically connected, so you can avoid the process of navigating through all folders. You can specify the desired remote and local folders if needed.
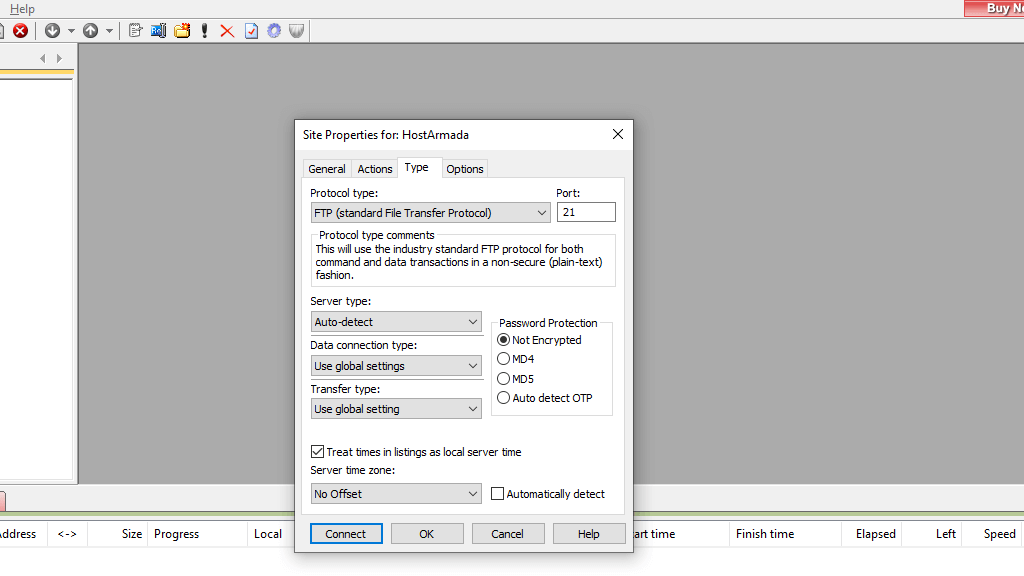
From the “Type” tab you can select the protocol for transferring files over the network. We do support the secure “FTP with TLS/SSL (AUTH TLS - Explicit)” type, therefore feel free to select it. Please note that some providers recommend using the “FTP (standard File Transfer Protocol)” type, as the rest of them, require additional configuration.
From the last “Options” tab you will be able to select a specific charset encoding standard if needed.

When you are ready, please click on the “Connect” button. If the connection was successful, you will see your web files listed in the right panel titled with the label you have specified in the previous step.

Congratulations! Now you have managed to successfully connect to your web hosting account and you are ready to start transferring and managing your files via CuteFTP. We hope you have found the information useful and our guidance easy to follow. As usual, if you have experienced any difficulties, please do not hesitate to contact our Support Team for further assistance.

Sebahat is a young and bright woman who has become an invaluable part of our team. She started as a Customer Care Representative, mastering that role and, along the way, growing into a tech-savvy individual who is well acquainted with every support layer of the company. Driven by her aim to improve our customers’ experience constantly, she is committed to enhancing the extraordinary support we deliver.
Learn more about FTP Service in the other tutorials that we have:
