
Having a recognizable hostname for your server can make your life easier when managing a lot of clients and websites. It should be something related to either your business or your domain name so that people can use it to connect their domains and utilize all of the offered services, such as FTP, Email, SSH, etc. In this tutorial, we are going to review the procedure of changing the hostname of your server, using the WHM control panel.
First, you need to log into the WHM service for your VPS or Dedicated Server. If you are not sure how to do that, please check our How to access the WHM service tutorial. After you have logged in, please use the search bar on the left side of the page and type “Change Hostname”.

When you click on the first result presented by the WHM, you will be immediately redirected to the “Change Hostname” page where you will notice quite a few things. The first section contains rudimentary instructions explaining how you should structure the hostname. As mentioned at the beginning of the guide, the hostname should be something recognizable and socially acceptable as it will be appearing in email headers. It should also derive from your domain name or business. It also needs to have at least two dots in it, should not begin with “www” or a digit, and should never end with “-”. On the right side of this section, you will find great examples of how a hostname should look like.
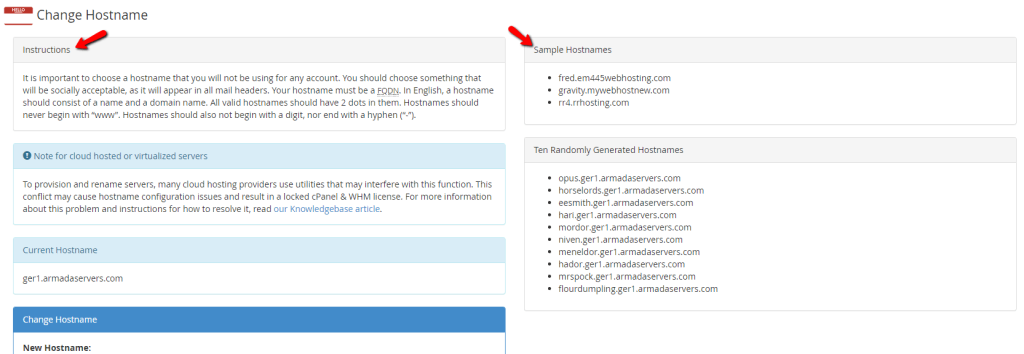
Underneath this section, you will be given ten randomly generated hostnames which you can use for the server. On the left side, you will find two additional sections. The first one explains that during the change of a hostname with a certain Cloud Provider there could be an issue with fetching the WHM or cPanel licenses. You should not worry about this with us, as we have already made the necessary arrangements to prevent this from happening. Nevertheless, if you are faced with any similar issues regarding your WHM/cPanel licenses, our Technical Support Team is always available and will happily assist you. The second one shows what the server’s current hostname is.

Lastly, we have the actual section “Change Hostname”. In order to proceed, simply write down your hostname in the text field under the text “New Hostname:” and then press the “Change” button to proceed.

For testing purposes, We will change the current hostname to “tutorials.armadaservers.com” so we can explain the next screens to come. When the “Change” button is clicked, a loading bar will appear that could take up to a minute. After this loading screen, you will see a big changelog.
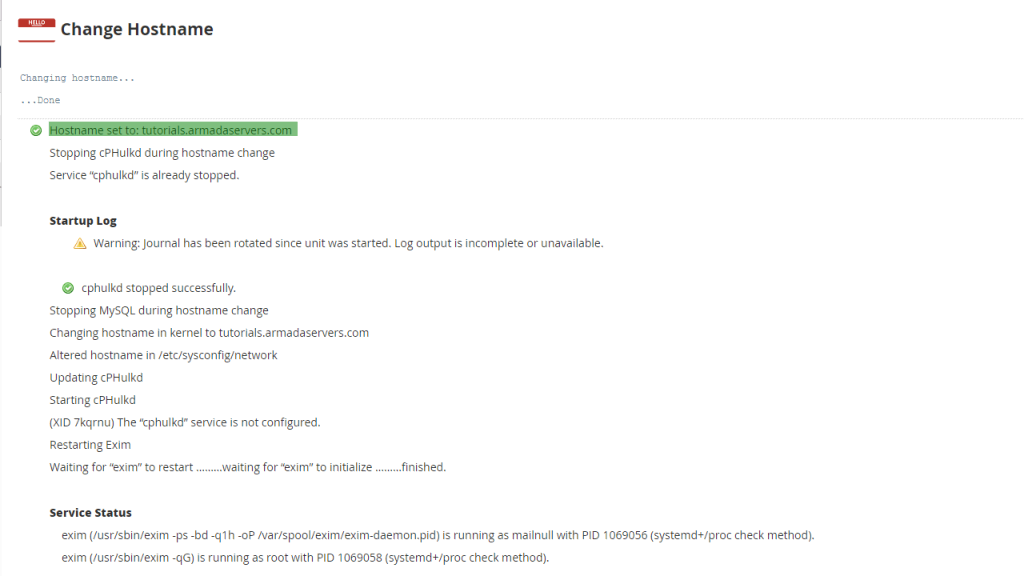
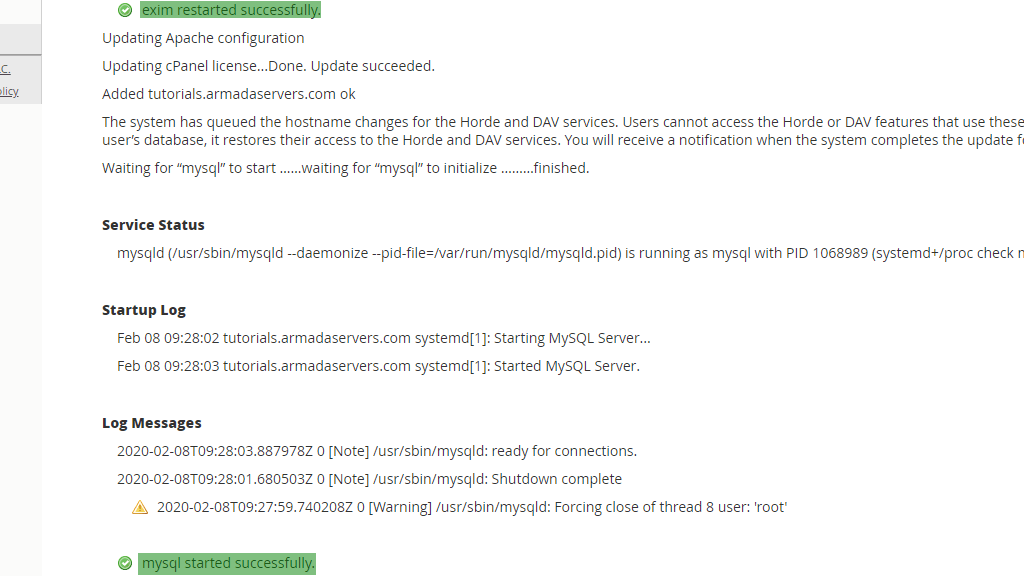
We have highlighted the most important text you should be looking at when the screen shows up. That would be the “Hostname set to: tutorials.armadaservers.com”. The rest of the output gives information about what files were changed on the filesystem in order for the change to be applied on the server and all the service restarts that occurred - more specifically - cphulkd, exim, mysqld. We will be highlighting these restarts in the screenshot to follow.
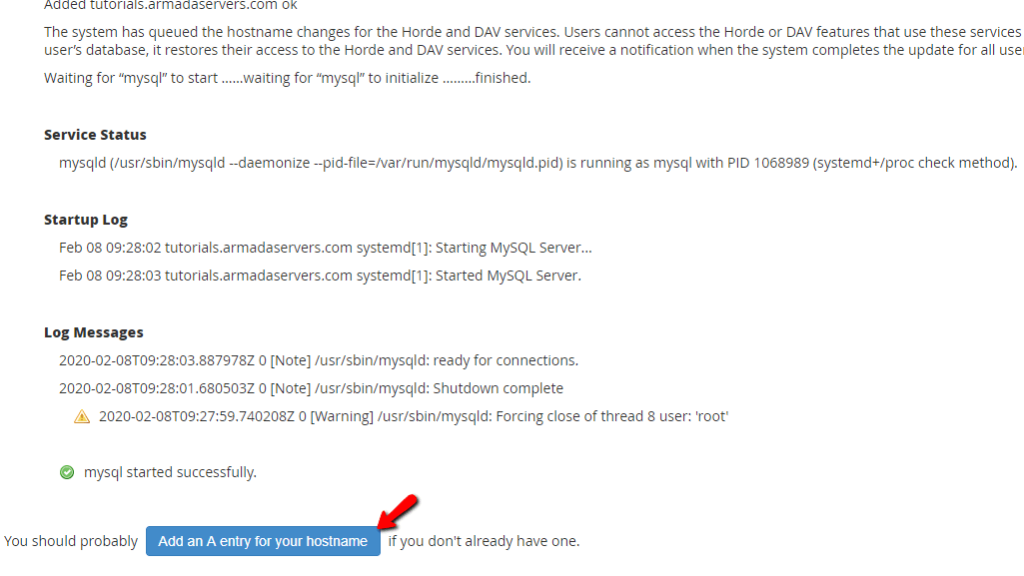
When you scroll down to the bottom of the page, you will find a button called “Add an A entry for your hostname”. Press this in order to proceed to the last step before the process is finalized.
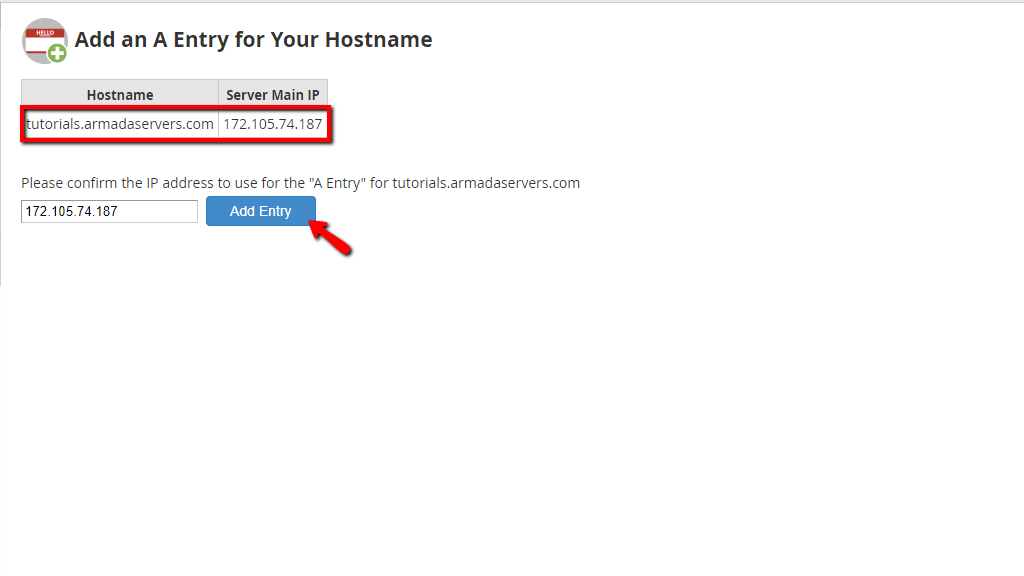
The last screen will contain information regarding the change itself. There will be a table section on the top of the page which will contain the “Hostname” and the “Server Main IP” and bellow you will see a text saying “Please confirm the IP address to use for the "A Entry" for tutorials.armadaservers.com” along with a field under it that has the server’s IP address inputted. Please click on the “Add Entry” button to finish the process.
The last output you will receive informs you that a DNS record is now added for the hostname you selected.

And there you have it - all the necessary information in order to properly perform a hostname change of your server from the WHM control panel. As always, if you need help with this feature, our Technical Support Crew is 24/7 available at your disposal. In order to reach them, please submit a ticket from your Client Area.

Sebahat is a young and bright woman who has become an invaluable part of our team. She started as a Customer Care Representative, mastering that role and, along the way, growing into a tech-savvy individual who is well acquainted with every support layer of the company. Driven by her aim to improve our customers’ experience constantly, she is committed to enhancing the extraordinary support we deliver.
Learn more about WHM in the other tutorials that we have: