
Exim is an open-source mail transfer agent (MTA). It is a service responsible for receiving, routing, and delivering e-mail messages. It is integrated with the WHM control panel and all of its settings are consolidated within the “Exim Configuration Manager” feature.
The feature’s configuration is divided into two tabs - one of them providing basic control over the Exim service, while the other one is aimed for advanced users giving them the means to fine-tune the service to their needs.
We are not able to discuss all the settings and options under the “Exim Configuration Manager” functionality, as they are simply too much to go through in a single tutorial. Therefore, we will explain the main purpose of the configuration options affecting the Exim service, emphasizing the most important ones and where you can find them.
Without any further ado, let’s begin the tutorial.
First, you need to log into the WHM service for your VPS or Dedicated Server. If you are not sure how to do that, please check our How to Access WHM tutorial. After you have logged in, please navigate to the search bar on the left side of the page and type “Exim Configuration Manager”.
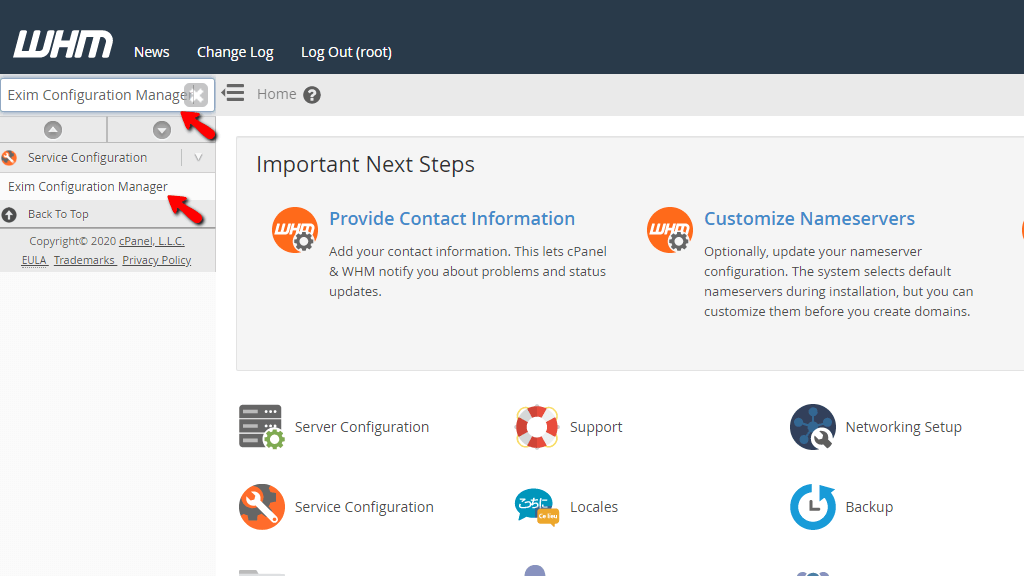
When the functionality shows up below the search bar, please click on it so you can be sent to the “Exim Configuration Manager” page.
When you land on the “Exim Configuration Manager” page, the first thing you are going to notice is the tabs located on the top of the page - “Basic Editor”, “Advanced Editor”, “Backup”, “Restore”, and “Reset”.
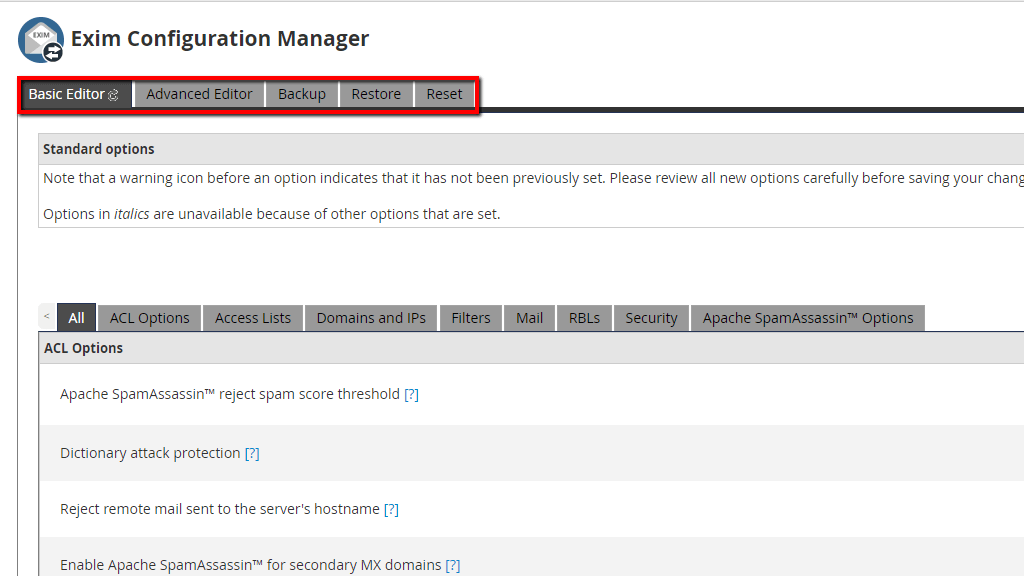
You may navigate through them by simply pressing on the desired tab. This process will open the tab’s available options underneath.
Let’s review each tab and see what it can be used for.
The “Basic Editor” tab will be opened by default when the “Exim Configuration Manager” feature is selected. All of the options in this tab will be presented by 8 categories of additional tabs, located below the main tab section.
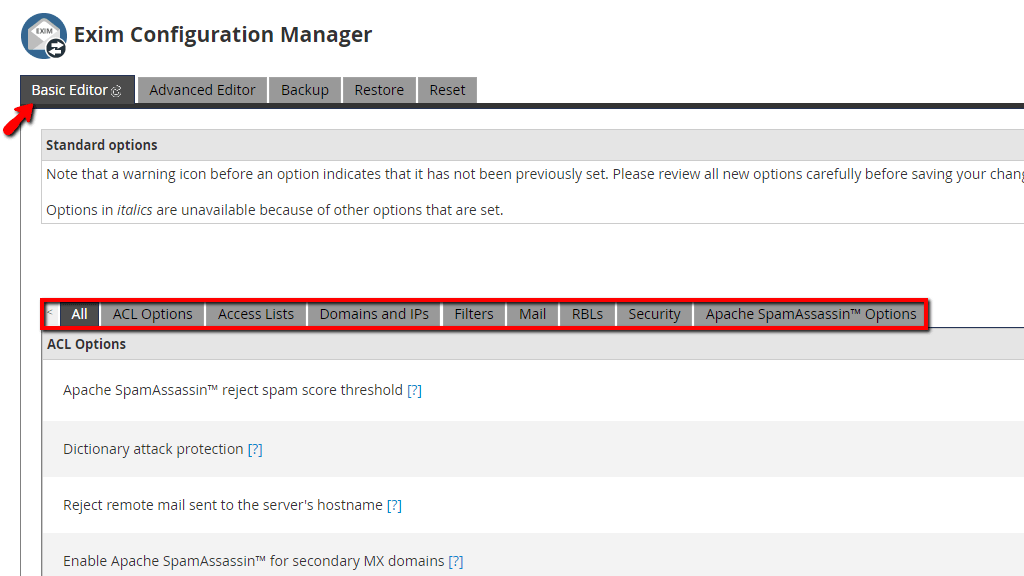
Let’s explain what each of them represents. The first category tab does not hold any specific options. It simply unites all of the available options of the other tabs under it.
There is also a very useful “Find” text field on the top right corner of the category tabs section.
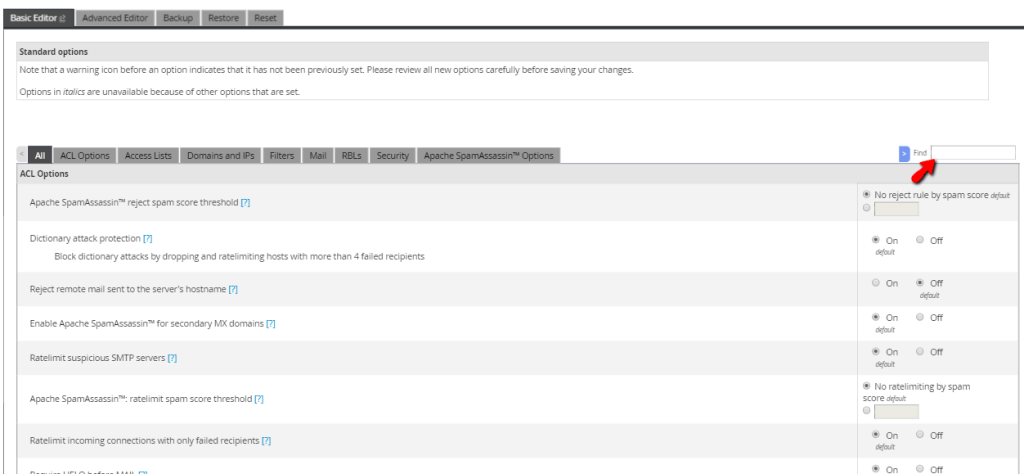
You may use it to filter out the options and find the one you want to modify.
The ACL Options Category Tab
To access this tab please click on the “ACL Options” category tab, located next to the “All” category tab.
The options available inside the “ACL Options” category tab will allow you to limit the users on your server who are sending emails. These options can be used to lower the bandwidth generation, prevent email spoofing and reduce or completely terminate spam.

To receive more information about a specific setting under this category tab, please press the question mark icon on the right side of the setting itself. This will cause the row to expand and provide additional information.
The Access Lists Category Tab
To access this tab please click on the “Access Lists” category tab, located next to the “ACL Options” category tab.
Using the options provided within the “Access Lists” category tab, you will be able to even further limit the mail service for the users on your server.

To receive more information about a specific setting under this category tab, please press the question mark icon on the right side of the setting itself. This will cause the row to expand and provide additional information.
The Domains and IPs Category Tab
To access this tab please click on the “Domains and IPs” category tab, located next to the “Access Lists” category tab.
Using the options within the “Domains and IPs” category tab, you will be able to change the IP address from which the Exim service sends out emails. If all these options are disabled, the WHM control panel will automatically send mail using the main shared IP address of the server.

To receive more information about a specific setting under this category tab, please press the question mark icon on the right side of the setting itself. This will cause the row to expand and provide additional information.
The Filters Category Tab
To access this tab please click on the “Filters” category tab, located next to the “Domains and IPs” category tab.
The options provided under the “Filters” category tab will help you configure filters that aim to prevent spam and potentially dangerous files that may be attached to emails sent from your server or towards it.

To receive more information about a specific setting under this category tab, please press the question mark icon on the right side of the setting itself. This will cause the row to expand and provide additional information.
The Mail Category Tab
To access this tab please click on the “Mail” category tab, located next to the “Filters” category tab.
Using the options under the “Mail” category tab will let you fine-tune the mail settings on your server. For instance, you may enable the “Sender Verification” option allowing Exim to verify that the domain sending the email is present on the origin server.

To receive more information about a specific setting under this category tab, please press the question mark icon on the right side of the setting itself. This will cause the row to expand and provide additional information.
The RBLs Category Tab
To access this tab please click on the “RBLs” category tab, located next to the “Mail” category tab.
Utilizing the options under the “RBLs” tab will allow you to configure your mail server to check inbound messages against a Real-time Blackhole (RBLs). Your server will then start blocking incoming messages should the IP address or hostname match an RBL entry.
RBL servers store lists of spam-heavy IP addresses and hostnames. The WHM control panel receives information about blocked IP addresses from two RBLs: bl.spamcop.net and zen.spamhaus.org.

To receive more information about a specific setting under this category tab, please press the question mark icon on the right side of the setting itself. This will cause the row to expand and provide additional information.
The Security Category Tab
To access this tab please click on the “Security” category tab, located next to the “RBLs” category tab.
Using the options underneath the “Security” category tab will allow you to configure security settings for your server. For instance, you will be able to allow or disallow weaker SSL/TLS ciphers or change OpenSSL settings.
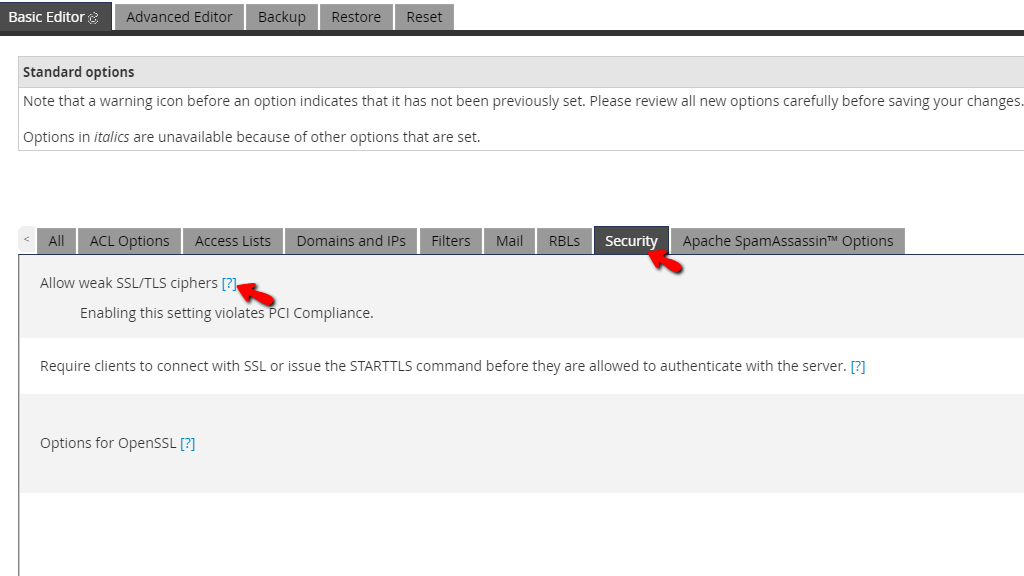
To receive more information about a specific setting under this category tab, please press the question mark icon on the right side of the setting itself. This will cause the row to expand and provide additional information.
The Apache SpamAssasin™ Options Category Tab
To access this tab please click on the “The Apache SpamAssasin™ Options” category tab, located next to the “Security” category tab.
Utilizing the options beneath the “The Apache SpamAssasin™ Options” category tab will enable you to configure the Apache SpamAssassin service to suit your server’s needs.
Apache SpamAssassin is used to detect, block and examine content typically associated with spam. It assigns each of the encountered emails with a score based on numerous spam-related traits it is able to find inside the received messages. If the message’s score exceeds a predefined limit, Apache SpamAssassin discards it as spam.
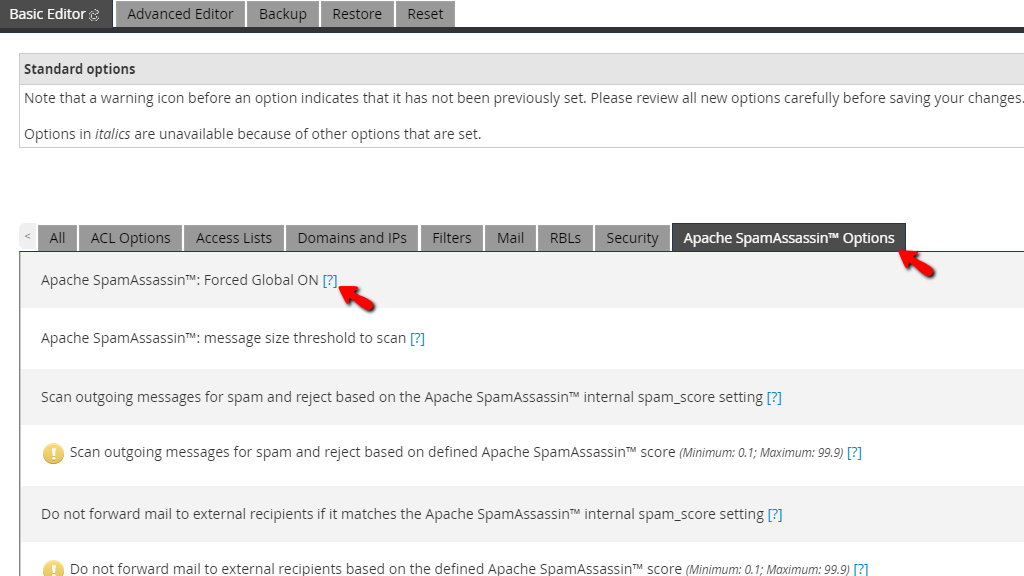
To receive more information about a specific setting under this category tab, please press the question mark icon on the right side of the setting itself. This will cause the row to expand and provide additional information.
After going through all the category tabs and enabling/disabling the desired options, please scroll down to the bottom of the page and press the “Save” button located there.

This will cause the Exim service to restart so that the changes may be applied.
To access the “Advanced Editor” tab, please press the “Advanced Editor” tab, located on the right side of the “Basic Editor” tab.
This will cause the “Combined Exim Configuration” section to expand underneath, where you may start altering the Exim service to your liking.
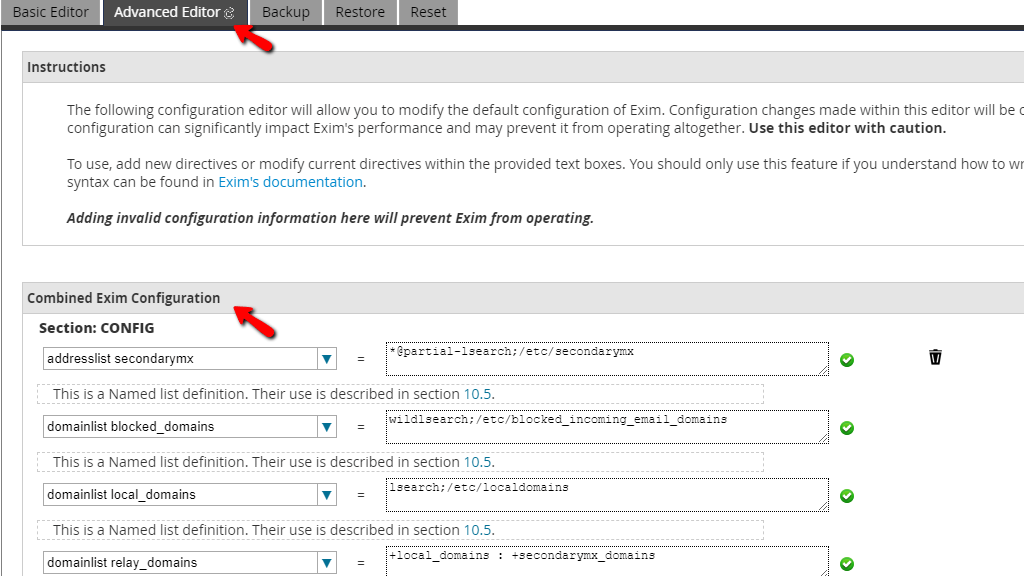
All of the changes under the “Exim Configuration Manager” tab should be performed with EXTREME caution. Performing unjustified settings may affect the performance of the Exim service or completely prevent it from operating properly. It should be used only by advanced users that are familiar with the Exim settings thoroughly. All of the directives inside are available on the official Exim documentation.
After applying the desired tweaks inside the “Advanced Editor”, please press the “Save” button located on the bottom of the page.
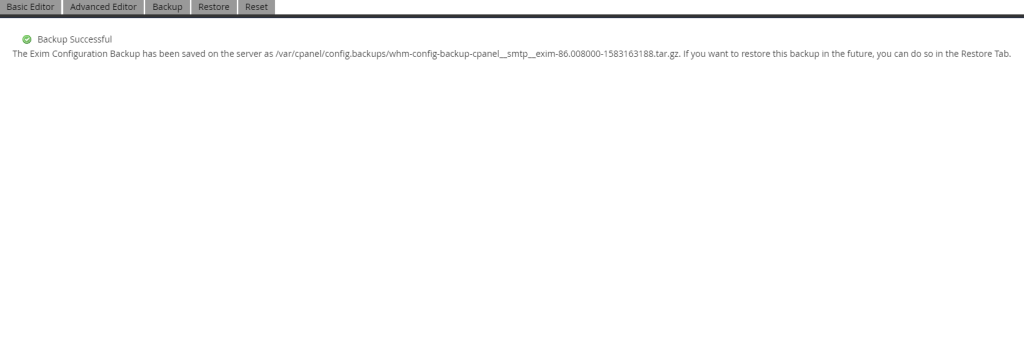
To access this tab, please press the “Backup” tab, located on the right side of the “Advanced Editor” tab.
Opening this tab will allow you to generate a backup of the current Exim configuration and store it either on the server or generate a download in your browser so you can store it locally.

Please use the radio button located on the left side of the options to select the place where the Exim configuration will be backed up.
To access this tab, please press the “Restore” tab, located on the right side of the “Backup” tab.
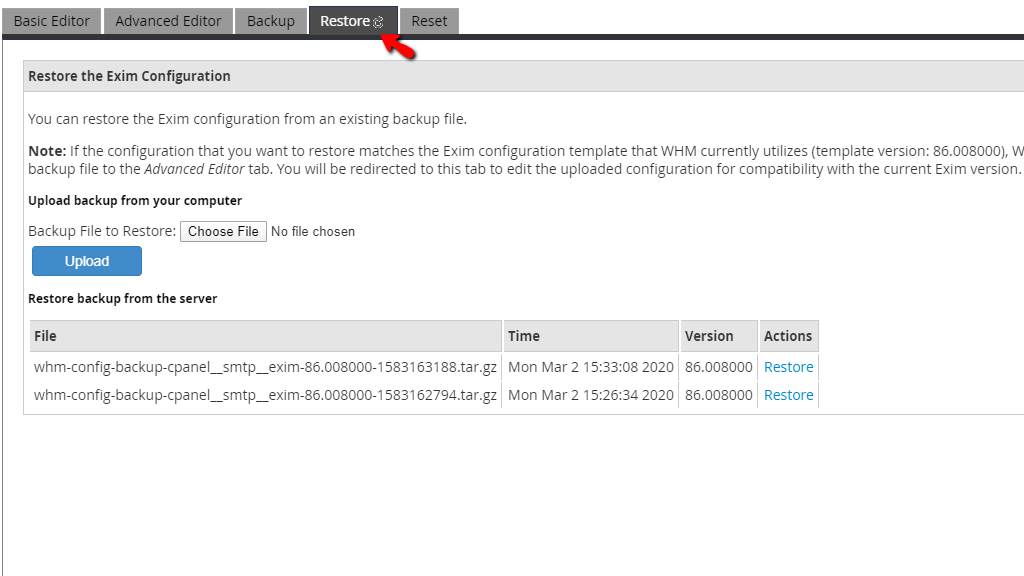
Opening this tab will allow you to restore a backup of the Exim configuration. You may choose to either upload a backup you have locally on your machine or you may select a backup currently located on the server.

Note that the system will restore the backup immediately if it is compatible with the current version. If this is not the case, you will be redirected to the “Advanced Editor” tab and you will need to perform changes in order to make the backup compatible with the current version.
In order to access this tab, please press the “Reset” tab located on the right side of the “Restore” tab.

There will be cases when changes have been applied to the Exim configuration which you are unable to backtrack. These changes may start causing the Exim service to behave out of the ordinary and this may result in your mail service being nonfunctional.
In these cases, the “Reset” tab will come in handy, as it will allow you to reset the current settings and bring back the “Manufacturing” settings.
Let’s explore the different types of resets available:
Given the magnitude of the “Reset” option, all of the above types are thoroughly explained on the screen once they have been selected from the dropdown menu, populating them.

When you have selected the reset type from the dropdown menu, please press the “Reset” button located at the bottom of the page to initiate the process.
This concludes our tutorial regarding the “Exim Configuration Manager” feature in the WHM control panel. It is a really helpful feature if used properly, as it can optimize the inbound and outbound email service and reduce the amount of spam the system receives or sends. If you are facing issues with the functionality, please contact our Technical Support Crew immediately. They will be happy to assist you and they are 24/7 available over the ticketing system in your Client Area.

Sebahat is a young and bright woman who has become an invaluable part of our team. She started as a Customer Care Representative, mastering that role and, along the way, growing into a tech-savvy individual who is well acquainted with every support layer of the company. Driven by her aim to improve our customers’ experience constantly, she is committed to enhancing the extraordinary support we deliver.
Learn more about WHM in the other tutorials that we have: