
Considering the fact that easy navigation is one of the most important aspects of a website, you should carefully organize your site menus. We are all aware of how frustrating it could get if you spend a long time trying to find your way through a website. It could reflect in potential user loss, and no one wants that.
In Una, menus are collections of order links that can be assigned to any menu position available in the template you are using. Each menu consists of a set that holds specific items. The fact that menus could be displayed on any page and in any form gives you great flexibility.
In this tutorial, we are going to guide you on how to manage and organize your menus effectively.
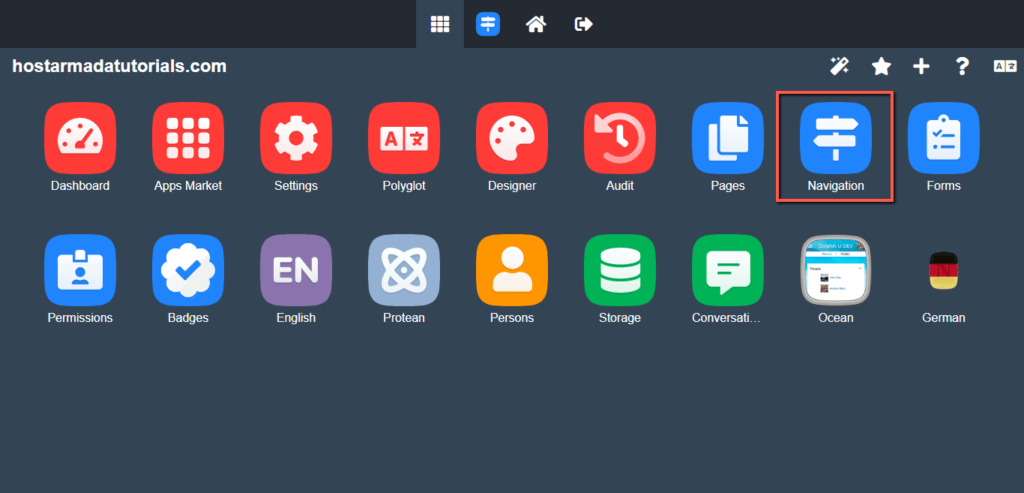
For a start, please log in to your Una Studio and access the "Navigation" app.
This is where the management of all your website menus, sets, and items takes place. You can see it is divided into three separate tabs, each dedicated to the given element.
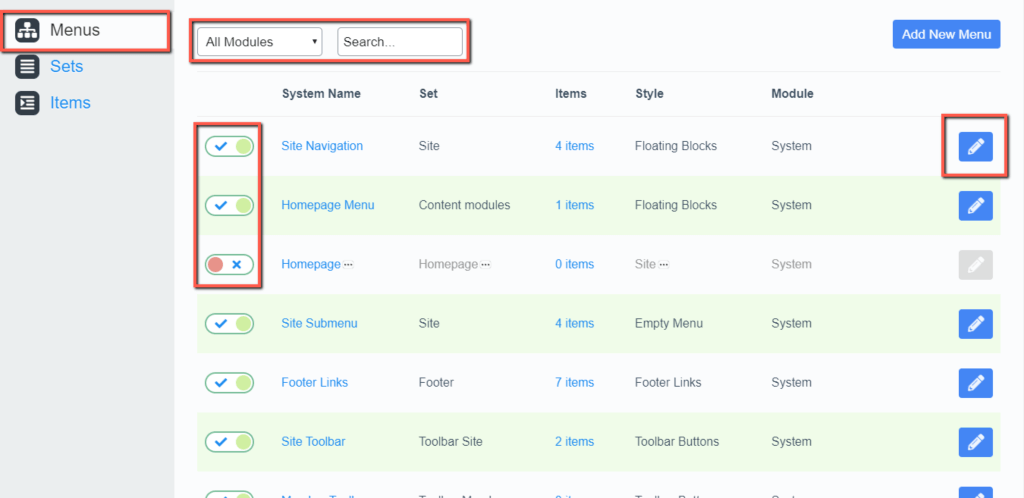
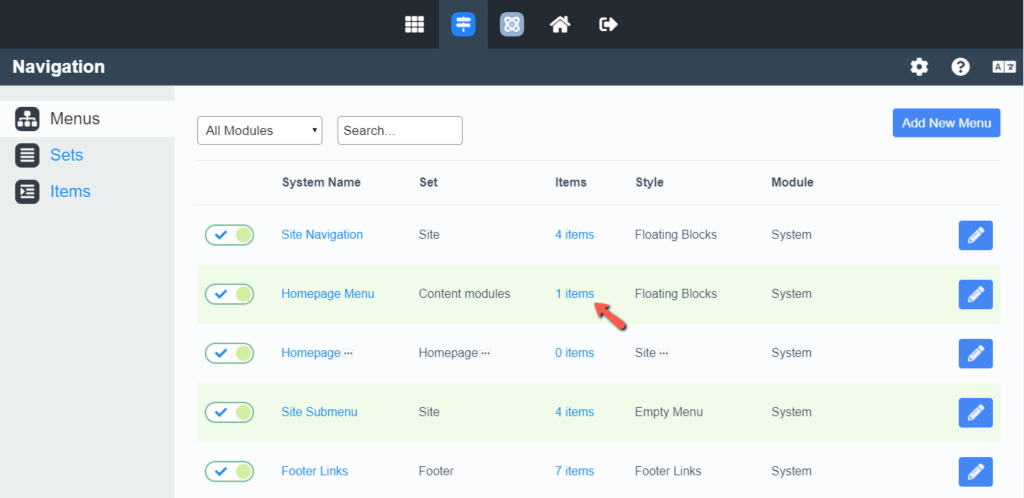
Under the first "Menu" tab, you can see a list of all menus currently created on your Una website. You can sort the menus per module by choosing it from the top dropdown menu, and you can find specific menus using the search tool.
The toggle switch button in front of each menu allows you to control whether the menu is displayed on the website frontend. Intuitively, the checkmark indicates the menu is enabled, whereas the "x" icon shows it is disabled.
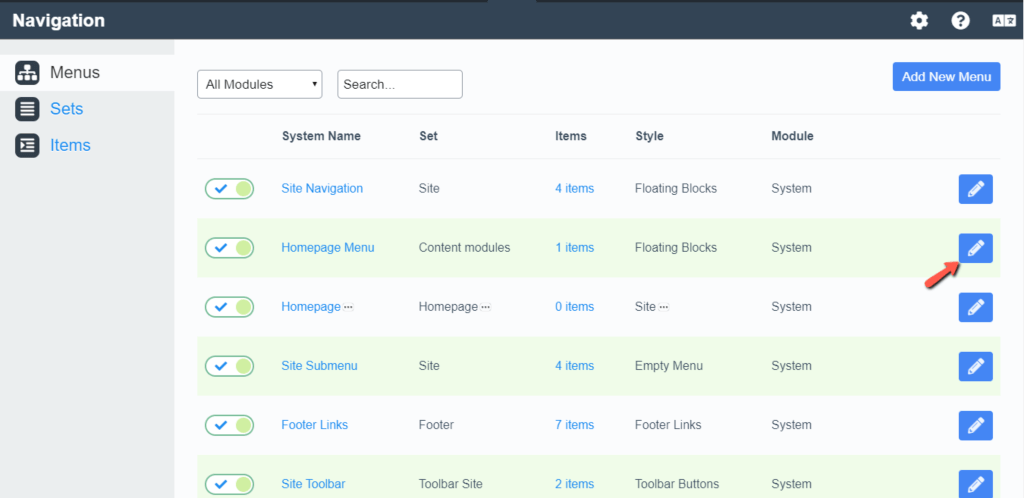
To edit a menu, please click on the corresponding pencil icon.
Upon doing that, a new pop-up window appears where you have to configure the menu.
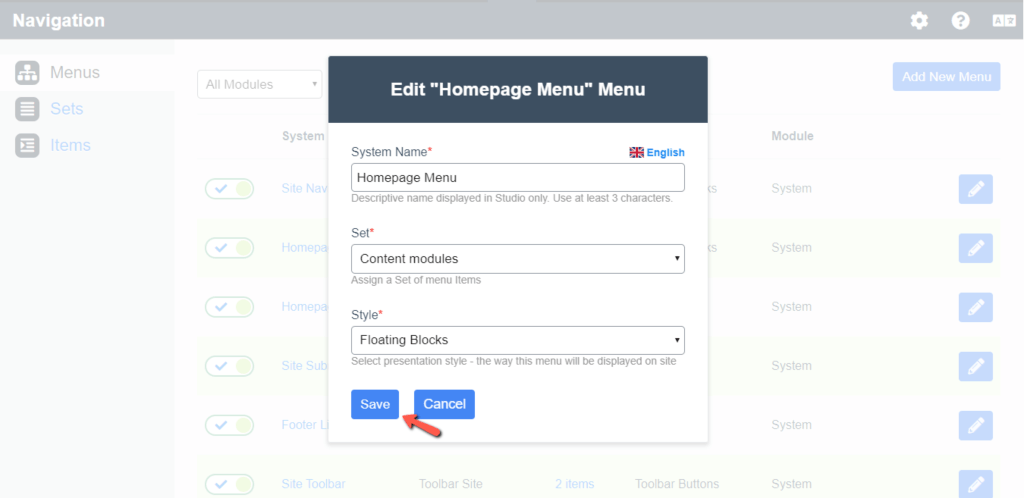
Once you apply the desired changes, please click on the "Save" button.
To assign or edit the menu items, please click on the menu name or on the "X items" link.
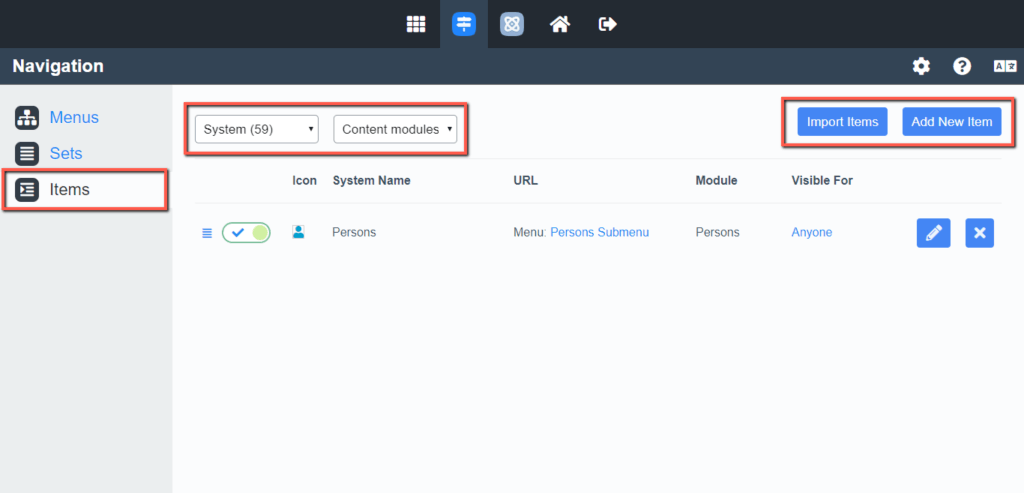
Upon doing that, you are redirected to the "Items" tab. The dropdown menus at the top of the page indicate which set you are currently editing. You can use them to navigate through your sets if this seems like a more convenient way.
You have two options to assign items to your menu - import them or create them manually. In our example, we are going to be creating one manually.
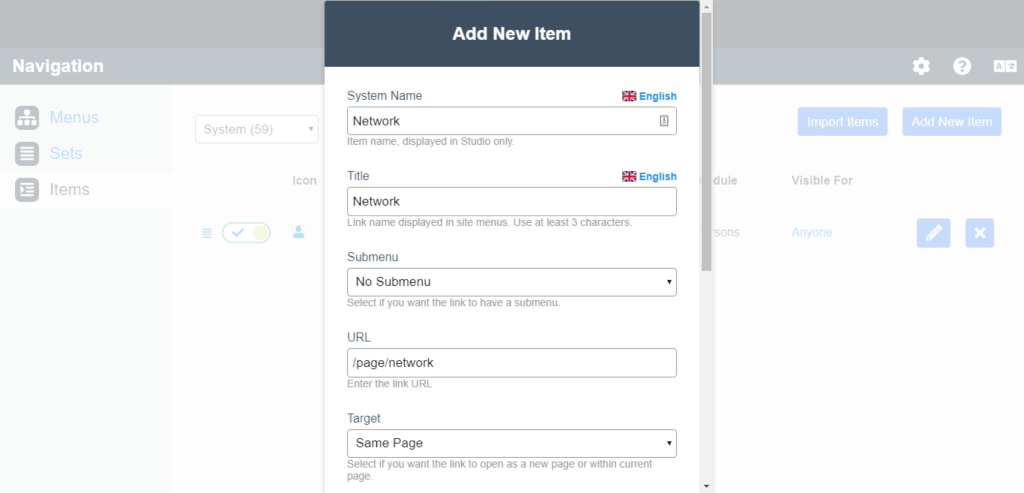
Upon clicking on the "Add new item" button, a pop-up window appears where you have to specify the item details.
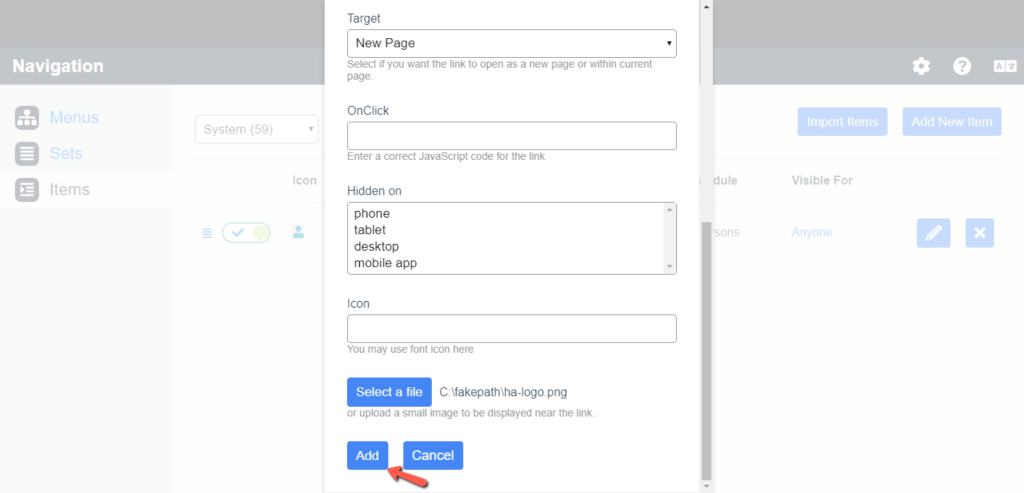
When you are ready with the details, please click on the "Add" button to save your new menu icon.
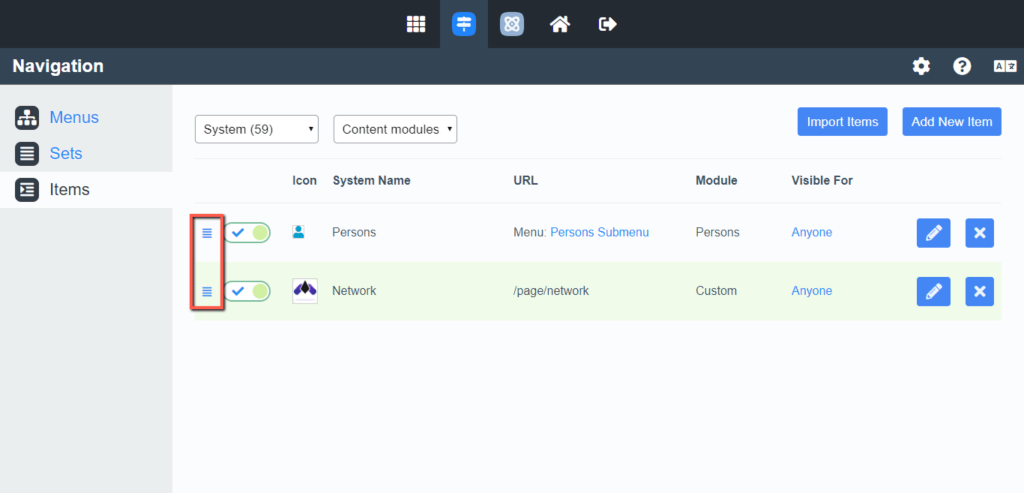
Afterward, you can see the new item listed along with the rest of the items assigned to this set. The order in which they appear in the "Items" section determines their sequence in the menu on the frontend. You can organize the items by clicking on the horizontal bars icon and dragging them to the desired position.
Once you perform the desired changes, please go ahead and check if the menu modification was successful and if the menu items are correctly functioning.
As soon as you confirm everything looks and works as expected, you are all set.
To sum up, in this tutorial, you learned how to modify your website menus, sets, and menu items. We hope this information was useful to you, and you have a clear idea of how menus operate in Una. As usual, we would like to thank you for trusting our guidance.

Sebahat is a young and bright woman who has become an invaluable part of our team. She started as a Customer Care Representative, mastering that role and, along the way, growing into a tech-savvy individual who is well acquainted with every support layer of the company. Driven by her aim to improve our customers’ experience constantly, she is committed to enhancing the extraordinary support we deliver.
Learn more about Una in the other tutorials that we have: