
Learn Drupal 8
In Drupal, Taxonomy is used to manage the categorization, classification, and tagging of your website content. This is significantly important when it comes to your website information architecture.
Before we step into the actual point of this tutorial, there are a few terms we would like to clarify in order to ensure you fully understand the Taxonomy concept in Drupal.
The taxonomy arrangement could be hierarchical or nonhierarchical. An example of taxonomy would be:
If it still does not ring the bell, do not worry. As soon as you see how you will need to create and arrange everything you will have a clear idea.
The first step needed to establish a taxonomy is creating a new vocabulary, then we will create the terms and assign them to the vocabulary. If you think you can catch up, let's get started!
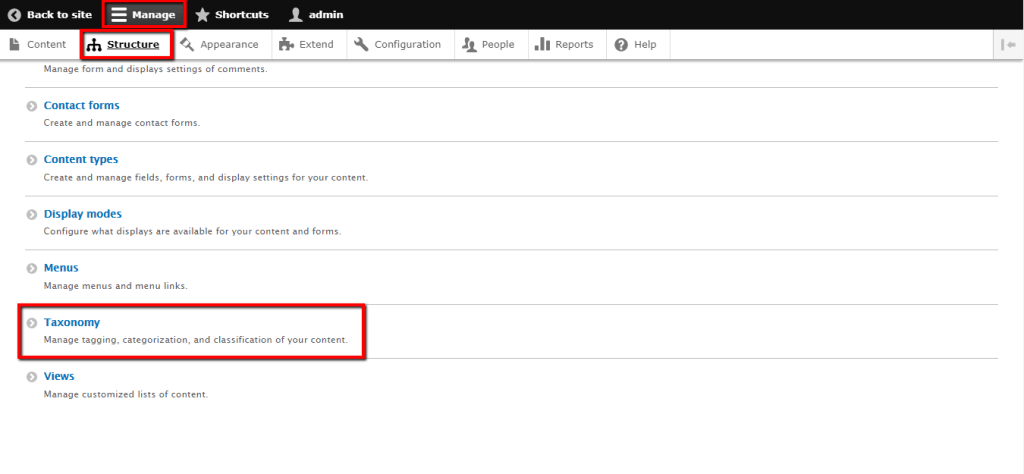
For a start, please log in to your Drupal Admin Dashboard and navigate through the Administration toolbar to Manage > Structure.
Once you access the "Structure" page, please locate the "Taxonomy" link and click on it.
When this is done you will be redirected to the "Taxonomy" page where you will need to click on the blue "+ Add vocabulary" button located at the upper left corner.
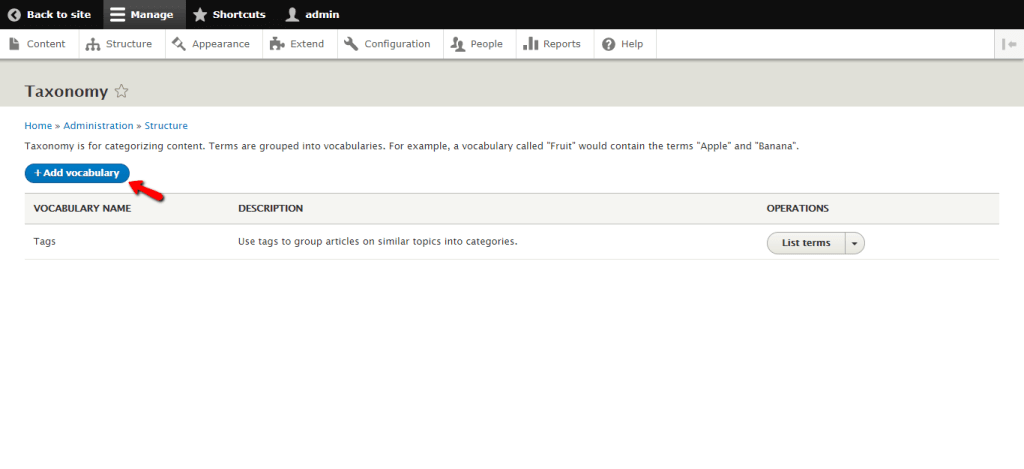
On the "Add vocabulary" page, you will see only two fields:
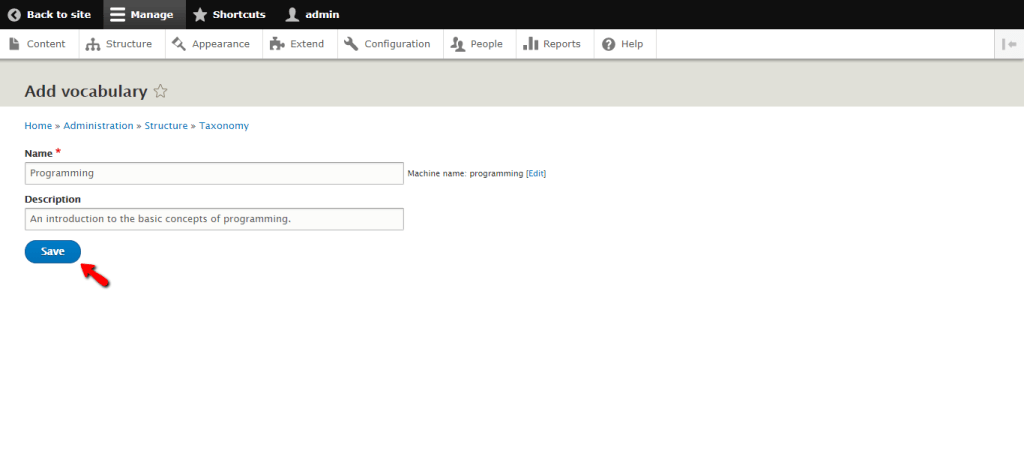
Whenever you are ready, please click on the "Save" button.
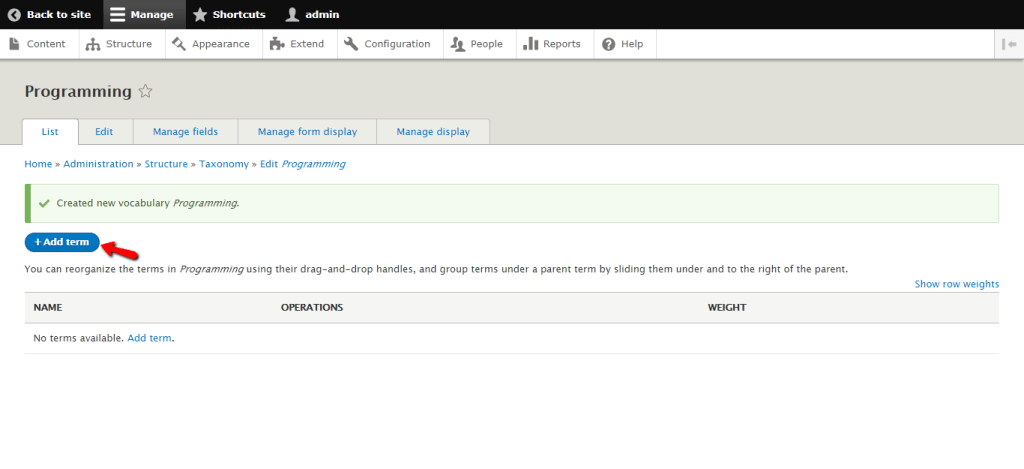
That is it! Your new Vocabulary is successfully created and now it is time to add the appropriate terms to it.
When the vocabulary is saved, you will be automatically prompted to its overview page. Under the default "List" tab you will find the "+ Add term" button.
Alternatively, under the "Taxonomy" page you will find a list of all your vocabularies. To add a new term, you can click either on the "List terms" button (which will take you to the page shown on the screenshot example below) or directly on the "Add terms" option which can be displayed by clicking on the arrow icon for the corresponding vocabulary.
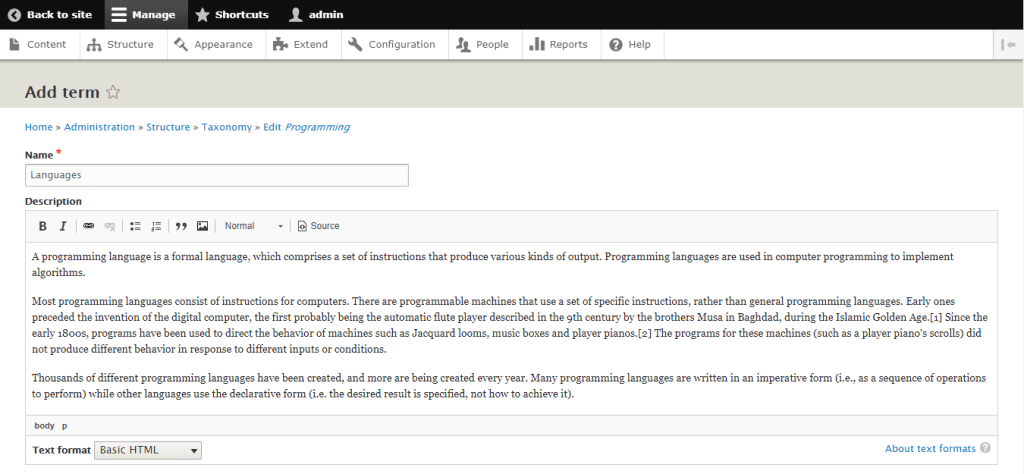
In each case, you will be taken to the "Add term" page where you will need to configure the term details.
Naturally, you would want to assign a "Name" to your term first.
Beneath the "Name" field, you will find the "Description" panel where you will be able to enter any information applicable to this term. Please note that compared to the name the description is optional, therefore if it is not required you are welcome to leave it blank.
In the footer of the content box, you will see the "Text Format" dropdown menu which will allow you to change the text formatting used in the "Description" content box. If you are not sure what exactly you could achieve with the available format types, you can always click on the "About text formats" links and explore your possibilities.
Right below, you will see the "Relations" meta box which can be expanded by clicking on the arrow icon. As we discussed at the very beginning of this tutorial, in Drupal you are allowed to create a hierarchical arrangement of the terms. In order words, if you would want this term to be nested as a sub-term in a parent category, you would need to select it from the "Parent terms" list. Alternatively, if this will be a parent category, please make sure to leave it set to "root". The value entered in the "Weight" field determines the position of this term compared to the rest of the terms added in the same vocabulary. The lower the value is, the higher the term will be positioned.
Following is the "URL alias" field where you will be able to enter a more understandable name for the URL of the term. You can think of that as an SEO-Friendly URL which will be beneficial for improving SEO and user experience since it will be easier to read by humans. The text entered here should start with forward-slash (/) and should be only the part that will appear after your domain, e.g. "/languages". When entering it, please make sure to use lower case letters only and replaces all spaces with dashed (-). We strongly recommend you to define relevant "URL alias" for all your Drupal content.
Last is the "Published" checkbox which controls whether the term will be automatically published upon saving it. If you uncheck the box, the term will be saved only in your Drupal backend and ready to be published when the time comes.
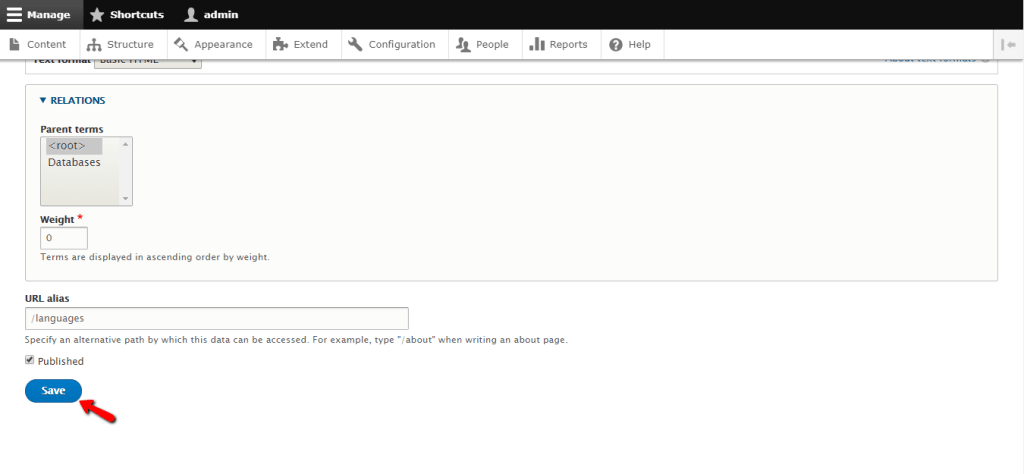
And finally the "Save" button - please make sure to click on it as soon as you specify all the necessary details for your new term.
Now your vocabulary is created and the terms are assigned to it, however, you cannot use them to organize your content items yet. This is because the Vocabulary itself needs to be assigned to the content type you would like to use it for.
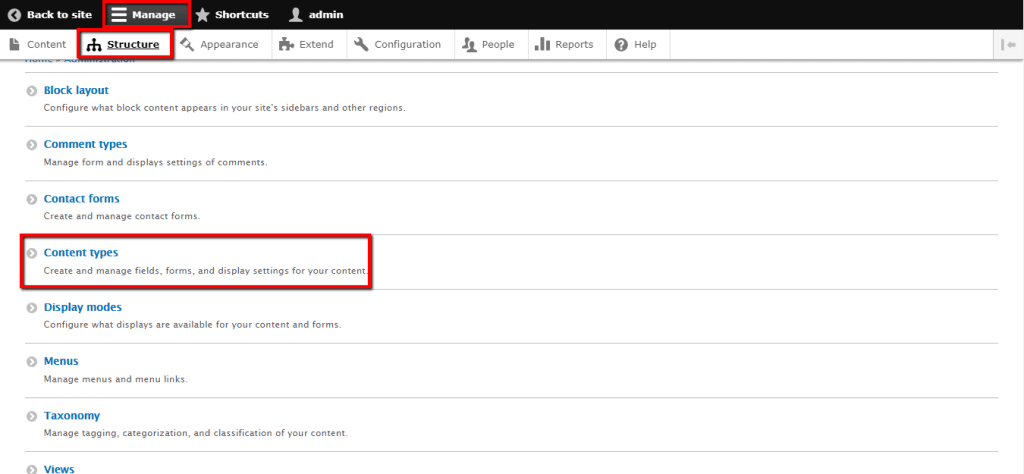
To do that, please, navigate through the Administration toolbar to Manage > Structure once again.
On the "Structure" page, we will need you to click on the "Content Types" this time.
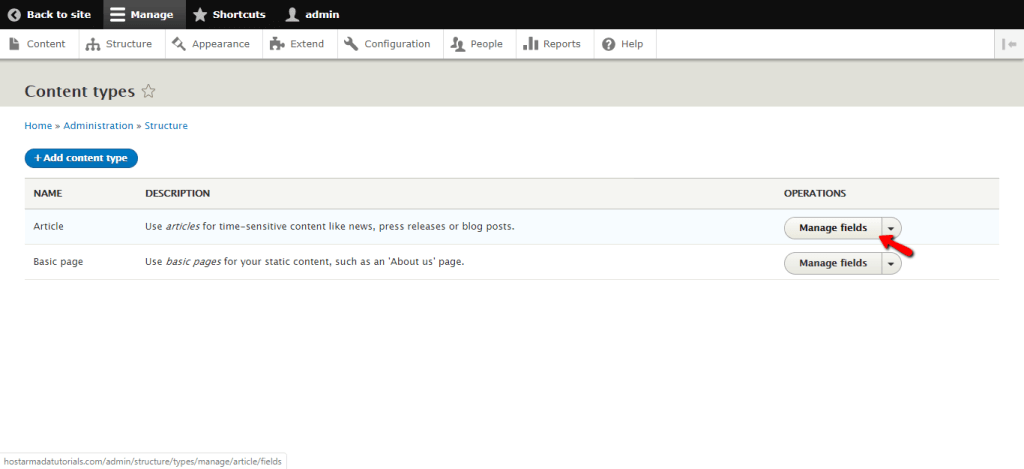
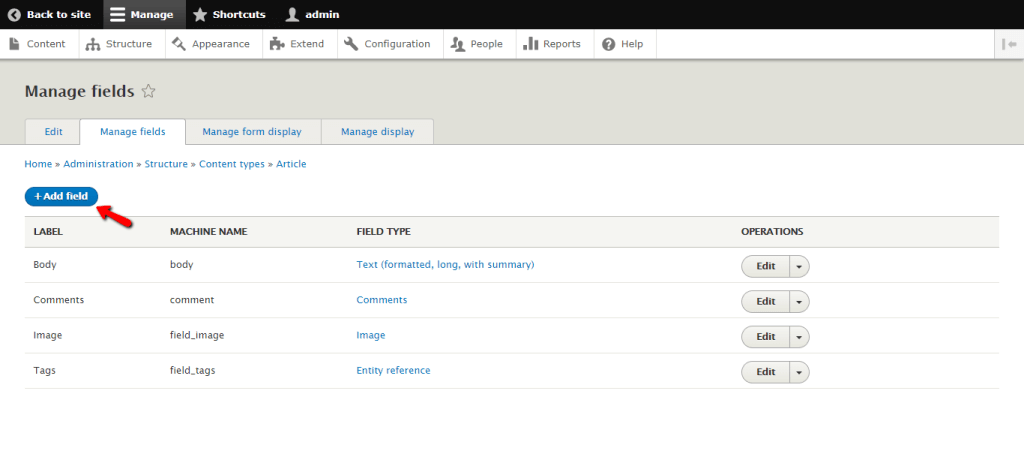
Once you access the "Content Types" page you will have to click on the "Manage fields" button for the content type you would like to organize with Taxonomy. For the sake of this example, we will be assigning our Vocabulary to the "Article" type.
This action will redirect you to the "Manage fields" page where you will need to click on the "+ Add field" button.
Once clicked, you will be prompted to a new page. From the "Add a new field" dropdown, please select "Taxonomy term" (located under the "Reference" section) and enter the "Label" for the field.
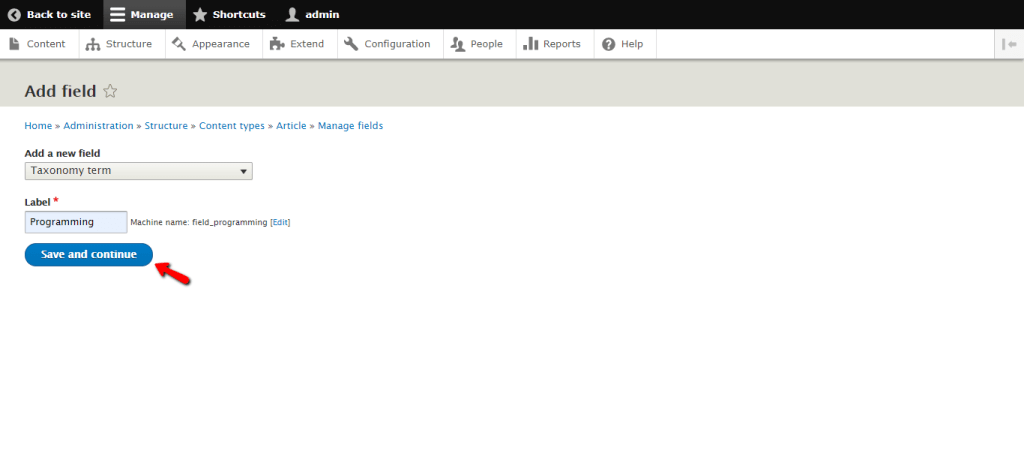
When you are ready, please hit "Save and continue".
On the following configuration step, you will see two dropdown menus:
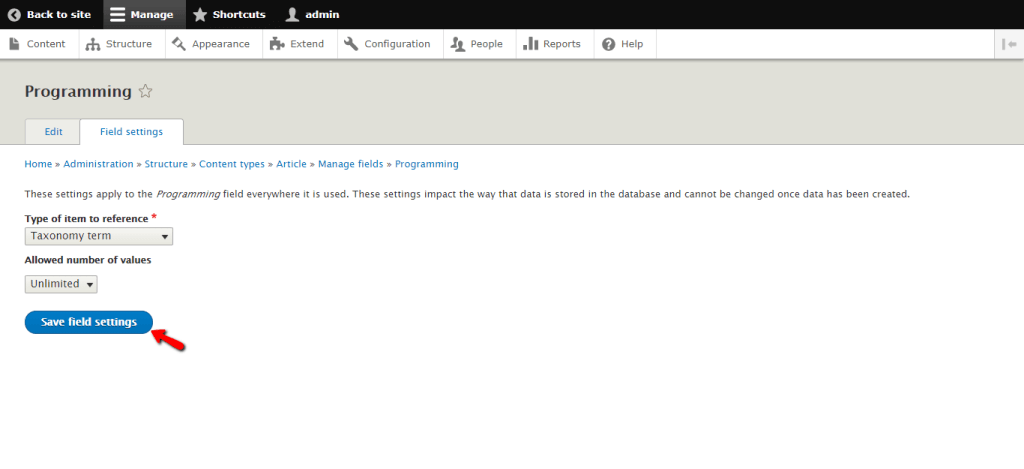
Once you are ready, please click on the "Save field settings" button.
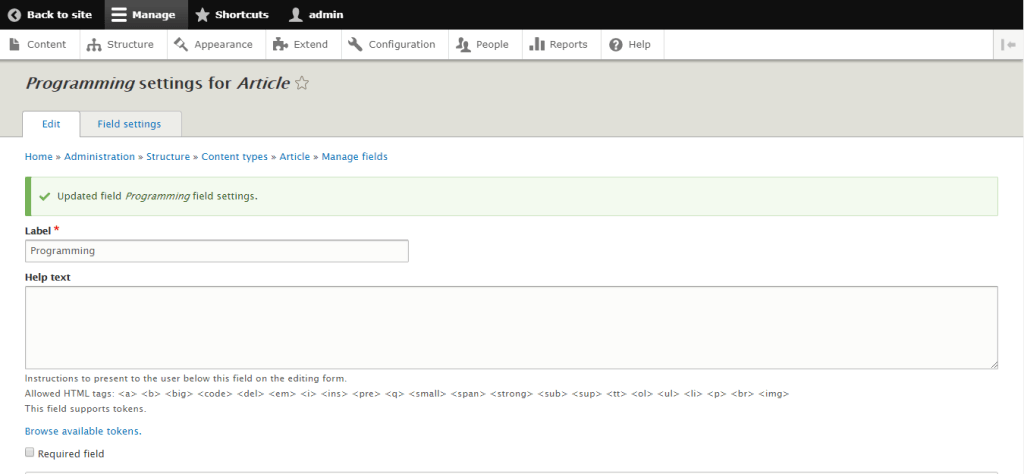
This action will take you to the final configuration step. The first field you will see will be the "Title" which will allow you to change the field title, if necessary.
Right beneath, you will see a "Help text" box where you can enter instructions for your content creators' reference.
The "Required field" checkbox determines whether you will be obliged to enter a term while creating content.
Scrolling down below, you will see the last two meta boxes.
Under the "Rerefance Type" section, you will need to configure the following settings:
Within the "Default Value" section you will be able to select term(s) that will be assigned by default while creating new content items.
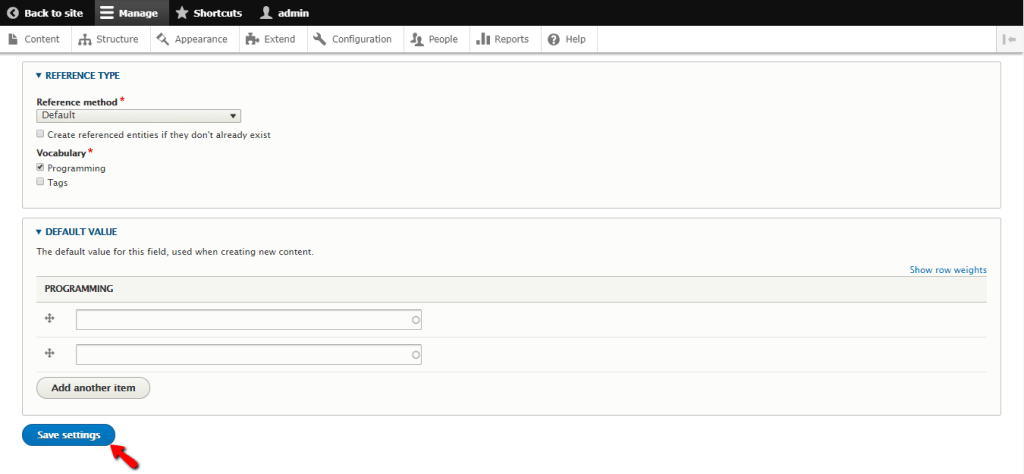
When you are ready, please do not forget to click on the "Save settings" button at the very bottom of the page.
This is it! You deserve one huge "Bravo!" for completing each step of this process.
Now, after this long "journey", when you attempt to create a new content item, you will be presented with an additional section where you will need to select the applicable term(s).
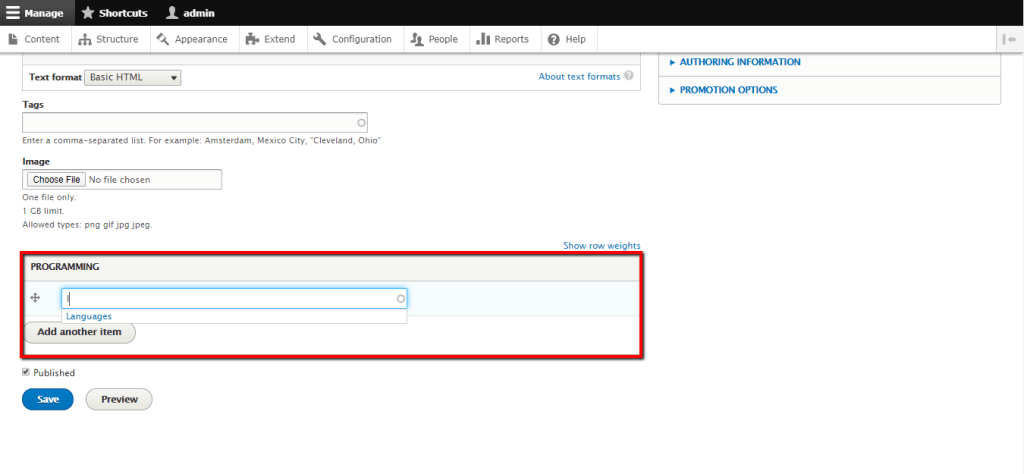
Please bear in mind, this section will hold the name you have specified earlier.
As soon as you start typing the term in the empty field, you will be displayed with a suggestion and you will be able to select it by clicking on it.
Well done! We hope our guide was useful to you in terms of understanding the Taxonomy concept in Drupal. Since that was a lot of information to digest and it is vital to keep it consistent by completing everything step-by-step, you might want to go over this tutorial once again. In any case, we want to thank you for trusting our guidance and welcome you to contact our Support Team in case you have any questions on the topic.

Sebahat is a young and bright woman who has become an invaluable part of our team. She started as a Customer Care Representative, mastering that role and, along the way, growing into a tech-savvy individual who is well acquainted with every support layer of the company. Driven by her aim to improve our customers’ experience constantly, she is committed to enhancing the extraordinary support we deliver.
Learn more about Drupal 8 in the other tutorials that we have: