
Learn Drupal 8
Drupal comes with a powerful menu management system which is just another point won by the CMS. Extremely flexible and customizable, the Drupal menu system allows you to easily manage and modify the structure of your website.
Drupal, along with the theme you have selected to use, always comes with handy default menus created for you. Usually, they are split into two categories - Primary and Secondary menus. The primary menu is the main navigation menu, typically displayed at the top or the side of the page and the secondary menu(es) often displayed at the very bottom of the page.
Now, that is pretty convenient, however, we do believe that at a certain point you might want to create your own menus. Believe it or not, this is an extremely simple task which we will cover in this guide. We will show you how to create a multi-layer deep menu from scratch and how to display it on your website frontend using Blocks.
Let's not waste more time and jump straight to the point.
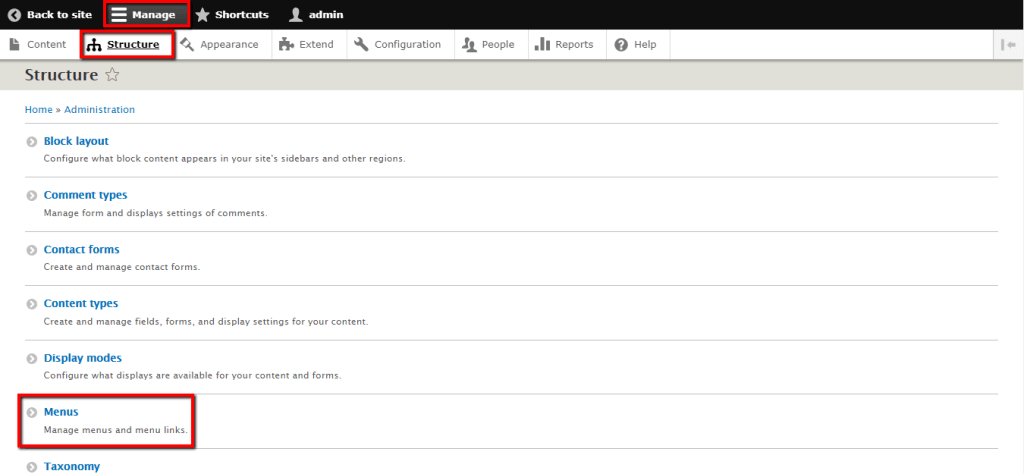
If you have been following our Drupal tutorials you should already know what the first step will be. As usual, we will need you to log in to your Drupal Admin Dashboard. When logged, please navigate through the Administration toolbar to Manage > Structure.
When you access the "Structure" page, please click on the "Menus" link.
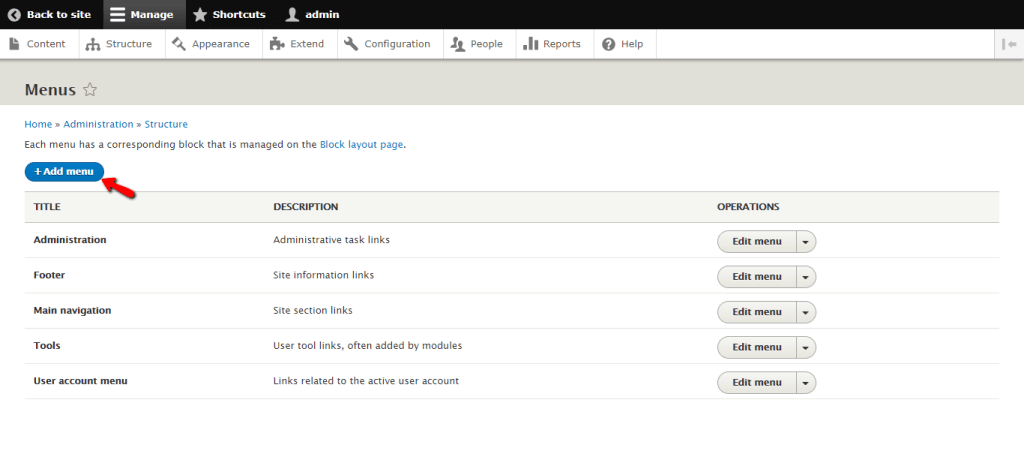
Once this is done, you will be redirected to the "Menus" page where you will see a list of all menus currently available on your Drupal website. And of course, a nice, big blue "+ Add menu" button at the upper left corner. As you have probably guessed, this is where you will need to click.
When clicked, you will be redirected to the "Add menu" page where you can start the actual process of creating your brand new menu.
All you will need to specify in the first step is the menu "Title" which represents the name of the menu and the "Administrative summary" which is the menu description and it is optional.
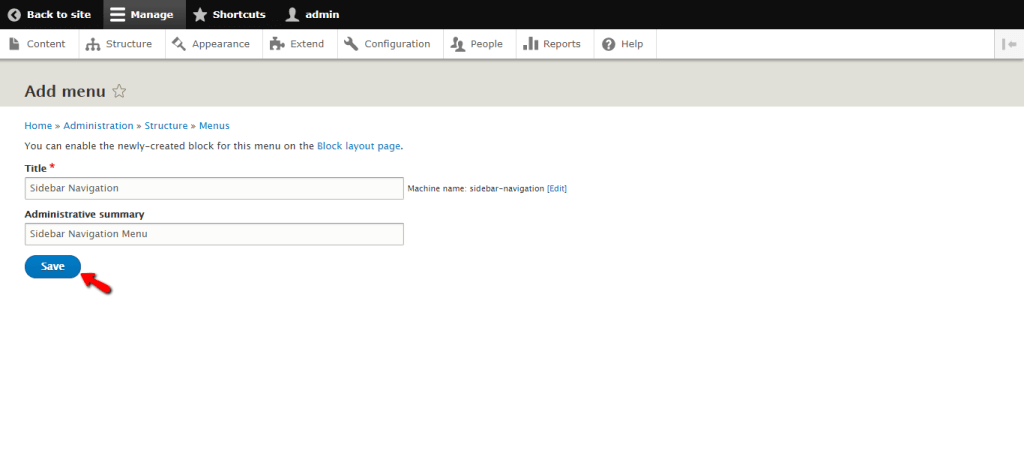
Once this is done, you will need to click on the "Save" button in order to continue to the following step.
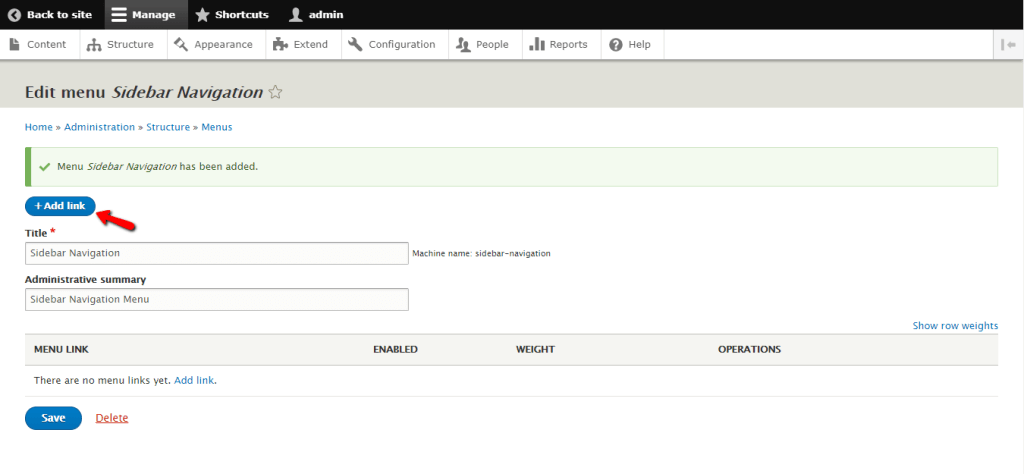
Now what the menu is successfully created we will have to add some content items to it. You can do that by clicking on the "+ Add link" button.
For the purpose of our guide, we will add one parent "Latest Articles" link and a few child "Article" links.
Let's begin with the parent one.
Since the process of adding links to menus had been already explained in detail in our How to modify Menus in Drupal tutorial, we will not dive in-depth and we will explain only what you should pay attention to. If you are not sure about a certain setting, please take a moment to review the aforementioned tutorial.
First, you will have to enter the "Menu link title". Then specify the URL address in the "Link" field. In our case, it is set to "<front>" as we want the link to take our visitors to the Home Page. The "Enabled" checkbox should be left ticked. You may enter a "Description" if required.
The important part of multi-layer menus is to tick the "Show as expanded" checkbox. Then the "Parent link" is already set to our new menu and since this is the parent link we should leave it as it is. Lastly - the "Weight" does not really matter in this case, as this is the only parent link we will have on this menu.
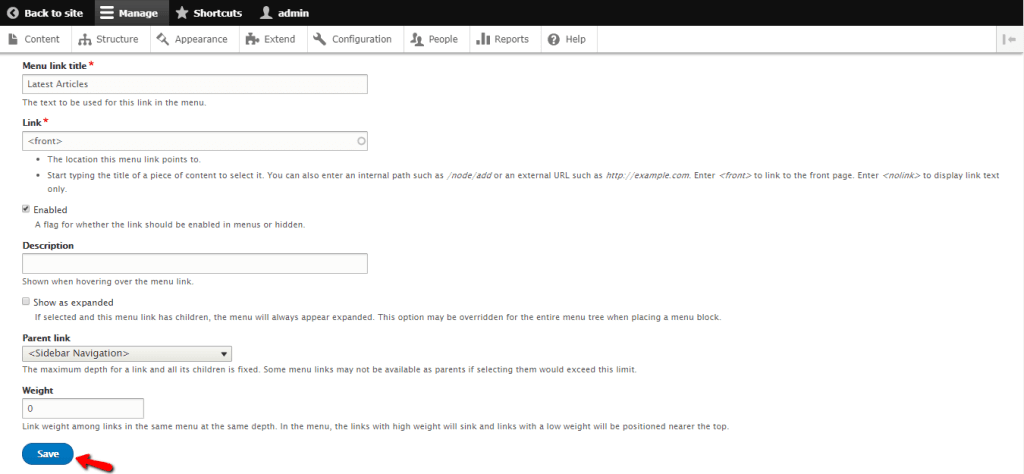
When you are ready, please make sure to click on the "Save" button.
Now, let's add the child link. Please click on the "+ Add link" button once again.
You should enter all the link details in the same manner apart from the last three. The "Show as expanded" checkbox should be left unticked this time. From the "Parent link" dropdown menu you will need to select the previous link - in our case, "Latest Articles". You will notice there will be a few dashes in front of it, which indicate the depth in the menu structure. Last, the "Weight" we will again leave set to "0" but only because this is the article we want to be displayed first.
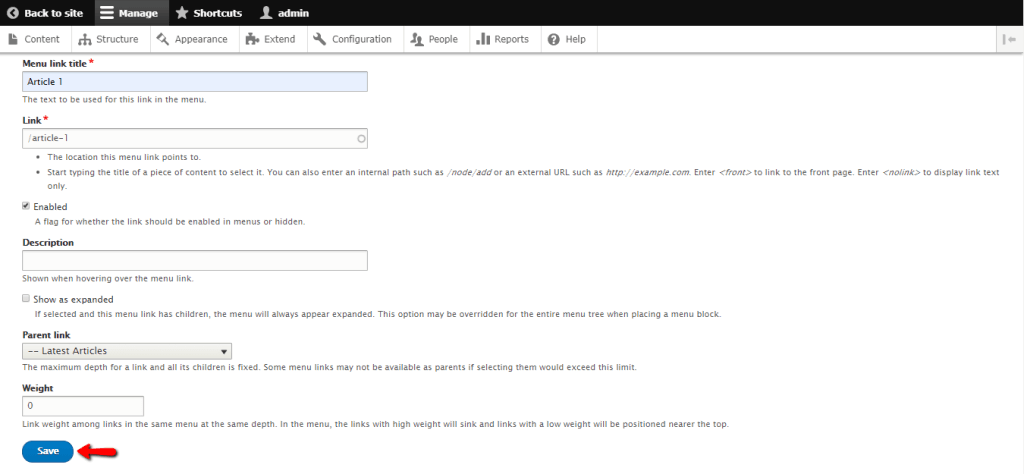
Once again, when you are ready, please click on the "Save" button. You will need to repeat the above-described steps for each child link you would like to add to your menu.
Now back at the "Edit menu" page, under the "Menu Link" section you will notice the links added and their actual parent-children hierarchy.
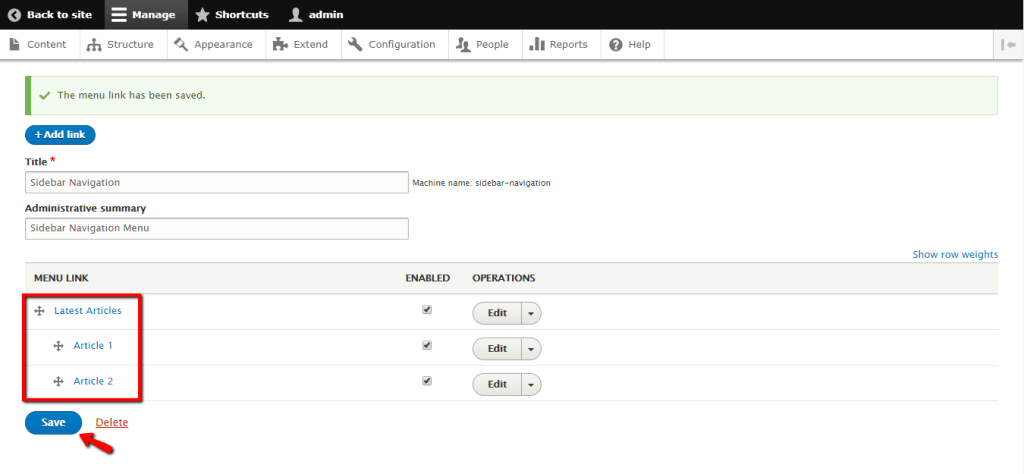
All left to be done is to click on the "Save" button.
Great! Your new custom menu had been successfully created now, but it will not show up on your website frontend yet. This is because it needs to be placed as a block.
If you are not familiar with the Blocks concept we would like to encourage you to check our tutorial based on How to manage Blocks in Drupal where you will find a lot of useful information. You will also find instructions on how to review the available region positions in your theme - this is something you will need in the following lines in order to know where exactly to place the block, i.e. the menu.
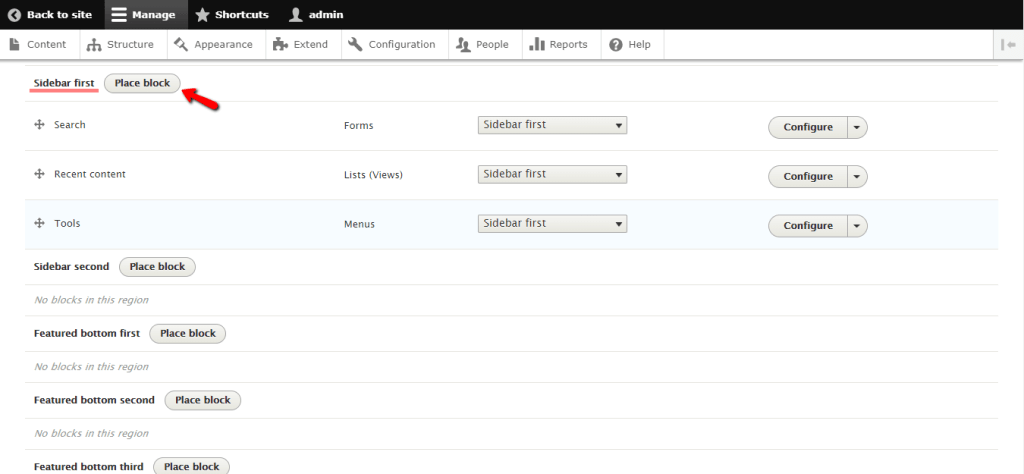
Whenever you are ready, please navigate through the Administration toolbar to Manage > Structure and then click on the "Block layout" link.
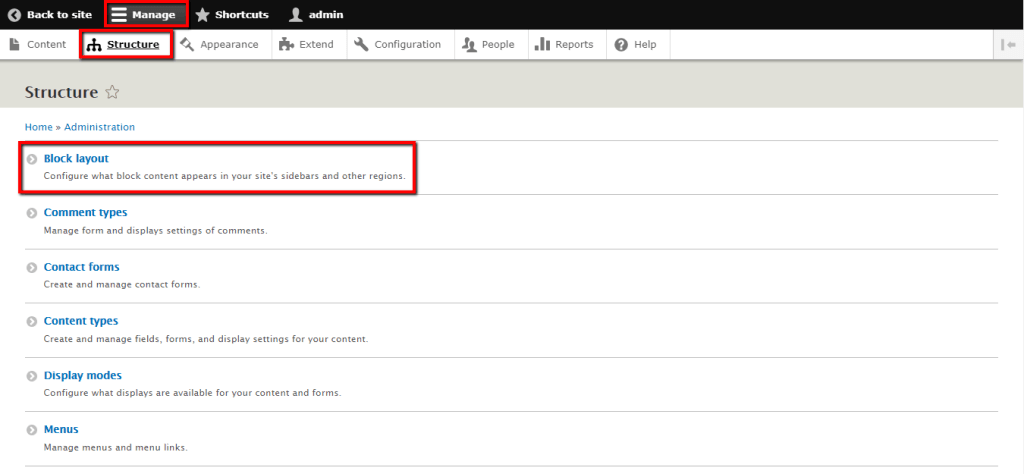
On the "Block layout" page, please locate the region in which you would like to display the menu and click on the "Place block" button.
Once this is done, a new dialog will be displayed where you will see a list of all available blocks. You may enter the menu title in the search to filter the blocks and easily find it.
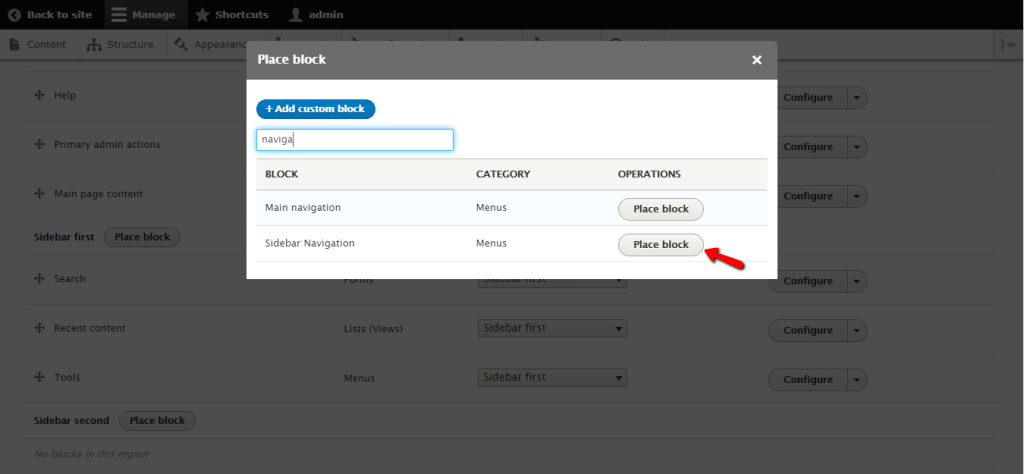
When you locate it, please click on the "Place block" button next to it.
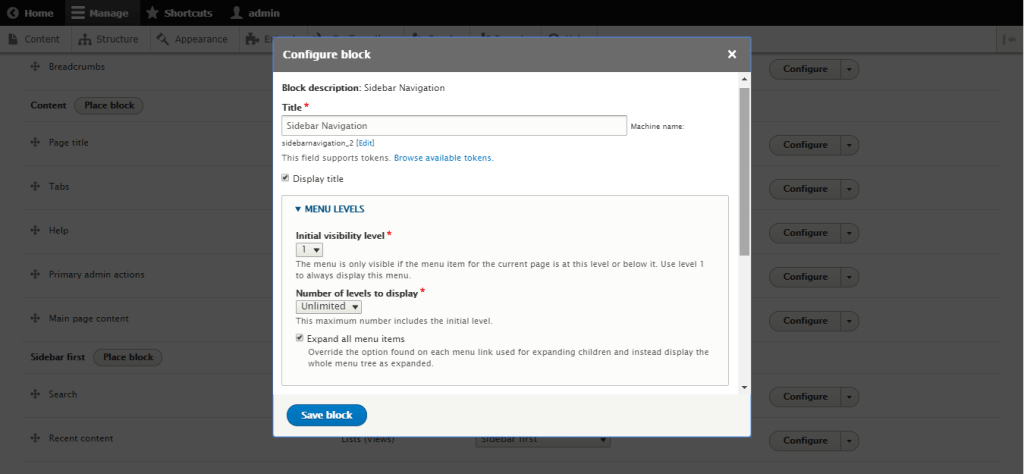
Afterward, you will be prompted with the "Configure block" screen where you will be able to modify the block as per your preferences.
You will be able to edit the block "Title" and control whether it will be displayed by ticking/unticking the "Display title" checkbox.
If you expand the "Menu Levels" section by clicking on the arrow icon, you will find the following settings:
Right below you will find the "Visibility" section where you will be able to restrict the block to be displayed only for specific content types, on particular pages or to certain visitors depending on their roles. To do so, you will simply need to tick the corresponding checkboxes.
Last is the "Region" dropdown menu which will allow you to change the initially selected region.
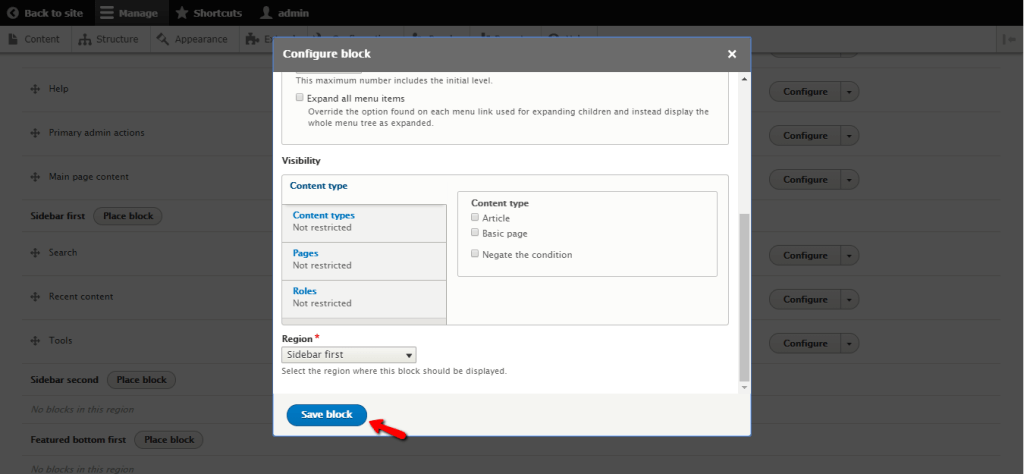
Finally, when you are ready, please click on the "Save" button.
Well done! Now you are ready to go ahead and check the result on your website frontend.
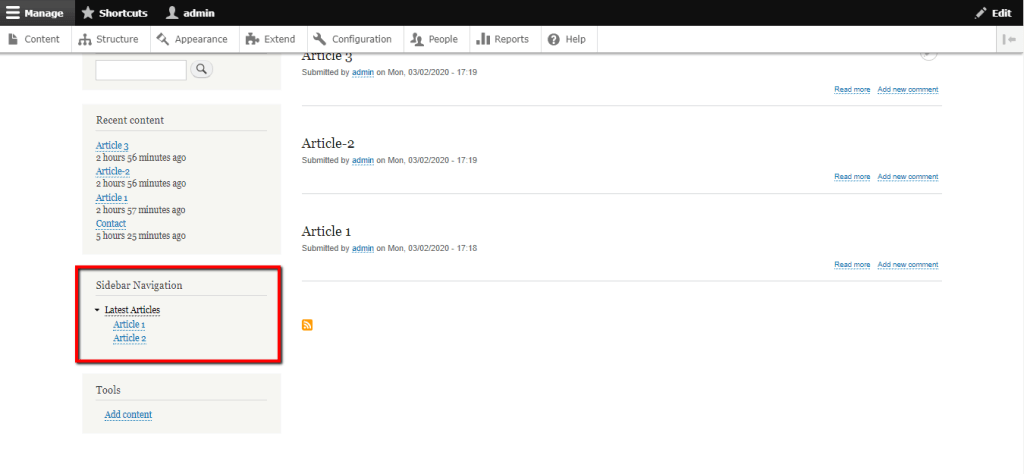
And there you have it! Your brand new custom menu nicely appearing where it is supposed to.
We would like to congratulate you on learning how to create a custom multi-layered menu and how to display it as a block on your website frontend. We hope your new skills will come in handy when you are customizing your website in the future. If you have any questions on the topic, you are always welcome to address them to our Support Team.

Sebahat is a young and bright woman who has become an invaluable part of our team. She started as a Customer Care Representative, mastering that role and, along the way, growing into a tech-savvy individual who is well acquainted with every support layer of the company. Driven by her aim to improve our customers’ experience constantly, she is committed to enhancing the extraordinary support we deliver.
Learn more about Drupal 8 in the other tutorials that we have: