
Before we begin explaining the “Convert Addon Domain to Account” feature, let’s get acquainted with the term “Addon Domain”. An Addon Domain is a domain name that is added separately from the primary domain in a typical cPanel Web Hosting Account. Addon Domains will allow you to manage multiple different websites under a single cPanel Web Hosting Account. What makes this possible is the cPanel functionality that maps an Addon Domain to a specific folder from the Web Hosting Account similarly to how the primary domain is mapped to work with the public_html folder. Since you can add as many folders as you would like to a cPanel account this means that you can add basically an unlimited amount of addon domains as well.
The “Convert Addon Domain to Account” feature in the WHM control panel allows you to convert this addon domain into a stand-alone cPanel account, gaining more control over the domain itself in the process. This includes database creation, FTP account creation, and controlled SSH access. Let’s dig into this.
As with all other WHM control panel features you need to first log into the WHM service for your VPS or Dedicated Server. If you are not sure how to do that, please check our How to Access WHM tutorial. After you have logged in, please use the search field on the left side of the page and type “Convert Addon Domain to Account”.
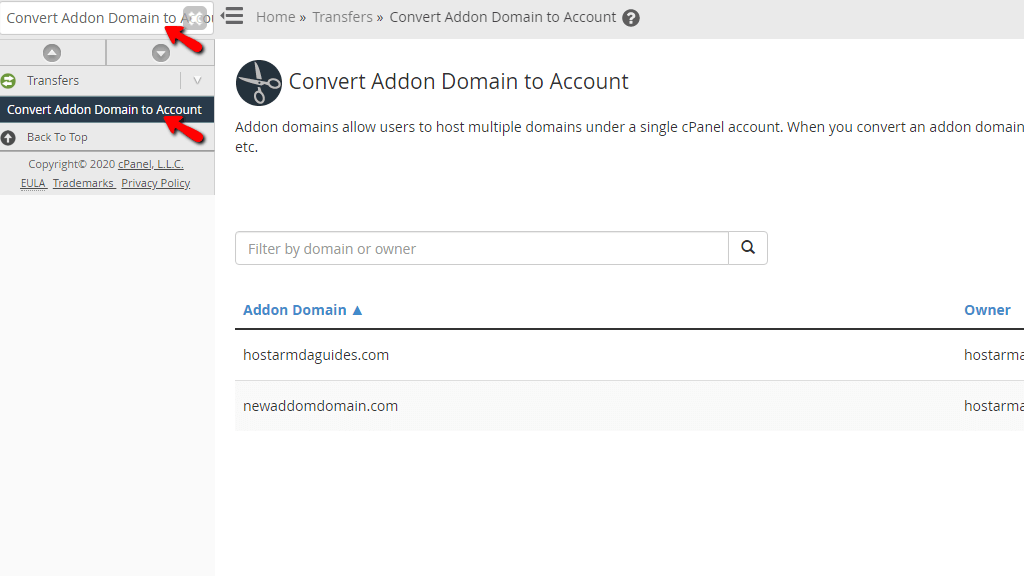
When the single result presents itself below the search bar, please click on the “Convert Addon Domain to Account” link so you can be redirected to the desired page.
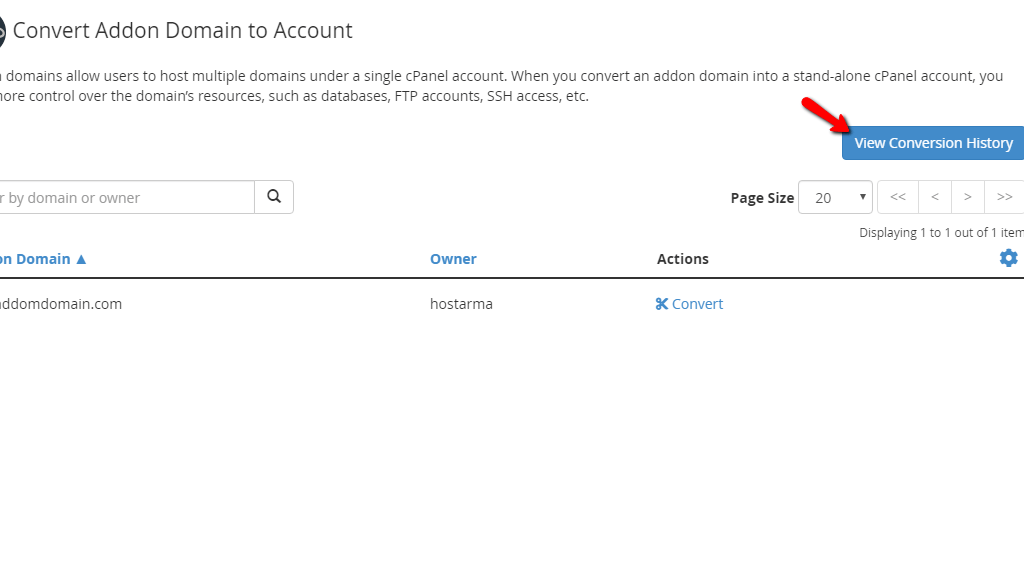
Upon landing there, you will notice a search bar, which you can use to filter the addon domains by either typing the domain itself inside the search box or the account owner.
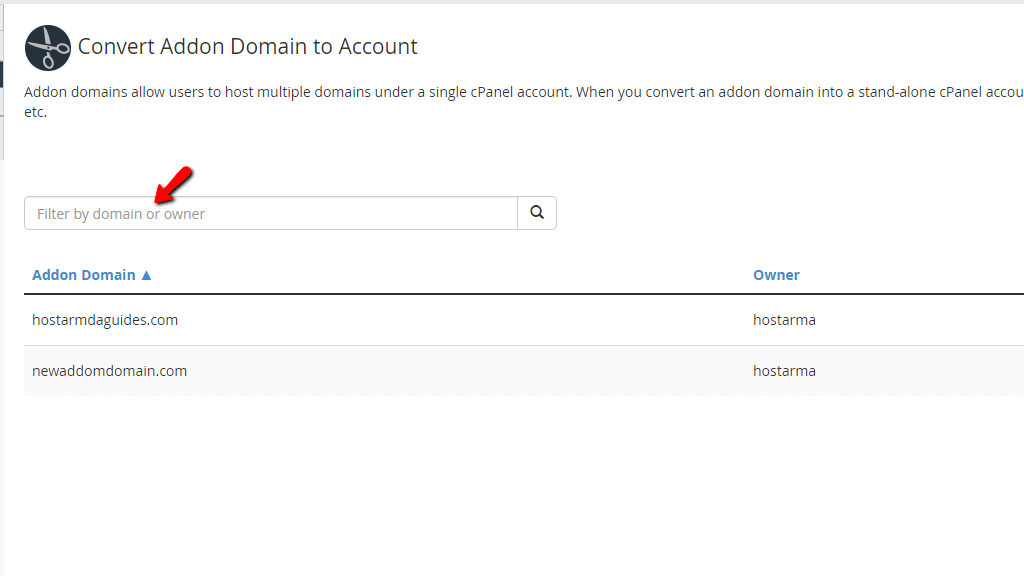
Underneath, there will be a table section containing the “Addon Domain” the “Owner” and the “Actions” column. The result from the search will be displayed inside this table and in order to start the process, please click on the “Convert” link which will be located under the “Actions” column for the chosen addon domain.

This will change the page’s layout and you will see a completely new set of options available for the conversion process. Let’s go over them.
First, you will have the “ Account Settings for “domain.com” ” section. Inside, you will find two text fields, a dropdown menu, and a checkbox:

The second section you will encounter is the “Website Configuration” section. In order to access the settings it provides, please click on the “Configure” button located on the right corner of the section itself.
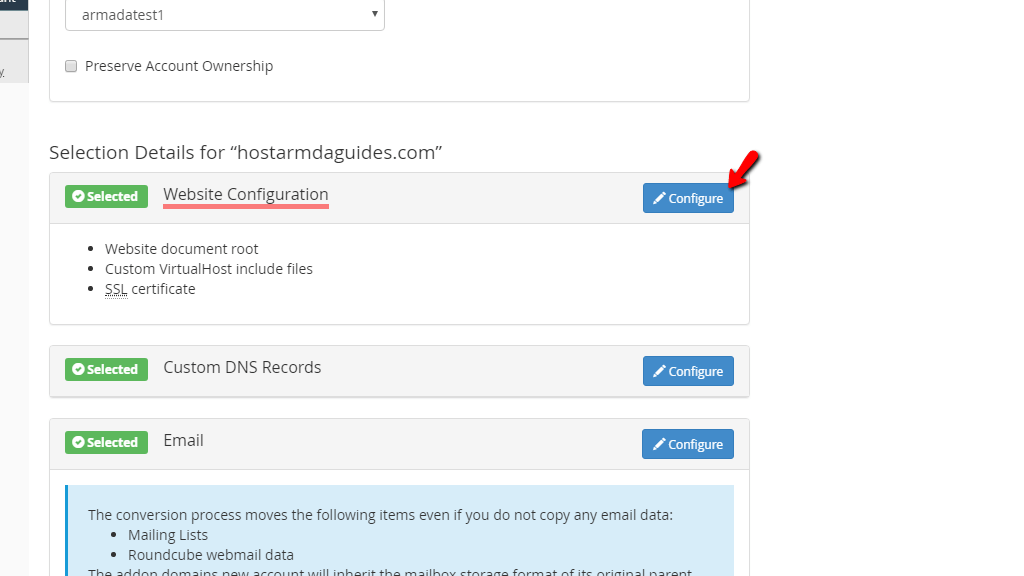
The presented settings will allow you to copy the contents of the addon domain’s document root and the SSL certificate of the domain to the new account. Note that the “SSL certificate” checkbox will be available only if there is an SSL certificate installed for this addon domain.
When you are redirected to the “Website Configuration” page, you will have the option of excluding one of the above-mentioned options, by removing the ticks from the checkboxes associated with them. By default, these options will always be checked.

When you have selected or respectfully deselected any of the options, please click on the “Save Selections” button located below the currently configured section. This will redirect you back to the “Convert” page and you can proceed further with the conversion.
This brings us to the next section, which is the “Custom DNS Records” section.
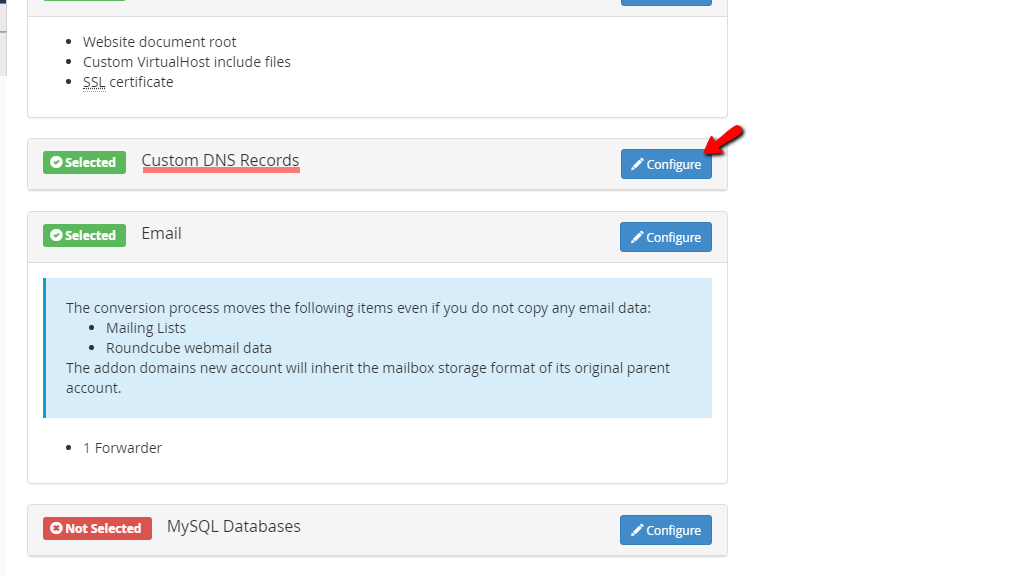
In order to display the configuration options behind it, press the “Configure” button located at the end of the section. This will open another section with just a single option “Move custom DNS records” that has a checkbox on its left side. In order to select it, please put a tick inside the checkbox. Choosing this option will guarantee that all of the DNS records you had for this addon domain name are carried over to the new cPanel account as well, otherwise, WHM will deploy the default DNS records for the account.
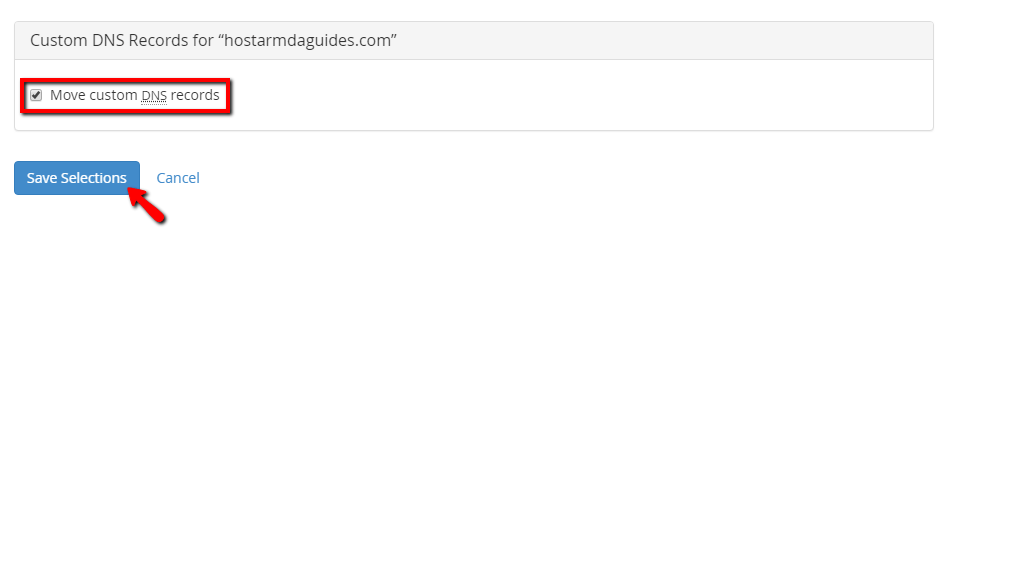
To save the changes, please press the “Save Selection” button underneath the section. This will take you to the previous page and will let you proceed with the rest of the steps before you initiate the conversion process.
The next section is the “Email” section. It will present you with options regarding the transfer of your email accounts, forwarders, autoresponders, and webmail data for the Horde mail client. To open the configuration screen, please click on the “Configure” button located in the top right corner of the section.
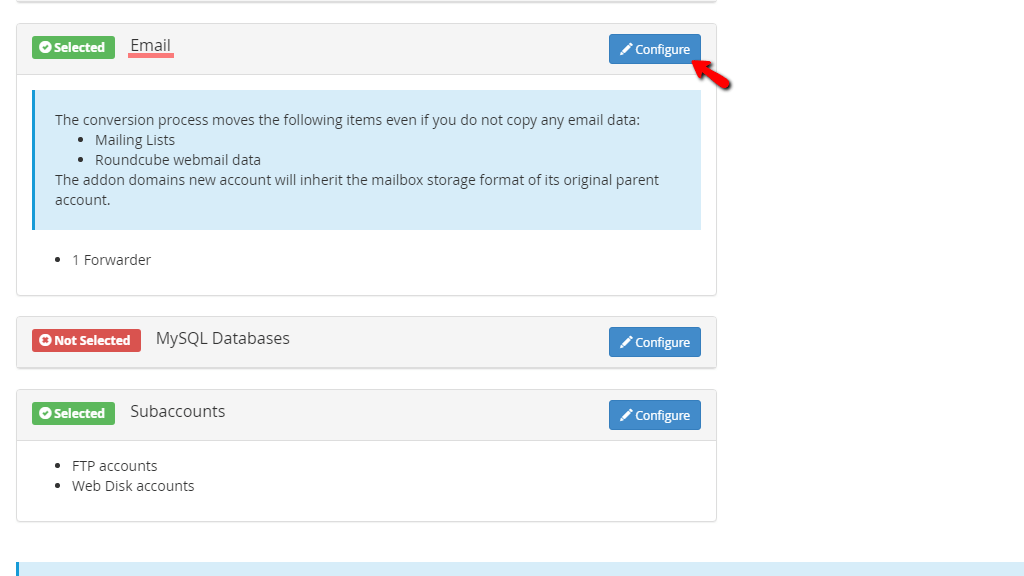
Upon being redirected to the configuration page, you will see the aforementioned options and checkboxes on their left side.

All of these will be selected by default and WHM will move all your mailing lists and Roundcube webmail data, regardless of the options you select. In our case, the addon domain does not have an e-mail account, an autoresponder, or any Horde webmail data, thus these checkboxes are greyed out and unticked.
When you select all the options from this page, please click the “Save Selections” button beneath the table to go back to the previous screen and continue forth with the setup.
The second to last section is the “MySQL Databases” section. This setting will be labeled as “Not Selected” by default, given the fact that WHM has no way of knowing what is the database or the username of the addon domain.

Pressing the “Configure” button at the end of the section will open the configuration page for MySQL databases.

When you first land there, you will see the question on the top of the page “How do you want to transfer your MySQL database?” and two choices bonded by radio buttons below. The options are to either use the “Move” or “Copy” method of moving the database to the new account. In order to use one of the provided options, please select the radio button on the left side of “Move” or “Copy”.
There are a few things you need to keep in mind when selecting “Move”. First off, the previous account will no longer have access to this database and secondly the new account will gain full access to it. In order to use this method, please select your database from the section below.
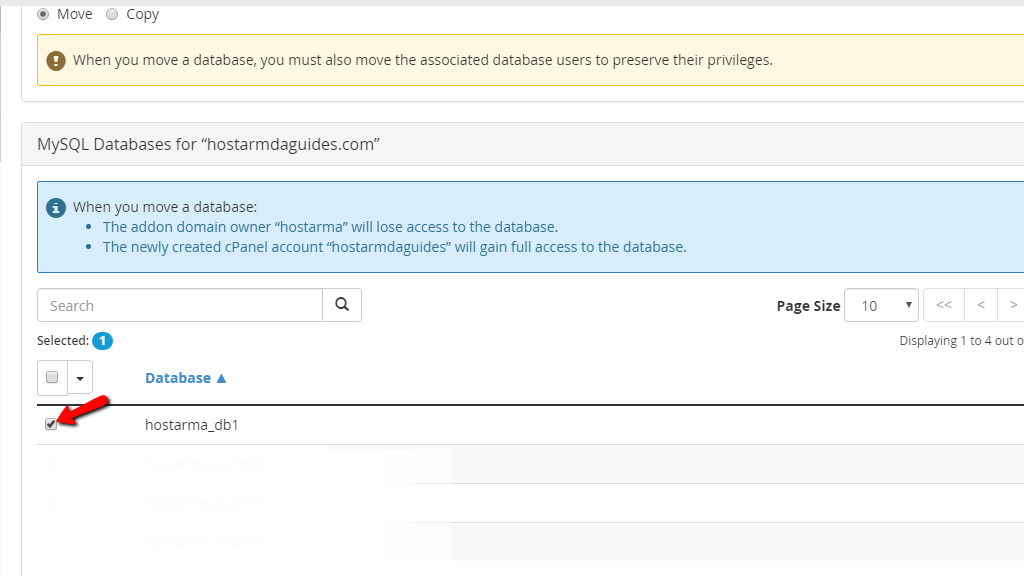
If you are not able to find it, please use the search field above the table section. Afterward, please scroll down to the “MySQL Users for domain.com” section, and from the list, select your database user. The database associated with the user will be shown underneath the “Databases” column of the table section.

When you have finished choosing the database and its username, please press the “Save Selections” button located below this table section. This will take you back to the previous screen, allowing you to continue with the configuration. In the “MySQL Databases” section you will now see the database and the user, along with the method you are going to use for the conversion.

The “Copy” option will make a copy of the database on the new account, however, it would need a new name as two databases with the same name cannot exist on the server. When “Copy” is selected the chosen database row will expand and will let you type in a new name for the database to the new cPanel account. Note that this process will not copy over the database user and if you want to have access to the database, you need to create a user from the cPanel service, apply the desired privileges and then assign it to the database. If you are not aware of how to do that, please follow our How to manage your databases in the cPanel tutorial.

When you have finished choosing the database, please click the “Save Selections” button located below this table section.
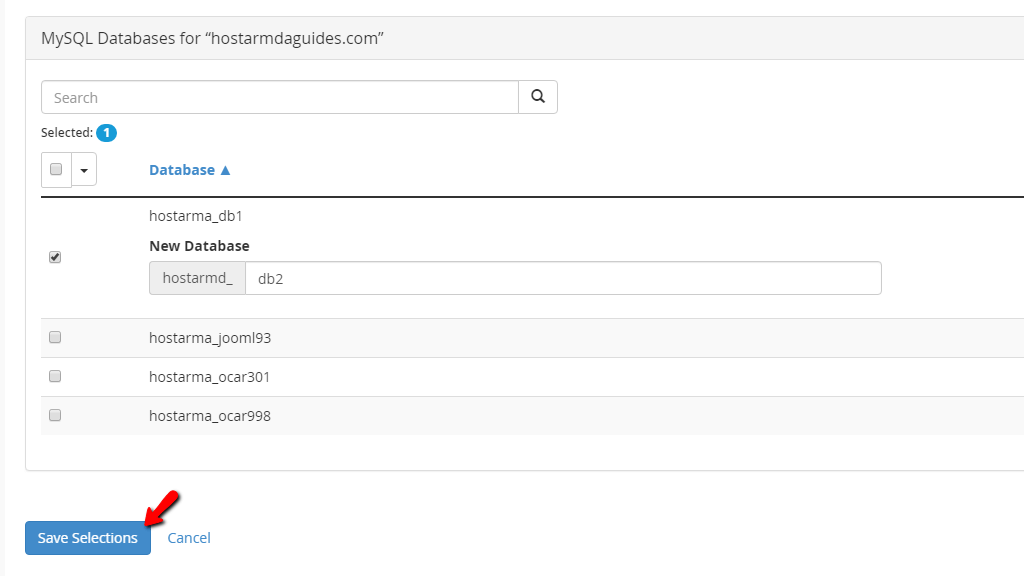
This will redirect you back to the previous screen, allowing you to continue further with the configuration. In the “MySQL Databases” section you will notice the original database, along with the new one and the method you are using for the conversion.

The last section in this feature is the “Subaccounts” section.
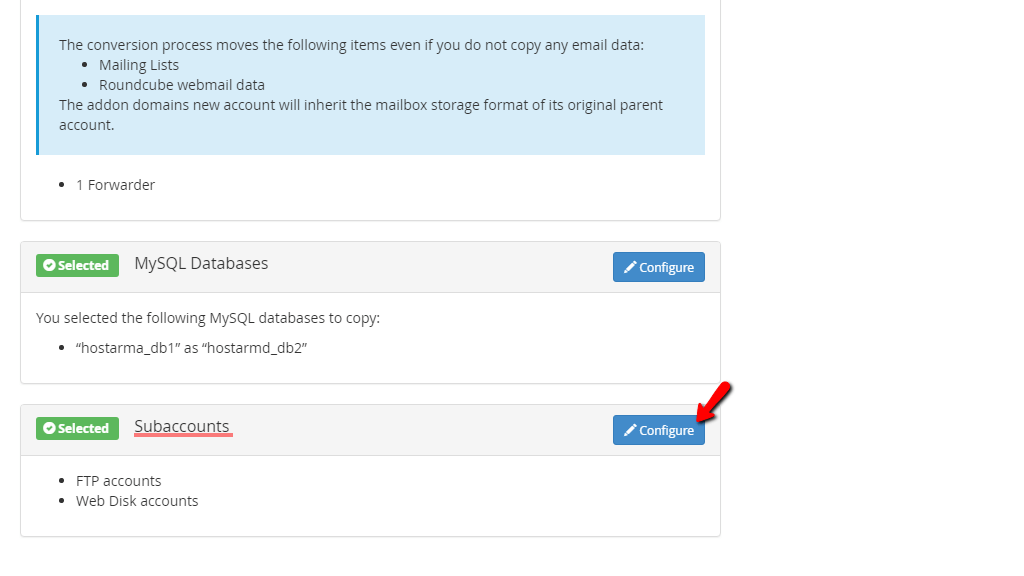
Pressing the “Configure” button on the top right corner will redirect you to the screen where you can select the options associated with it.

There are two available choices presented for you to choose from by ticking the checkboxes displayed before each of the options. The choices include copying the addon domain’s FTP accounts, Web Disk accounts, or both to the new cPanel account. Upon making your choice, please press the “Save Selection” button under the section. This will once again take you back to the previous page, where you can finally press the “Start Conversion” button that will initiate the process.

When this button is pressed, you will be taken to the “View Conversion History” page where you will see a table section that will contain a record for the conversion you just performed.

This page is also accessible from the initial screen of this feature. The button “View Conversion History” used to access it is located in the top right corner.
Pressing the “Details” clickable link under the “Actions” column will open a log of the process showing you all the steps WHM took in order to make the conversion.
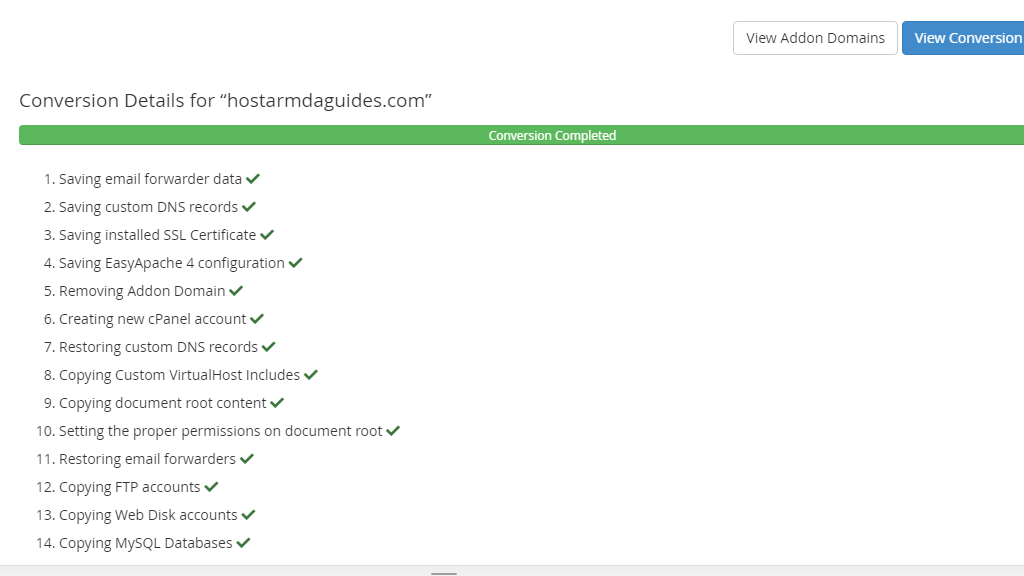
On the top right of this screen, there will be two buttons “View Addon Domains” and “View Conversion History”. Pressing the ”View Addon Domains” will take you to the initial page of this feature letting you perform this process all over again with a new addon domain. the “View Conversion History” will take you to the previous page where the records of the converted addon domains were displayed.
That’s it! We have gone over all there is regarding the “Convert Addon Domain to Account” feature in the WHM control panel. It is really useful and intuitive to use and by breaking down all the steps in this guide, we hope that you are able to handle it on your own. If you are ever faced with any issues while using it, please contact our Technical Support Team over the ticking system from your Client Area. They will be more than happy to look into it for you.

Sebahat is a young and bright woman who has become an invaluable part of our team. She started as a Customer Care Representative, mastering that role and, along the way, growing into a tech-savvy individual who is well acquainted with every support layer of the company. Driven by her aim to improve our customers’ experience constantly, she is committed to enhancing the extraordinary support we deliver.
Learn more about WHM in the other tutorials that we have: