
Immediately after you install the WordPress platform on your web hosting account, you will probably want to start filling in with content. Although this is the of creating your WordPress website, you might want to consider reviewing the settings that the platform offers in order to get familiar with all the aspects you can tweak in order to build and configure the astonishing website your visitors will enjoy. In this tutorial, we will provide you with detailed information on all the available settings available in WordPress.
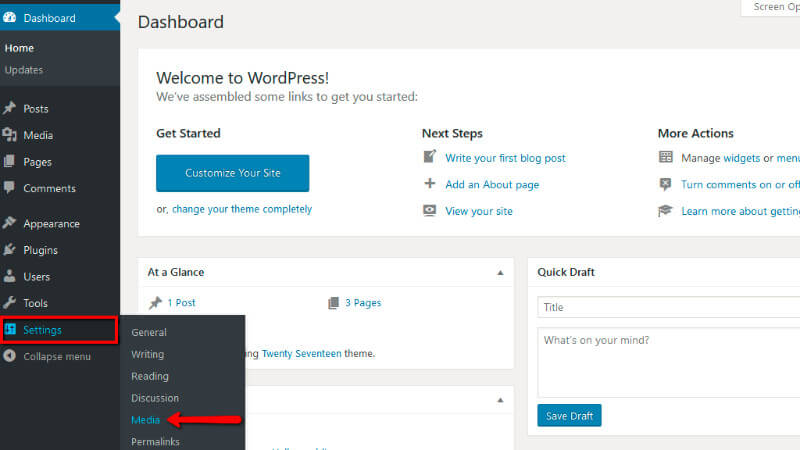
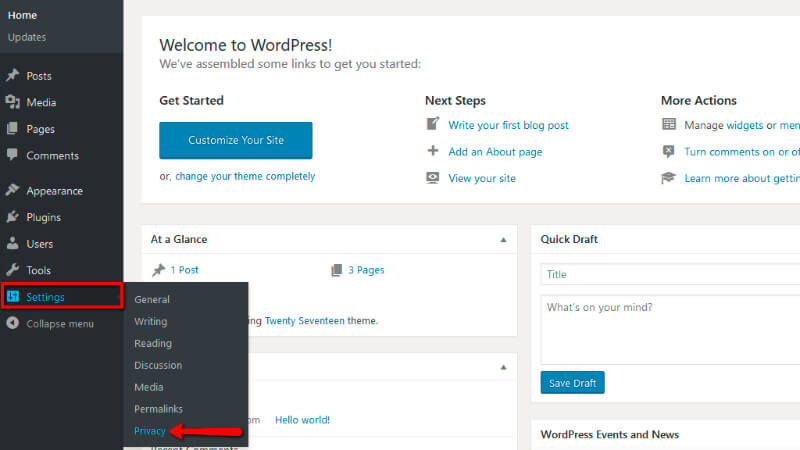
WordPress keeps all the settings it supports in a conveniently separated, from the others, page right inside the admin area. To be able to reach the "Settings" page, you have to login to the admin area of your WordPress based website and from the main vertical navigation menu, you have to look for the "Settings" option.
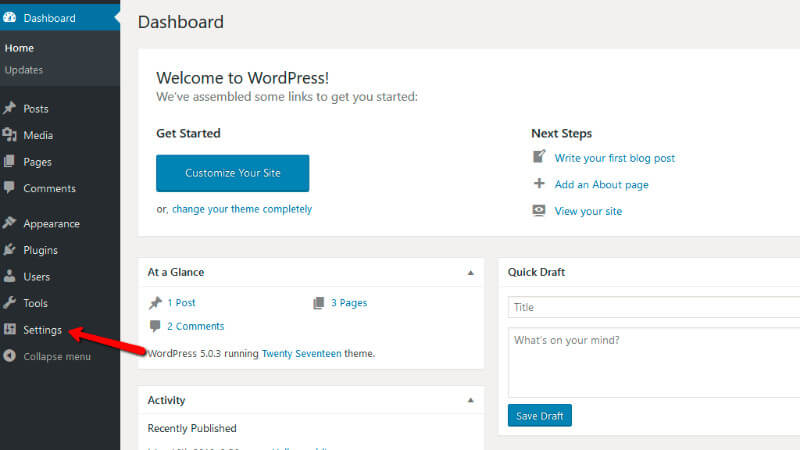
As you will probably notice, immediately after you hover over the "Settings" menu item, a new submenu will appear with different links such as "General", "Writing", "Reading" and so on. These are the actual categories of settings that WordPress provides for its users. We will review each one of those separately in the following lines of this tutorial.
The first set of settings you will probably see is the "General" settings since it is the first link in the "Settings" submenu. To access the "General Settings" page, please, simply click on that link in the submenu that will appear right after you hover over the "Settings" link. All the settings provided here contain basic information about your site.
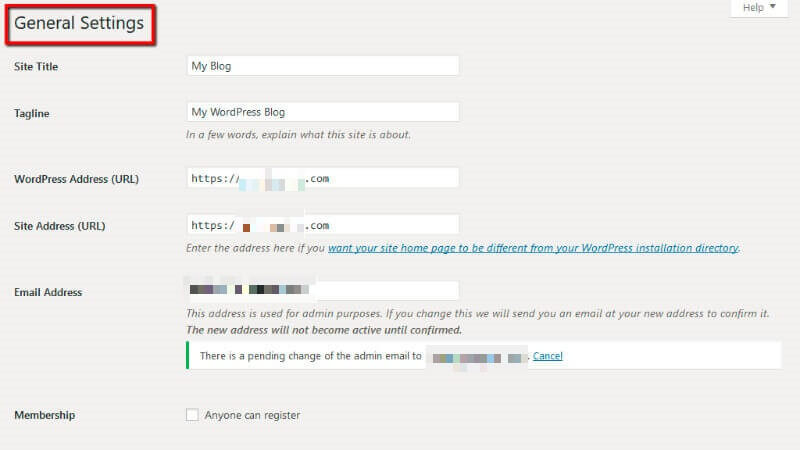
The first section of the page is the most straightforward. The first two fields, that are positioned right under the name of the page ("General Settings" ), are the "Site Title" and the "Tagline" for your site. The "Site Title", as the name suggests, is used for specifying the name of the website. It is displayed by default on many of the pages. The "Tagline" provides brief information on what this site is about.
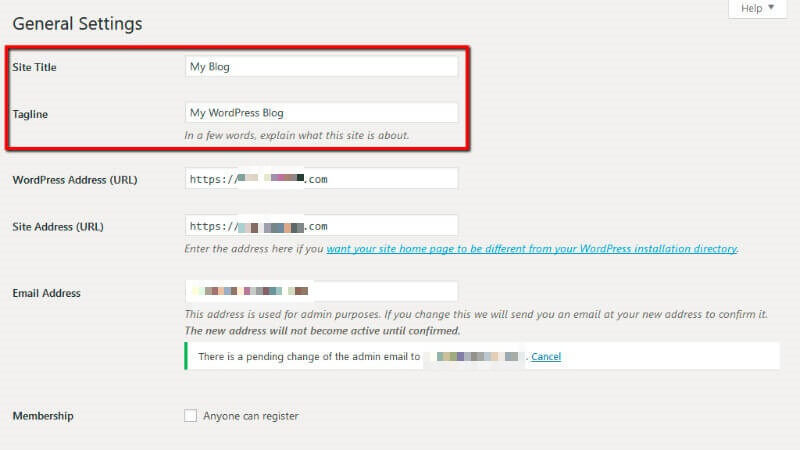
Filling out the "Tagline" field provides the visitors with more explanations about what the website is about, with a short phrase or sentence.
Next, you will see two "URL" text fields:

It is recommended for them to stay identical and that is in almost all of the cases. However, in rare situations, you might need to change one or both of them depending if you would like your website to be stored in a different directory.
Under these settings next you will see the email address.
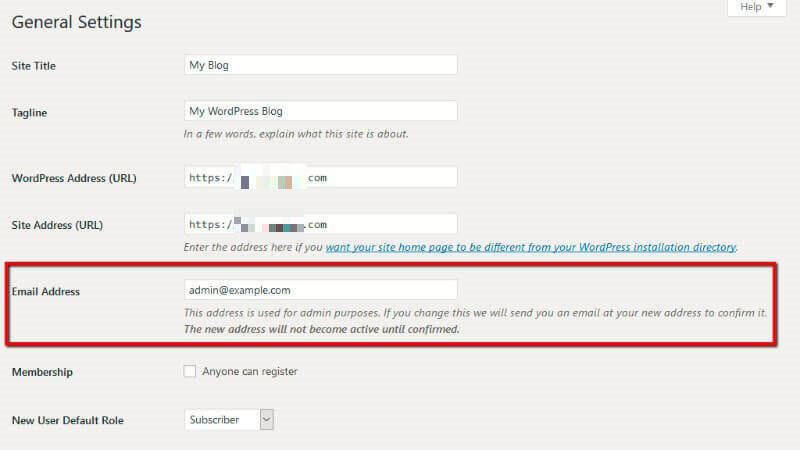
The email address is used for admin purposes, this is why it is crucial for it to be correct. Please, bear in mind, that if you change it the new email address will not become active until confirmed. Wordpress sends various notifications on that address.
Right after that, you should see the settings related to the users of your website.

These were the most important settings from the "General Settings" page. The rest of the settings are for the "Language", "Timezone" and the Date/Time. You can select the language and the time zone for your WordPress based website, choose how do you prefer for the dates and times to appear and also decide the starting day of the week for the site.
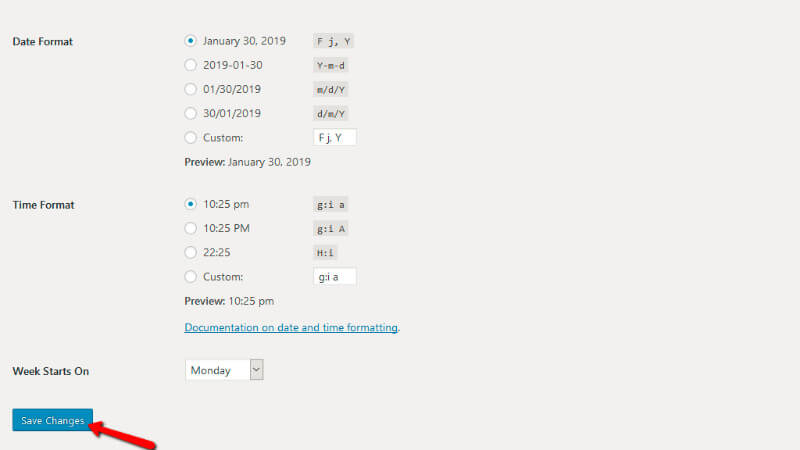
After you are done setting the "General Settings" section, just click on the "Save Changes" button, in order for all the settings you have just set to be saved.
The next set of settings WordPress offers is the Writing settings. These are mostly related to the content of your website and since WordPress was initially intended as a blogging platform, this means that the settings are mostly related to the blog posts. To access the page you will have to enter the main page of the site and again search for the "Settings" option, but this time from the drop-down menu click the "Writing Settings" option.

As the name suggests, here you will be configuring settings all about writing posts. The first two options are:
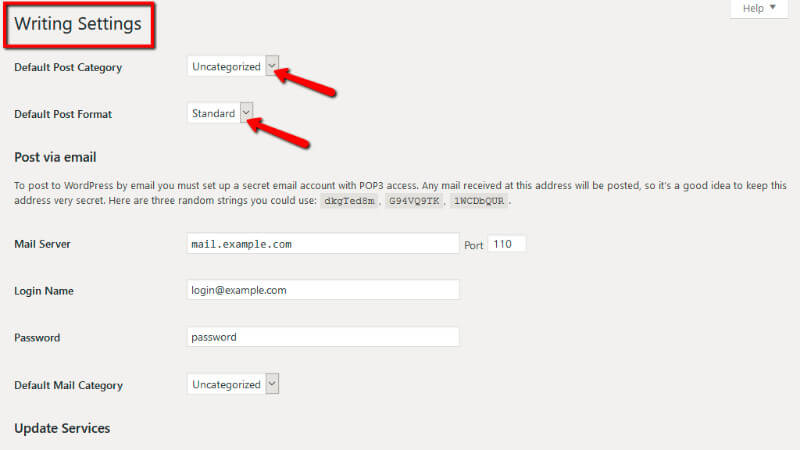
Under these options, you will see the settings for creating posts via email and publish them directly to your site.
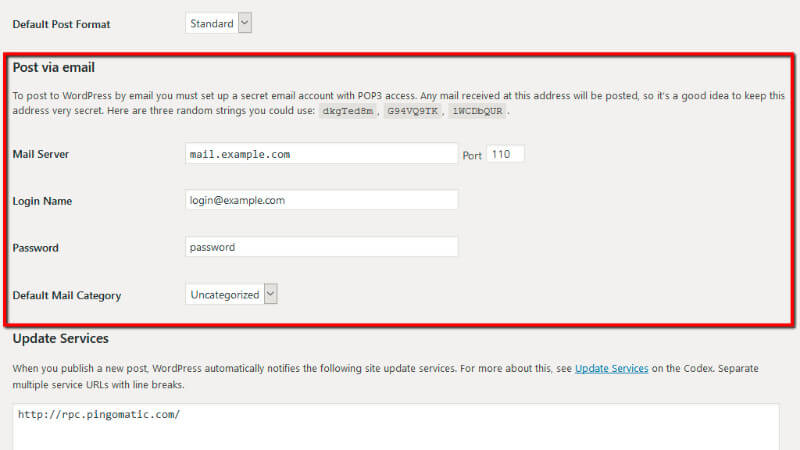
In order to configure the "Post via Email" feature, you will need an active email account. You can either use an existing Gmail account or an email account that you can create with your web hosting provider. This can come in handy if you have a lot of simple content to post and do not want to log into your dashboard each time. The settings that come along with "Posts via email" are:
The last option you will see in the "Writing Settings" page is called "Update Services".
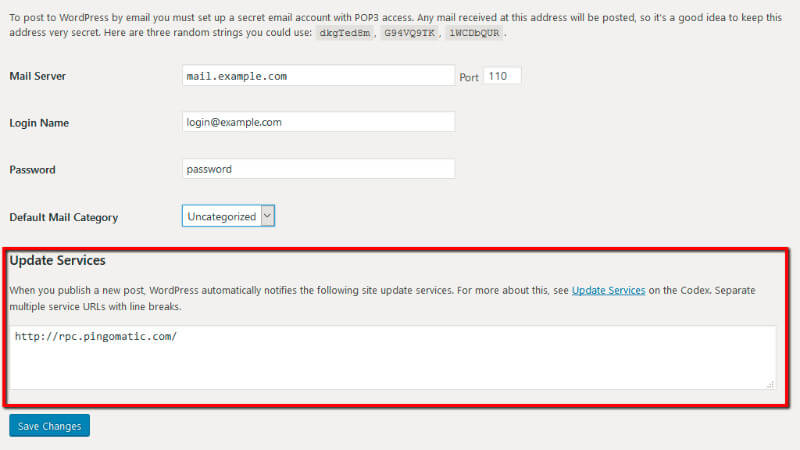
Here, you list services that will be notified once you publish a post. It is recommended to leave this as set by default. Once you are done editing the changes, please, click the "Save Changes" button to complete the configuration.

Once the changes are saved, you can proceed to the next settings' page.
The "Reading Settings" control how your blog will be displayed to the visitors of your WordPress based website. Once you go to the main page again and find the "Settings" option, from the drop-down menu click the "Reading Settings" option.

When you click it, you will be redirected to the "Reading Settings" page. The "Reading Settings" resembles how your posts will appear to the readers.
The first section on that page is called "Your homepage displays". Here you can set your homepage.
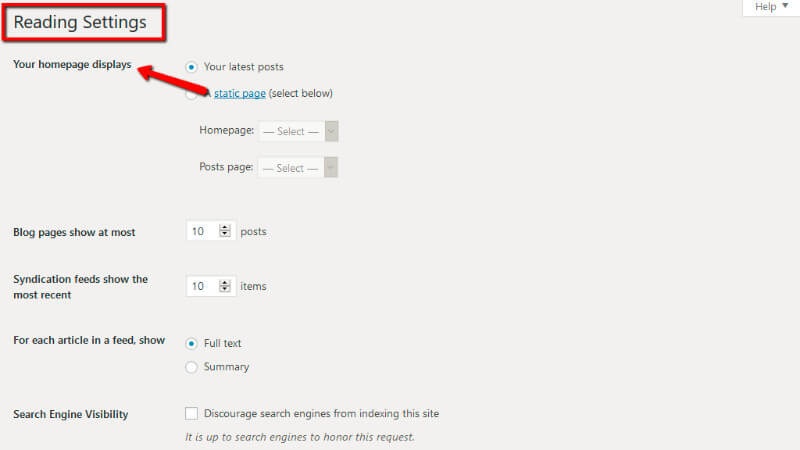
By default, your homepage is set as a list of "Your latest posts". You can find that useful for blogs and news sites. Anyway, it is less functional for business, online stores and more. For such types of sites is good for you to choose "A static page" option.

The "A static page" option provides you with two more options that will help you arrange the look for your homepage.

For the "Homepage" option you can now choose any of the already created pages on your site. You also need to select a page in which the posts will be displayed from the "Posts page" option.
Once you are done with that, you can customize how many posts you want to show up on your blog, as well as in any feeds. There is no limit to how much they can be. WordPress also provides you with the option to decide how do you want your feeds to appear - to be displayed with their full text or just a summary. This will determine how the subscribers will see your content.

The last setting from the "Reading Settings" page is called "Search Engine Visibility". This is the most important setting on this page because marking the checkbox tells search engines like Google to ignore your site, otherwise, they will index it as normal. That checkbox should be left unmarked because search engines can be a major source of the traffic to your WordPress based website. You can check it if the site is considered to be private or while you are still building it.
When you are ready with all the edits on that page, please, do not forget to click the "Save Changes" button at the bottom of the page.

Now, you will continue exploring and configuring the other settings.
The "Discussion Settings" are the ones that help you control how visitors and other blogs will interact with your site, such as enable commenting. They can be overwritten for each different article. To be able to access the "Discussion Settings" page, you will have to once again enter the main page and from the vertical navigation menu to look for "Settings". When you find it, hover over it and from the drop-down menu click "Discussion Settings" option.

That action will redirect you to a page called "Discussion Settings". As the name suggests that page is all about comments on your site. The page is defined in three sections. The first section is about "Default article settings", "Other Comment settings", "Email me whenever" and "Before a comment appears".

There are different options for each of the settings in that section. Most of them are self-explanatory. The "Default article settings" exception is "Allow link notifications from other blogs (pingbacks and trackbacks) on new articles".
A "pingback" lets you know via a comment if someone has linked to your content. A "trackback" is a way other authors can let you know they had written something relevant to your content, even without a direct link. The difference between these two is that the pingback is less prone to spam than trackback.

In the "Other comment settings" section the options you have are "Comment author must fill out name and email" and "Users must be registered and logged in to comment". These settings, once checked, they ensure that the person writing the comment is an authenticated user and not a spam robot.
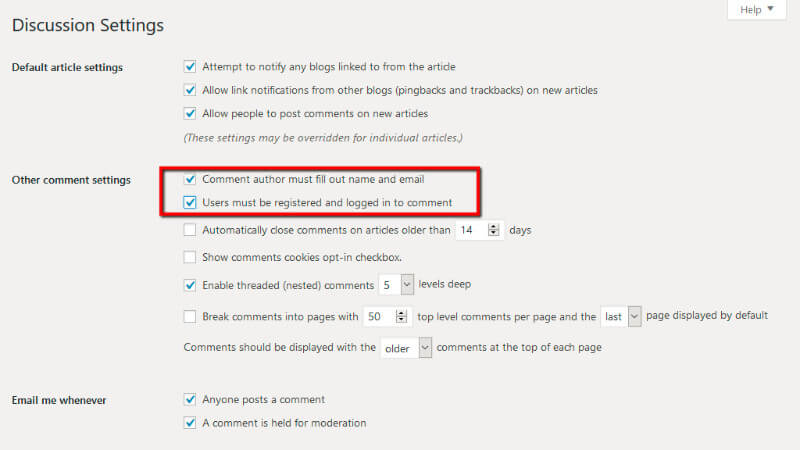
The "Before a comment appears" settings allow you to choose when a comment should appear.
In the "Comment Moderation" field you are able to enter a list of words and URLs that will show up a flag if the comment is a scam. Messages that contain any of the specified content will be held for approval, before being posted to your site. You can also set specific terms in the "Comment Blacklist" field.

The next settings are related to the avatars for your visitors. Configure them on your personal likes.
![]()
Once ready making changes, please, click on the "Save Changes" button. This action will actually save the moderations you had made on the "Discussion Settings" page.
The "Media Settings" can work with the design of the site by allowing you to set image sizes to the appropriate width and height. In order to start editing the options about "Media Settings", you will have to access the page first. To do that, please, go to the main navigation menu one more time and from the navigation menu look for "Settings" option again and once the drop-down menu appears, just click on the "Media Settings" option.
You will be redirected to the "Media Settings" page. These settings are related to the media types you are uploading on your application.

You can set different default sizes, that you can choose from when you add an image to a post or page. Let's say, for example, that you upload an image which is 2000px wide and 2000px height. WordPress will automatically generate 3 images with sizes specified in these very sections. When you click on the image to edit it, in the "Attachment Details" of the image, you will see all the available image sizes.
You are almost done with the configuration of the settings.
The Permalinks are used for configuring the structure of the URLs used by the blog posts on your website. Often the users are recognizing the content of a page thanks to the user-friendly URL it has which the Permalink settings are conveniently taking care of.
To enter the "Permalinks Settings" page, please, reach the main menu page again and on the navigation menu look for the "Settings" option one more time and from the drop-down menu, this time click the "Permalinks Settings" option.
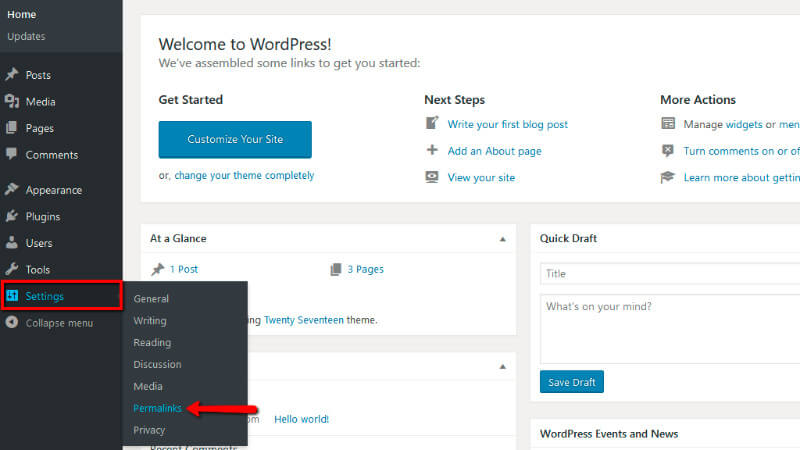
The "Permalinks" resemble the URLs for each post of your WordPress based website. Once redirected to the "Permalinks" page, you will see the interface of it with the different options provided.

Based on your needs you can set your permalinks structure to any of the provided.
By default, the platform has a day and name permalink structure set. There is another set, right above the "Day and name" one that goes by the name of "Plain" in the "Permalinks" page. Once you are redirected to the "Permalinks" page and start setting your "Permalinks" options, we recommend you to NOT choose the "Plain" option. Here is why: The "Plain" option in the permalinks page is not optimized at all. It is the ID of a given post or page in the database, but it gives you no possibility to optimize the permalink for neither human beings nor Google. In other words, it is not good for SEO.

Let's say you publish a piece of content on, "Chinese cuisine". If your permalink is:
You can even set your own "Custom Permalink".

Bear in mind, that any different from the default permalink structures you set, has to be presented on in the file list of the WordPress platform and also generates specific codes in its' structure. When you are done making changes, please, click on the "Save Changes" button to actually save the changes you had made.

You are almost there. Only one more settings page had left for you to go through.
A "Privacy" page is a statement from you, indicating the information you collect on your website about visitors, through cookies, registration, comments, subscription forms and so on. A privacy policy page is also a statement showing how you use that information.
For one last time now, you have to enter the main menu page and in the vertical navigation menu search for the "Settings" option again. When the drop-down menu appears, please, click the very last option there called "Privacy".
That setting is the newest of the WordPress based website. As the name suggests, the "Privacy Settings" option helps you create a privacy policy for your site. This has been in the news lately, because of the "General Data Protection Regulation (GDPR)" creating new requirements for site owners when it comes to transparency and privacy.
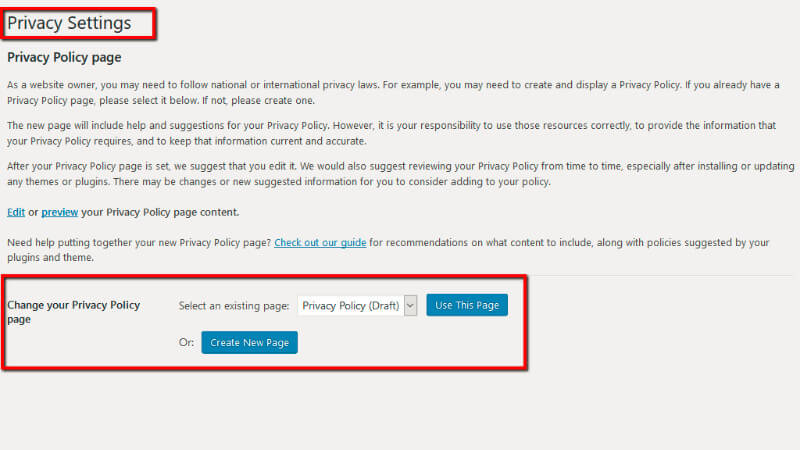
You are provided with two options here - you can create a privacy policy using an existing page, or a new one. However, no matter which option you choose, you will be presented with a partially-filled out page that you can customize. With the default content, you will be able to include all the information your users need to be fully informed and safe.
Congratulations! Today you just learned what all the settings are useful for and how to configure each one of them, which helps you set properly your WordPress based website.

Simeon is an experienced System Administrator with over 10 years of experience in the Web Hosting field. He is recognized unanimously as the man behind every technical innovation or improvement that HostArmada introduces. Adaptable and responsible, he solves every technical issue that we or our clients throw at him. Every so often you will find him publishing technical content on our website.
Learn more about Wordpress in the other tutorials that we have:
