
In 2018, Google made a change to their entire search algorithm and how certain websites are ranked. One of the more exciting announcements they gave was that a domain would rank higher if it has an SSL certificate installed. This change increased SSL certificates’ significance, forcing many webmasters and website owners to acquire and install an SSL certificate on their domain names to preserve their current status in Google and hopefully increase it even further. Unfortunately, just having an SSL will not cut it for Google since the website needs to also open via the secured HTTPS protocol, despite having an SSL.
Activating an SSL certificate has a vital security benefit other than boosting your Google ranking. Configuring your website to use HTTPS will encrypt the connection between the server and your client’s browser, preventing the acquisition of personal information from malicious entities or scripts. The HTTPS protocol is especially useful on websites that accept payments such as online stores. An SSL certificate will increase visitors’ confidence in your website, as they will feel secure when submitting their credit card information to make purchases.
Almost 40% of the websites in 2020 are created with WordPress, and naturally, knowing how to activate your SSL certificate is an essential factor in boosting your website’s rank. WordPress is a domain-sensitive application, meaning that for it to open via HTTPS, you need to configure it to do so. To people who are not tech-savvy, this can seem overwhelming, and thus, in this tutorial, we will go over a simple way of enabling the SSL in your WordPress website with a few clicks.
To get started, please log into your WordPress Admin Dashboard. You can do that by accessing your domain followed by "/wp-admin", i.e., "yourdomain.com/wp-admin", where "yourdomain.com" represents your actual domain.
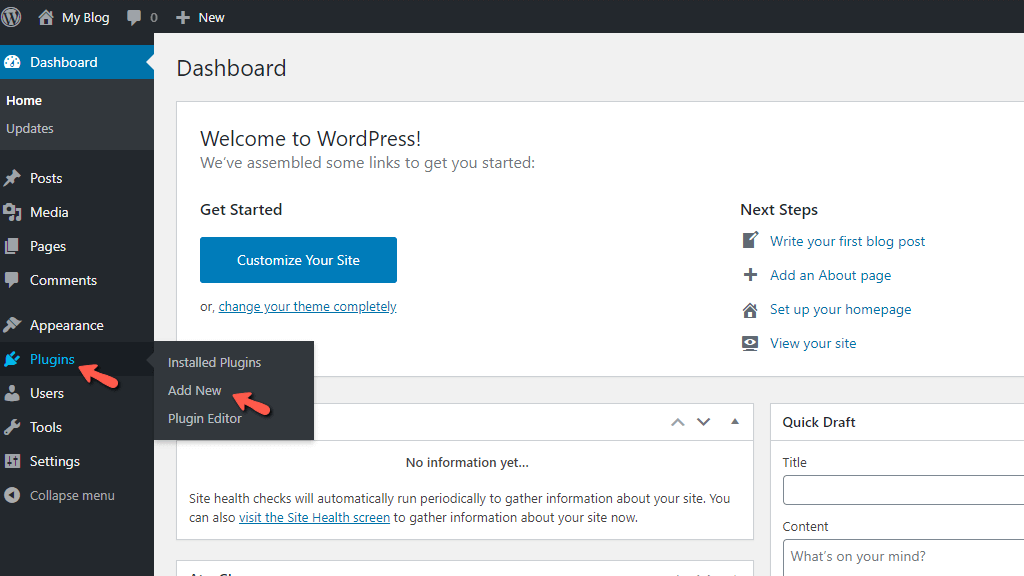
Once logged in, please navigate through the left-hand side menu to Plugins > Add New. This action will redirect you to the Plugin Installation page.
Please note that at this point, you are expected to already have a valid SSL certificate issued on your domain name. If you are a HostArmada customer, you most surely have one, as we offer free SSL certificates that are automatically installed with all our plans.
As promised in the introduction of this tutorial, the SSL activation will take a few clicks. To activate your SSL and force HTTPS redirection, all you need to do is install a plugin called “Really Simple SSL”. In our experience, it has proven to be the most effective in doing so.
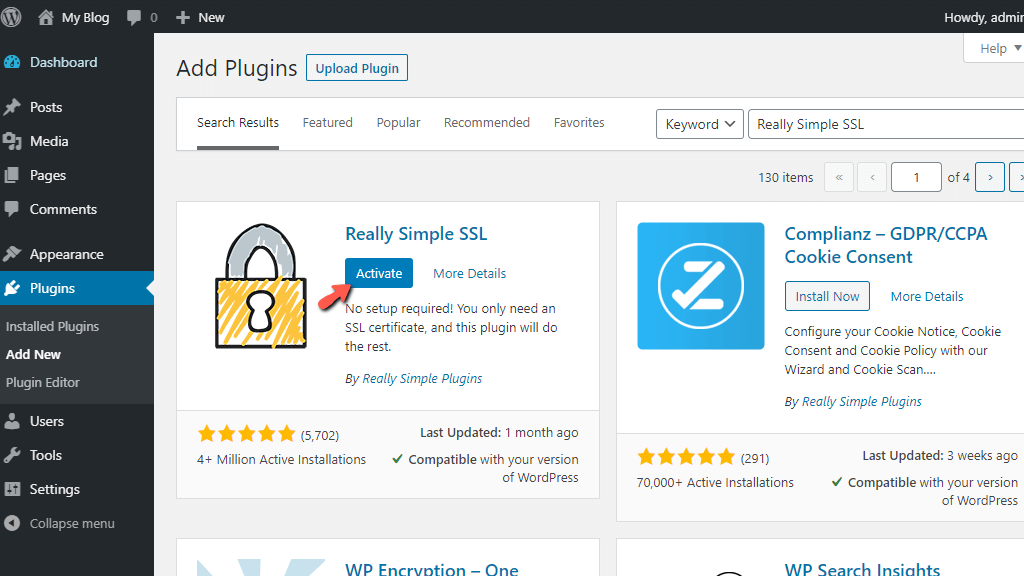
When you land on the Plugin Installation page, please use the search tool at the top right corner by entering “Really Simple SSL” into the search field.

After WordPress displays the result, please click the “Install Now” button corresponding to the “Really Simple SSL” plugin.
This action will install it, and the button will transform into an “Activate” button. Please click on it to activate the plugin.
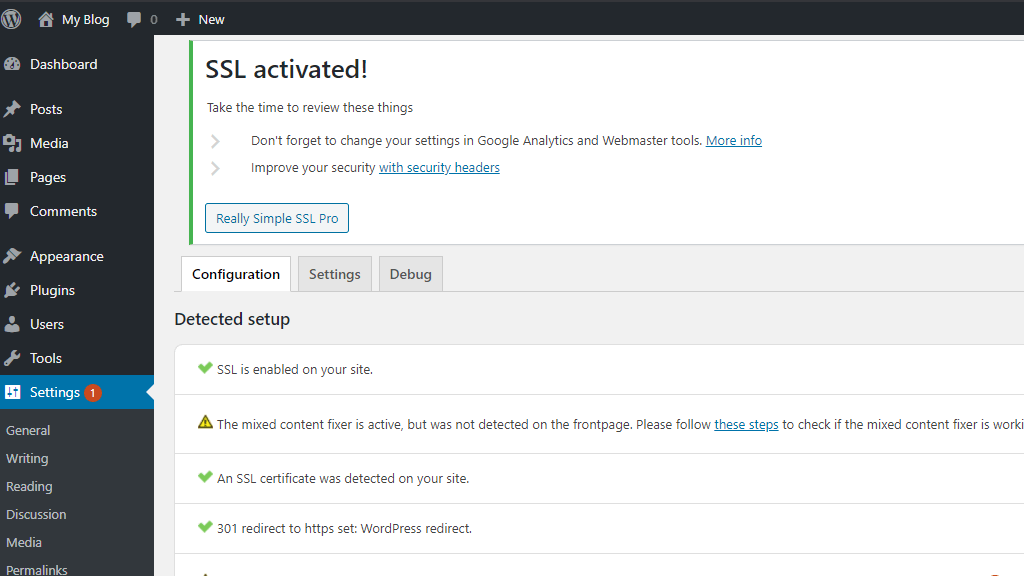
Finally, when activated, you will see a notice in the middle of your screen, indicating you have successfully installed the plugin, and you can migrate your website to HTTPS and activate your SSL certificate correctly!

To start the process, please click on the “Go ahead, activate SSL!” button. Note that this action will most likely log you out of your dashboard, and you will need to log in again.
When you log in again, you will see a different message this time, stating that you have activated the SSL, and you will see all of the configuration options available for the plugin. As this tutorial aims to teach you how to enable an SSL for your WordPress website, we will not go over the plugin settings. We will leave the plugin overview for a different tutorial!
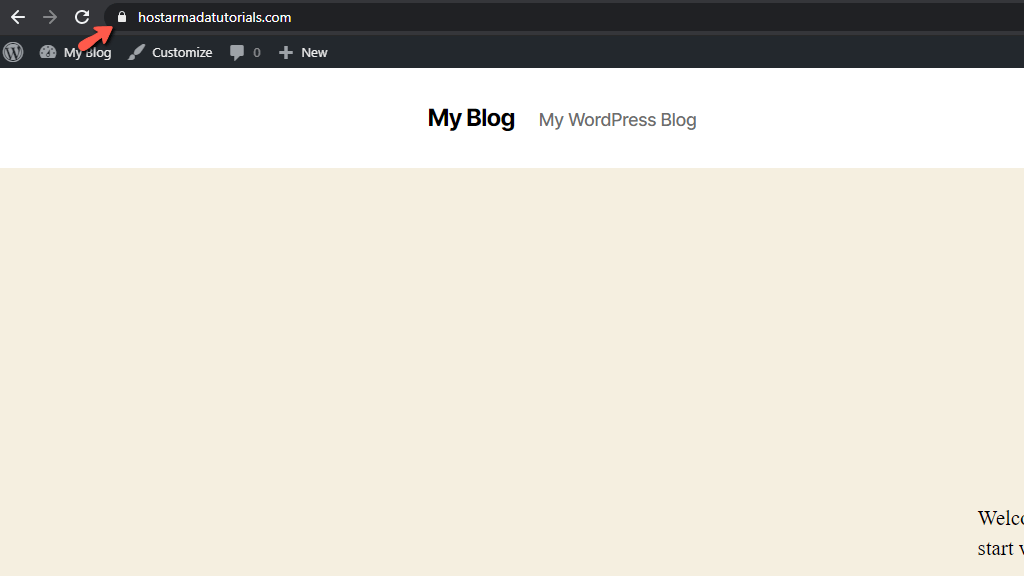
If you point your attention to the browser bar, you will see that your website is no longer labeled as “Not Secure” and now has a padlock! Here is what it should look like before and after the installation
Before:
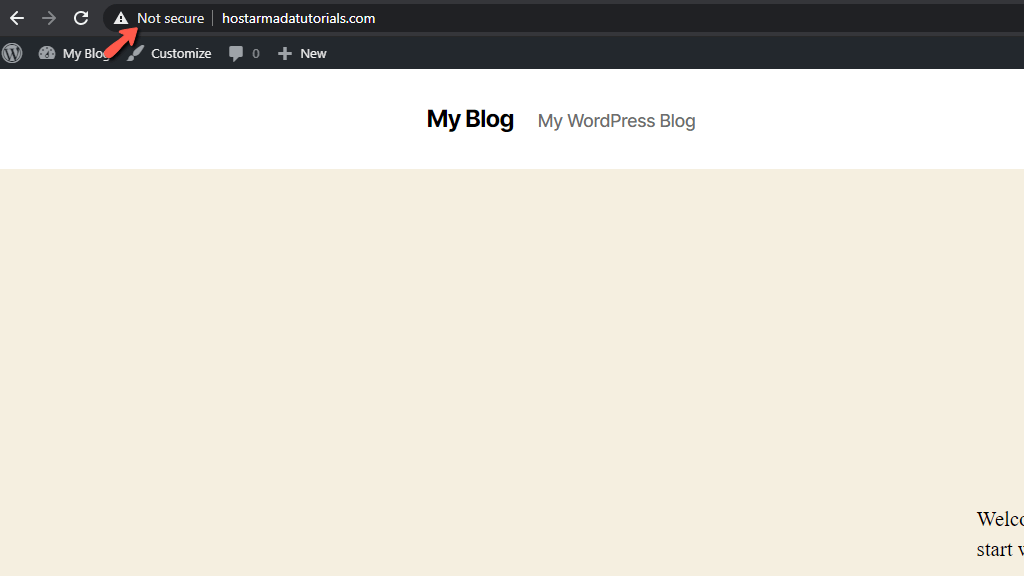
After:
That is it! Enabling your SSL certificate for your WordPress website is as easy as clicking a few buttons inside your admin dashboard. Hopefully, this tutorial was not a massive hassle for you, and you have activated HTTPS for your site, preserving or boosting your Google ranking! If you believe that this tutorial is beyond your scope of understanding - fear not! Our technical support team is 24/7 available at your disposal, and they will be happy to assist you with the setup. To contact them, please submit a ticket over the ticketing system in your HostArmada Client Area.

Sebahat is a young and bright woman who has become an invaluable part of our team. She started as a Customer Care Representative, mastering that role and, along the way, growing into a tech-savvy individual who is well acquainted with every support layer of the company. Driven by her aim to improve our customers’ experience constantly, she is committed to enhancing the extraordinary support we deliver.
Learn more about Wordpress in the other tutorials that we have:
