
When customers make a purchase from your Online Store, they will be presented with an option to choose a shipping method that best suits them. Shipping methods can vary based on the configuration you had made in the Back office of your PrestaShop store. It is recommended to set a few shipping methods, this way the customer can find the easiest way to have the purchase delivered to them. Thanks to PrestaShop you are provided with an easy way to add shipping methods and configure those thanks to the “Carriers” functionality. Please note that Prestashop defines the shipping methods as “Carriers”. In this tutorial, you are going to learn how to add and configure shipping methods, explained in detail.
Setting up shipping methods is just configuring the correct carrier. To be able to do that you will have to access the PrestaShop admin area and from the left vertical navigation menu, look for the “Shipping” option. Once you find it, click on it. A drop-down menu will appear with the following options: “Carriers” and “Preferences”.
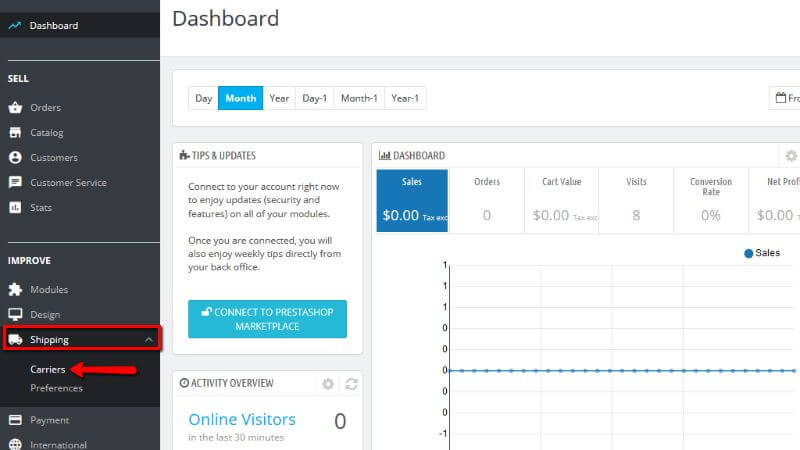
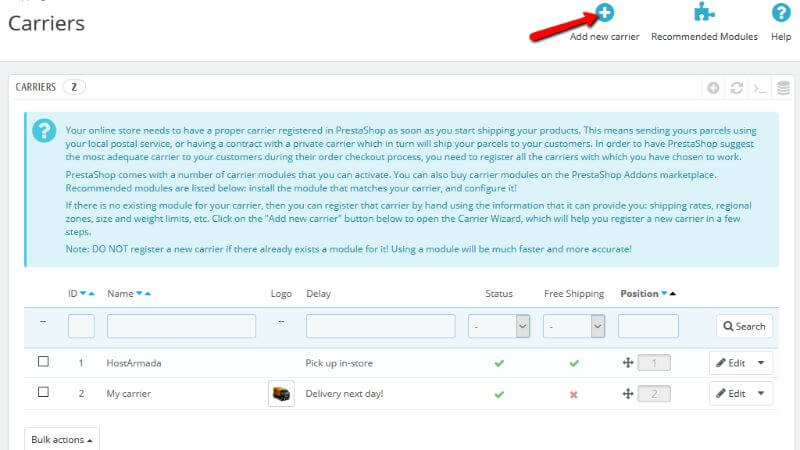
From the two options that you are provided with, please, click the “Carriers” option.
You will be redirected to a page called “Carriers”.
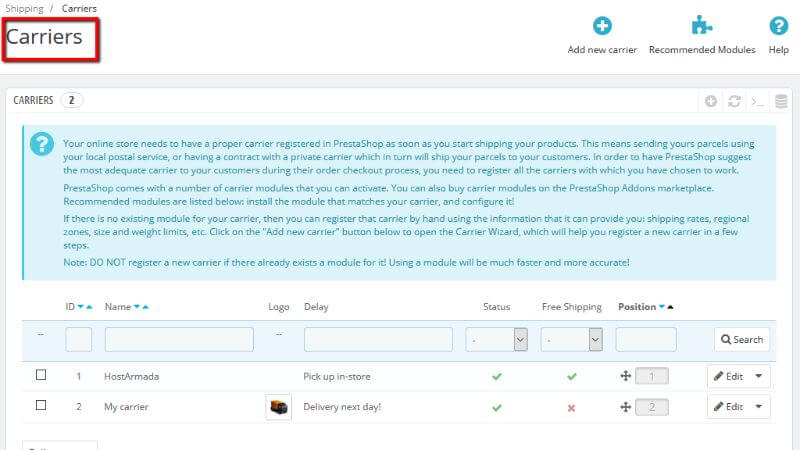
On that page, you will see a list of already configured carriers. By default, PrestaShop has two predefined carriers set for you.
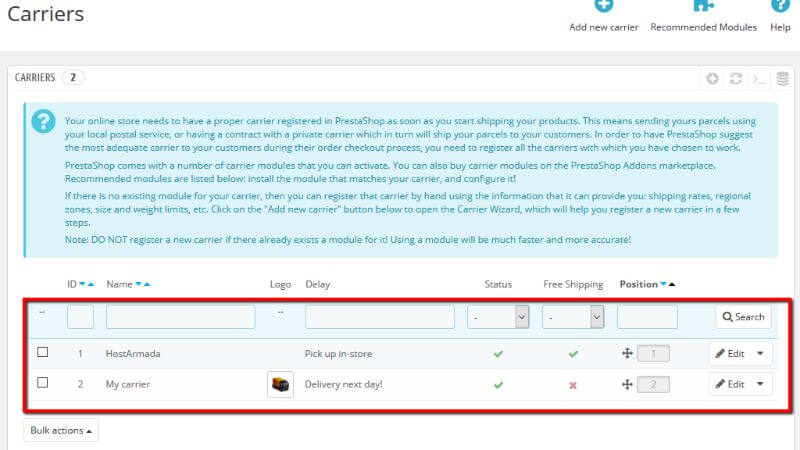
You are being provided with these carriers as examples only and you can remove them anytime you like.
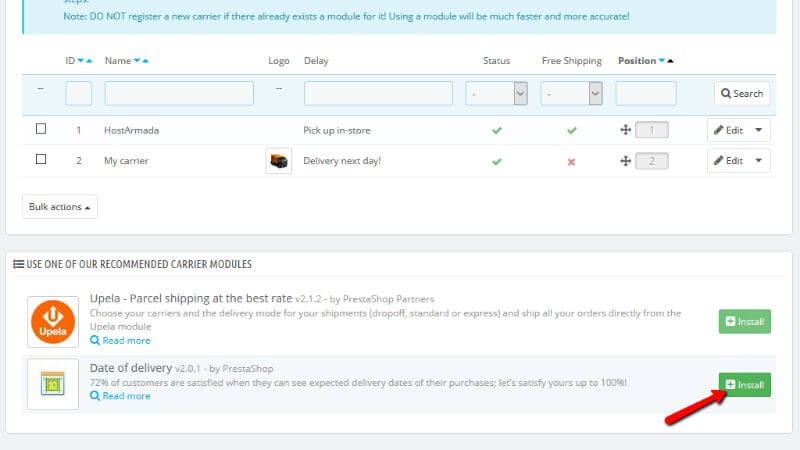
Under the predefined carriers, you will see a section called “Use one of our recommended carrier modules”.

If you see a carrier module in that section that you might need, you can easily click the “Install” button, positioned right next to the carrier itself.
Now, on the other hand, if you want to add a new carrier, please, click the “Add new carrier” button at the top right of the page.
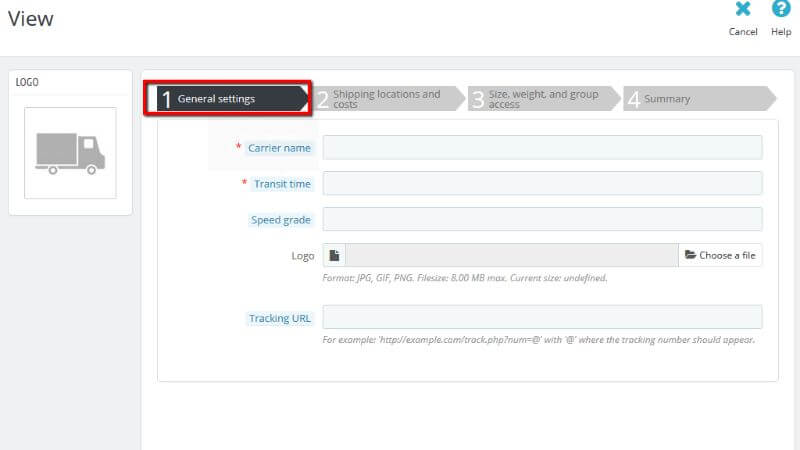
You will be redirected to a page called “View”. This is where you will be presented with a section for the “Logo” of the shipping method and another section divided into 4 steps.
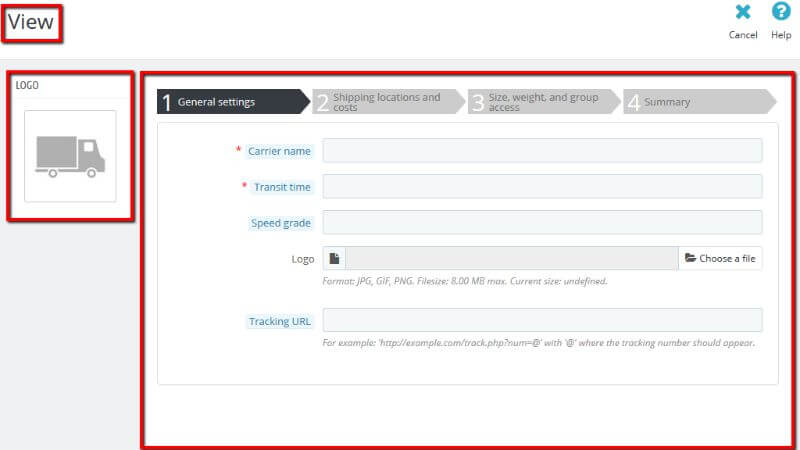
The 4 steps actually resemble different options that you can configure for the new carrier you are adding.
The first one is called “General settings”.
The “General settings” step contains the following options:
Entering a tracking URL is allowing the customer to track the process of delivery for the ordered product. After you are done filling the general settings information, please, click the “Next” button at the bottom of the page.
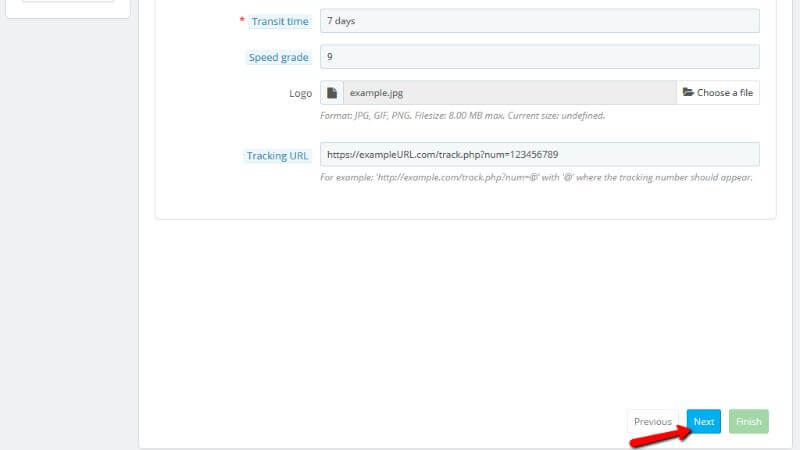
That action will move you to the next step of the configuration of the carrier module.
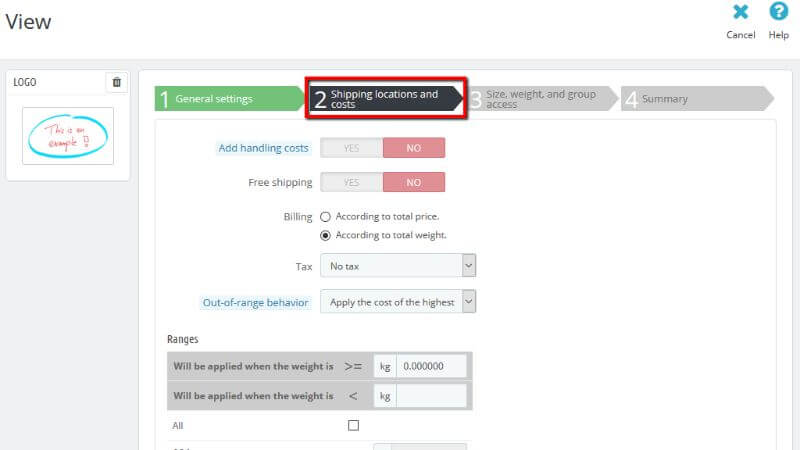
The second step is called “Shipping locations and costs”. There you will see a handful of configuration options such as:
Please, bear in mind, that depending on the order’s total price or total weight, some carrier options may not be available, while others can only appear at a certain value. It is up to you to fill out these values properly and precisely. You should use the suggested values by the carrier’s documentation.
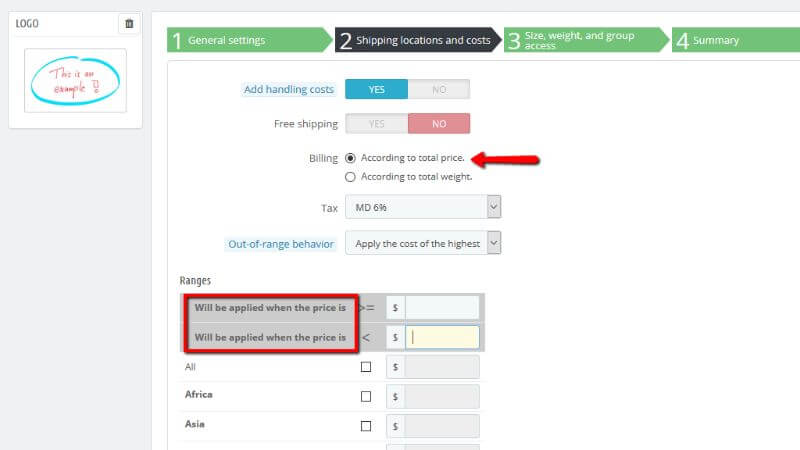
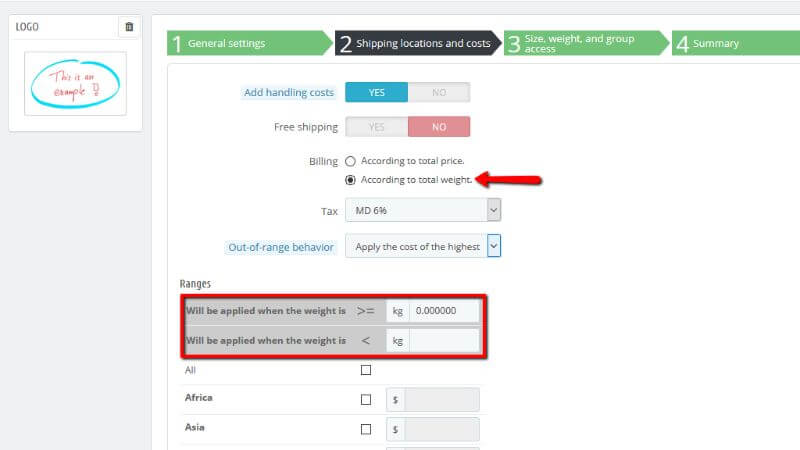
The range option is very important for adding a new carrier because this is where you can build your carrier’s price or weight ranges, based on what you chose for the “Billing” option. By choosing different zones, you will have to set the ranges one after another and you will have to apply your prices for each zone.
Once you start setting the range zones, for each range you will only have to follow these steps:
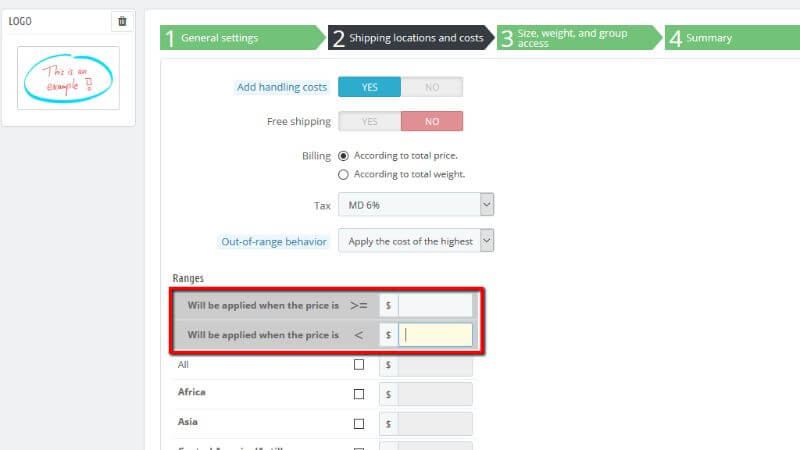
In these two fields, you will have to set the lower and upper limits of the range you are creating. If, for example, on the “Billing” option you had chosen the "According to total price", then the name of the range will appear as “Will be applied when the price is”.
If on the other hand, on the “Billing” option you have chosen weight then the range will be displayed as “Will be applied when the weight is”.
Please, bear in mind, that the lower limit is shown with the symbols “>=” and the upper one is with “<”. That means that you can set the range’s upper limit to have the same value as the next lower one and these two will not overlap.
The moment both lower and upper limits are filled, PrestaShop will make the “All” field available to edit. Please, bear in mind, that the “All” field is a special field because the value that you enter will be copied into the field for all the available geographical zones.
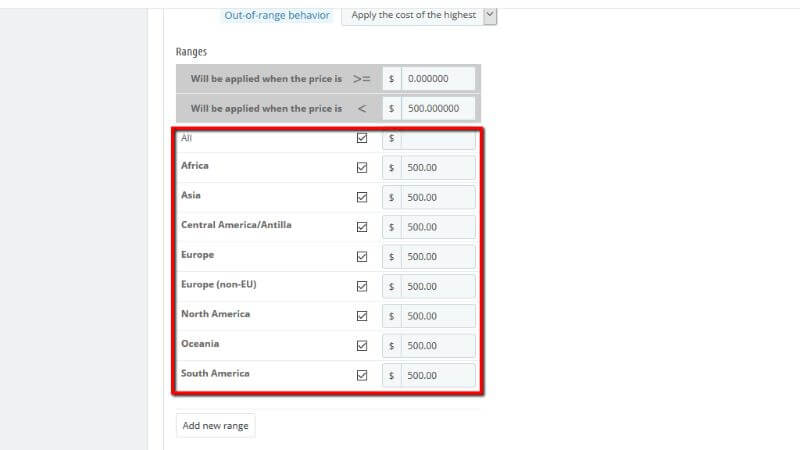
If you decide to use the “All” field, then the value will be copied without any other action on your part. Now, if you want to edit the values for each zone, then that has to be done separately. Once you see the documents, that the carrier provides you with, then you will know for which zones the carrier makes or does not make deliveries and you can mark the checkboxes where they deliver.
If the range you want to apply is not shown on that list, you can easily “Add new range” by yourself.

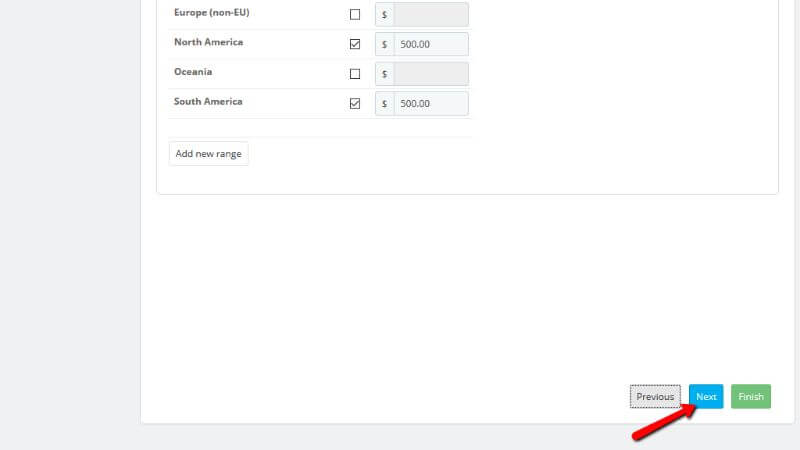
To be able to do that you have to click the “Add new range” button at the bottom of the “Range” section. PrestaShop will load for you a new column of zone fields right next to the already existing one.

Setting up the second column requires for you to start again with the ranges by fixing the lower and upper limits of that range and then you have to fill the prices per zone.
After you are done setting the ranges for the geographic zones where the carrier delivers, please, click the “Next” button at the bottom of the step to be able to move to the third one.
When you click the “Next” button, you will be redirected to the next step which is called “size, weight and group access.”
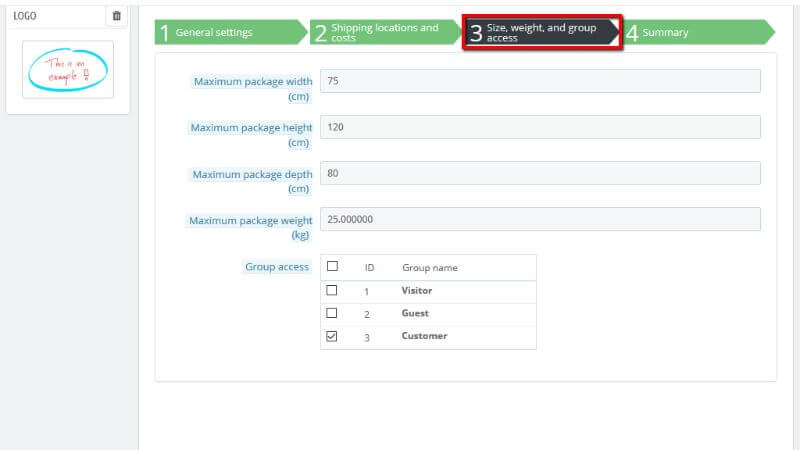
In that panel, you are presented with two sets of options. The first one goes by the name “Maximum package width/height/depth/weight”. Thanks to it you can set the minimum and maximum package width, height, depth, and weight. It is important to fill these fields because the prices that the carriers have for the different sizes of packages are varying.
The second set of options is called “Group access”. Thanks to the “Group access” option you can choose which of the shown groups can access the created carrier. If you want only a certain user group to be able to use a carrier, such as “Customer” only, you should mark only that option.
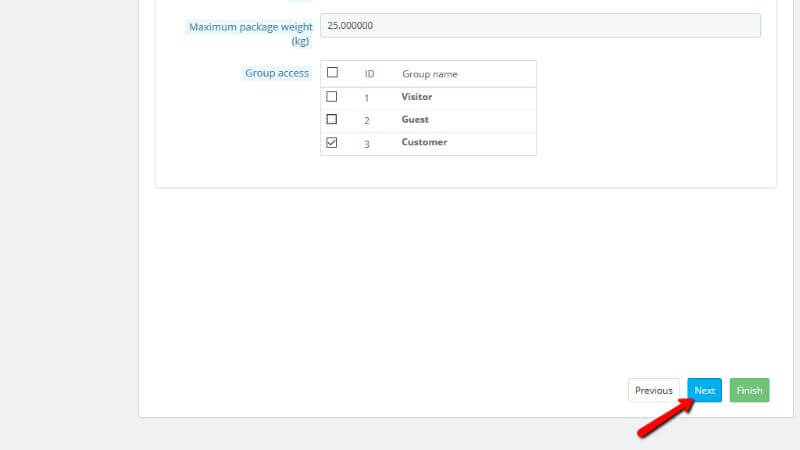
Once you are done filling the package measurements and choosing the desired group from the “Group access”, please, once again click the “Next” button at the bottom of that step in order to move tot he last step.
The final step is called "Summary" and it displays structured information on the configuration you have set in the previous steps.
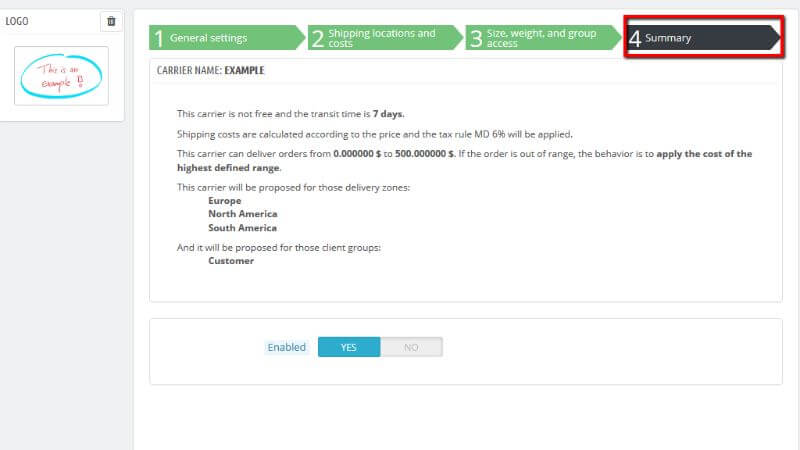
On the “Summary” page you will be provided with brief information as an overview of the settings for the carrier that you just added in the previous steps. Before finalizing the configuration of the carrier, please, check the information again and if there is a mistake you can always go back to any previous panel by clicking the “Previous” button, or simply click the desired panel’s tab.
PrestaShop provides you with the option to save the carrier as a draft. You can do that by clicking the “No” value of the “Enabled” option at the bottom of this panel. Otherwise, please, click the “Finish” button at the bottom of the page, to be able to save your work and create the carrier.
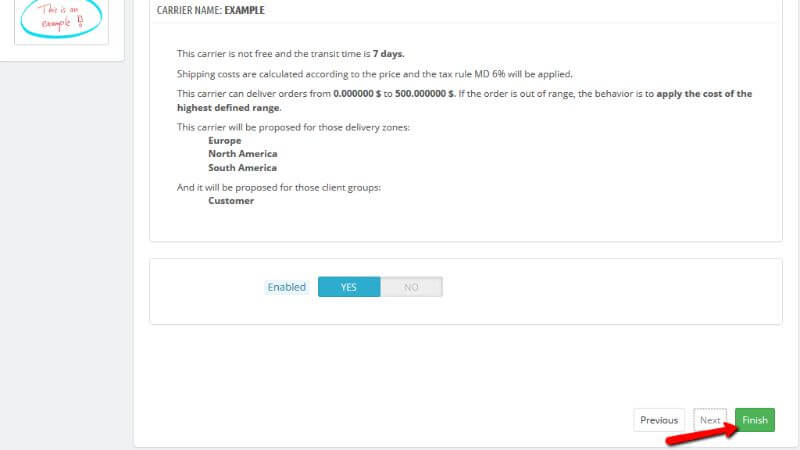
The moment you click the “Finish” button, the page will reload to the main “Carriers” page and there you will see your newly added carrier positioned in the list with already existing ones.
Congratulations! Today you learned what is a shipping method, how to fully configure creating carriers and why it is so important to have carriers set for your Online Store.

Nikola is an accomplished tech-savvy extraordinaire with over six years of experience in the web hosting field. He started as a customer care representative and quickly rose the ranks to become a support supervisor and, eventually - the head of the technical department in HostArmada. His deep understanding of the client's needs, combined with his technical knowledge, makes him the perfect man to create the ideal harmony between client satisfaction and professional problem-solving. You will often find him creating helpful tutorials, articles, and blog posts that help existing customers get around.
Learn more about Prestashop 1.7 in the other tutorials that we have: