
Learn cPanel
The phpMyAdmin feature offers many utilities to the users, and a very significant one is the “Import” option. It can be used to efficiently migrate a website’s database when you have the SQL file at your disposal or create a staging version of your website. In this tutorial, we will teach you how to use phpMyAdmin to import an SQL file in a database you already created. If you are not sure how to create a database, we have great tutorials on the matter.
Before you can access the phpMyAdmin functionality, you need to log into your cPanel account with us. To do so, please check our tutorial on How to access the cPanel service.
Once logged in, please navigate to the “Database” section and click on the “phpMyAdmin” icon.
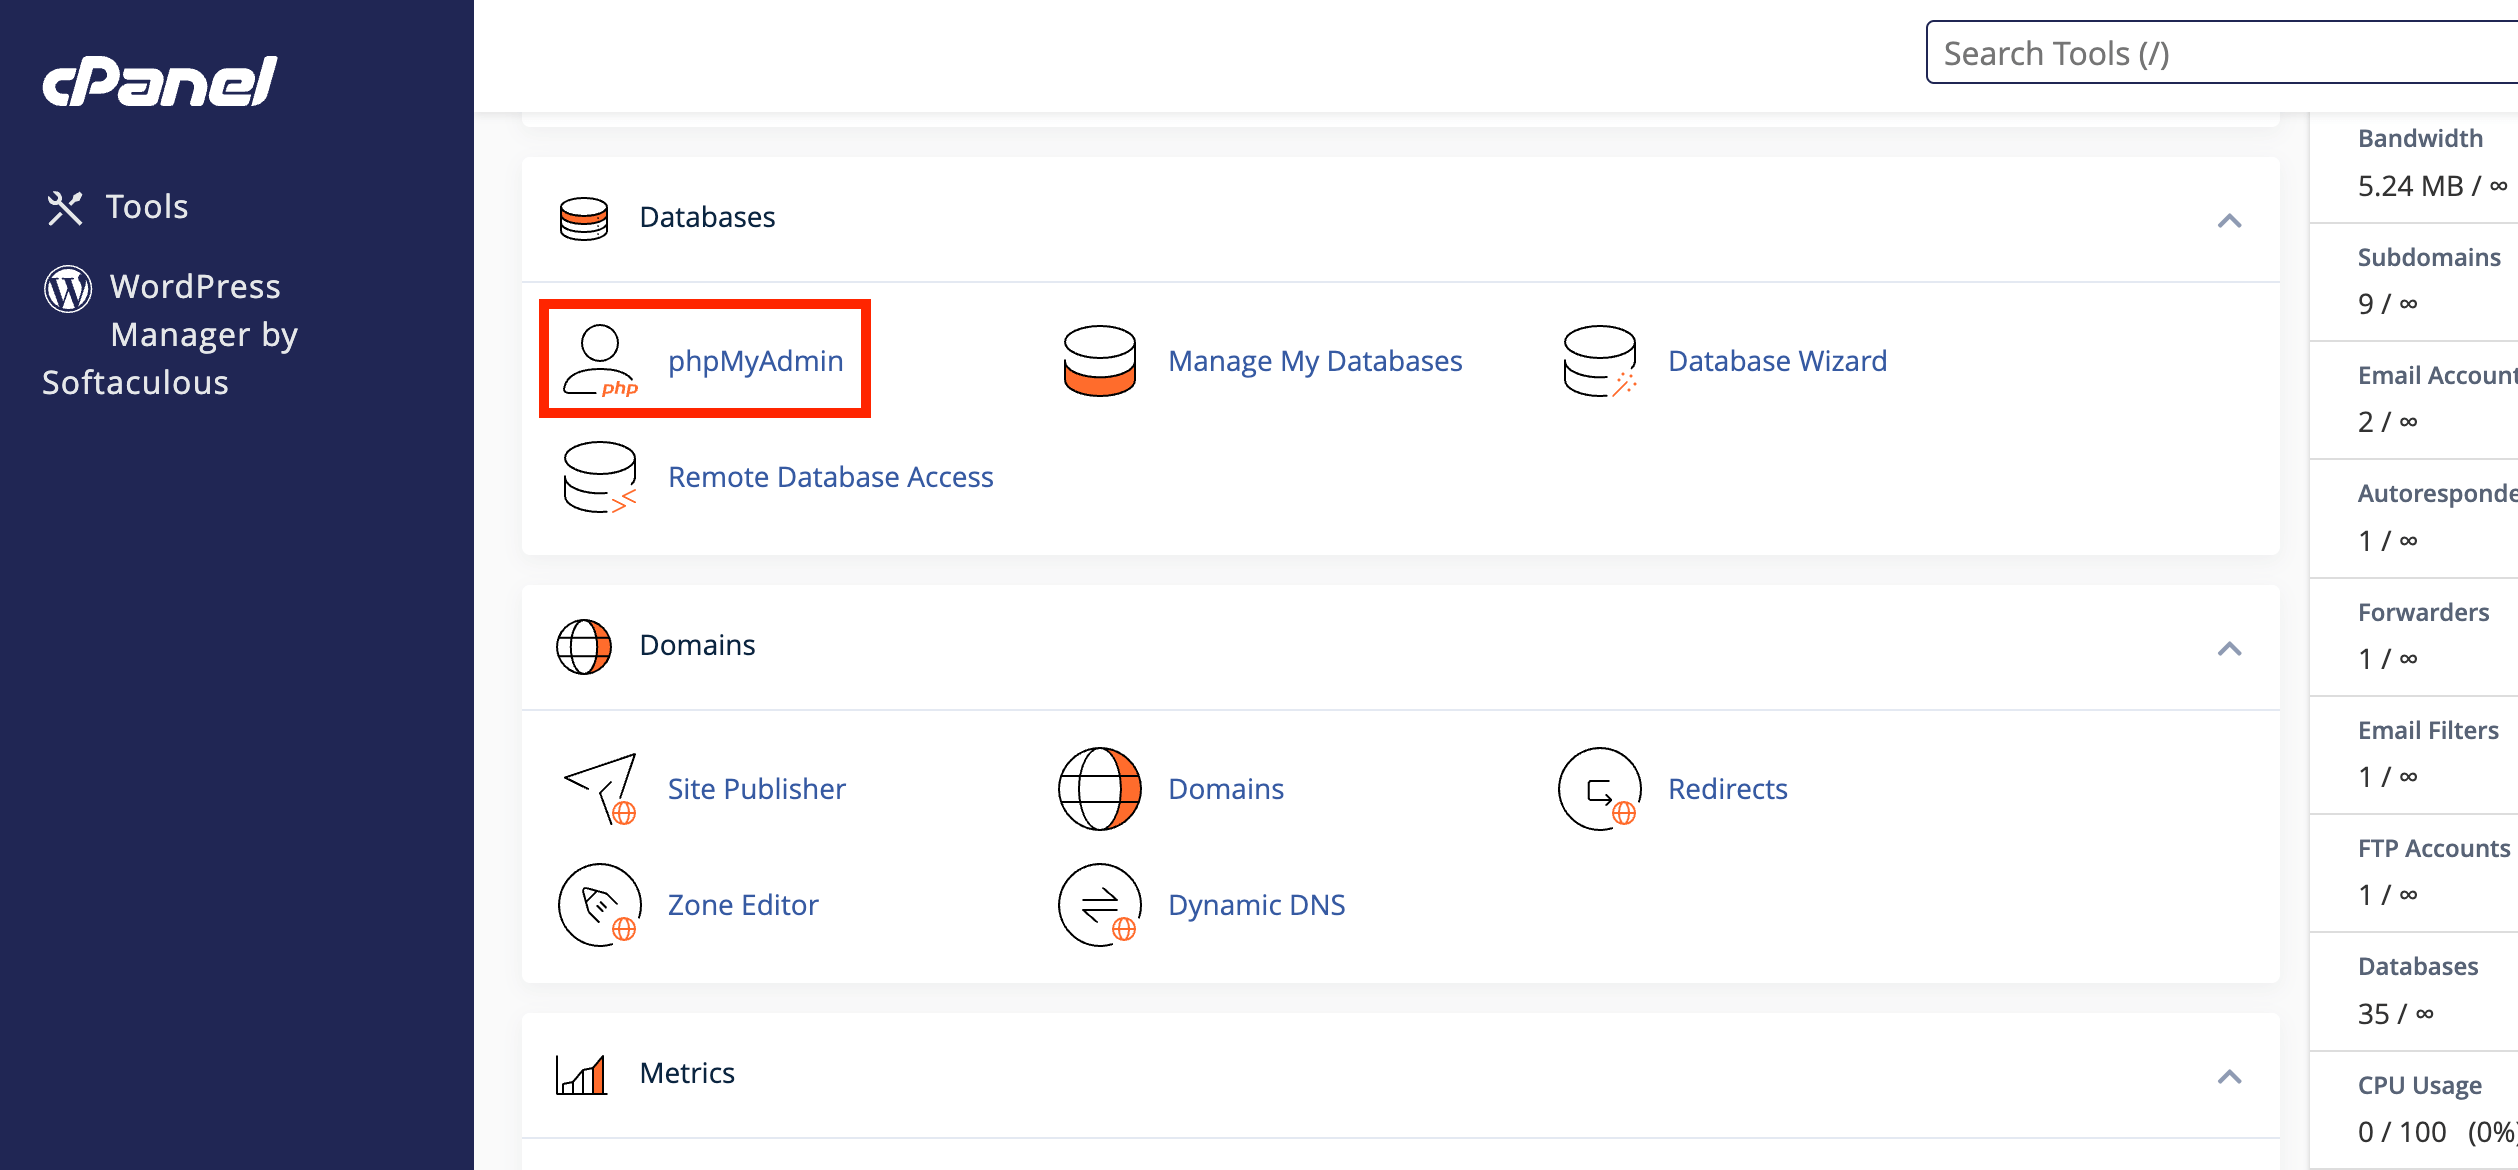
Clicking on the result redirects you to the “PHPMyAdmin” feature. In the left sidebar, you can see a list of all your databases.
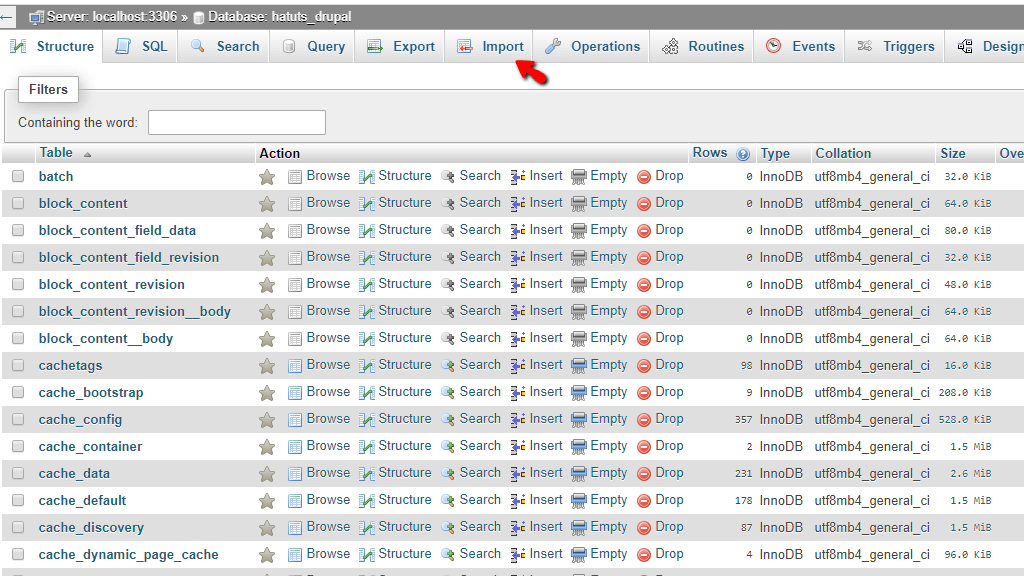
Please select the newly created database the SQL file should be imported within.

To access the “Import” functionality, please click on the “Import” tab, located at the top toolbar.
When you land on the “Import” page, you can see a few sections. Let’s go over them so you can get a better understanding of all the available settings:
Under the “File to Import” section, you can see the “Choose File” button. When you click on it, a popup window appears, allowing you to select a file. This file can be an SQL file XML file, CSV file, or an archived file containing the same, such as a gzip, bzip2, or zip compressed archive.
Once the file is selected, phpMyAdmin uploads it and imports all the tables within the selected database. You may also use the drag-and-drop method to drag the file from your computer on the phpMyAdmin import screen to start the process.
Note that you may not select a file larger than 50MB. This limit is implemented to prevent the importation of large SQL files containing slow and unoptimized queries, which can result in a dramatic drop in performance on the entire server. If your SQL file or archive is above the limit, you would need to either reduce it or import it via SSH.
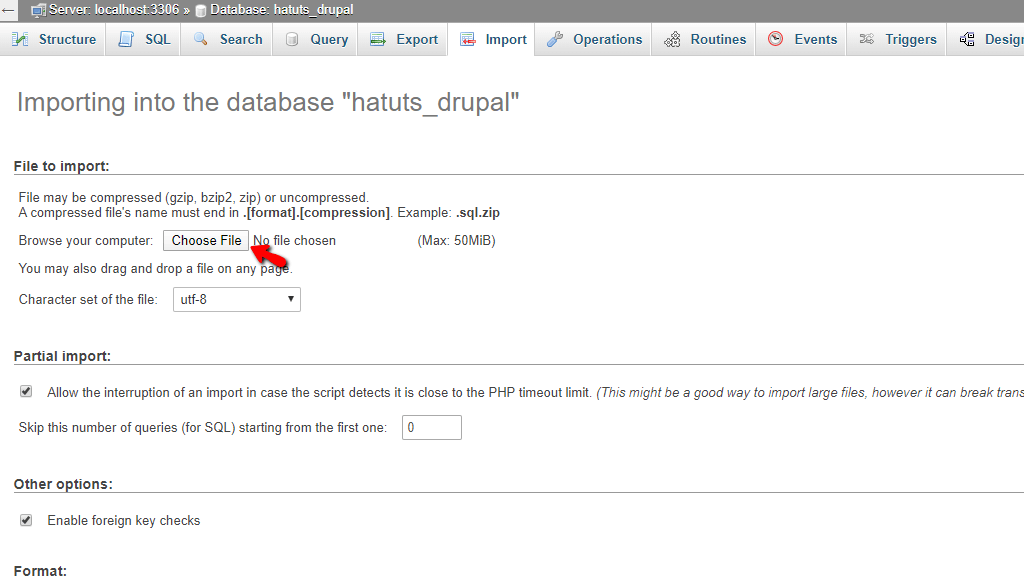
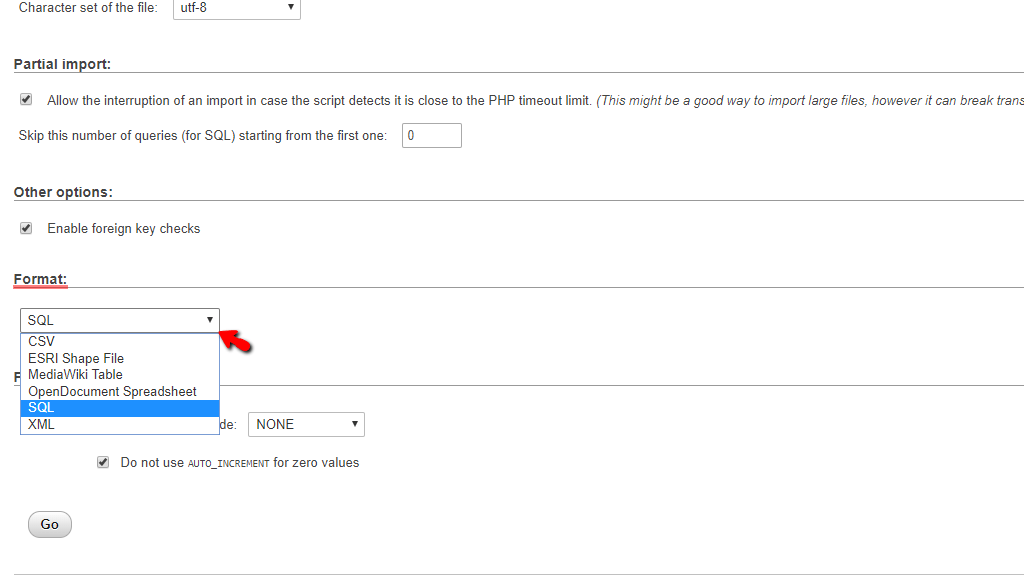
The last option you have under this section is the “Character set of the file” dropdown menu. You may use it to select a charset of the file you are about to upload. In most cases, you should leave it at the default utf-8.
As phpMyAdmin is written in PHP, it can utilize every PHP settings on the server, and the timeout limit is one of them.
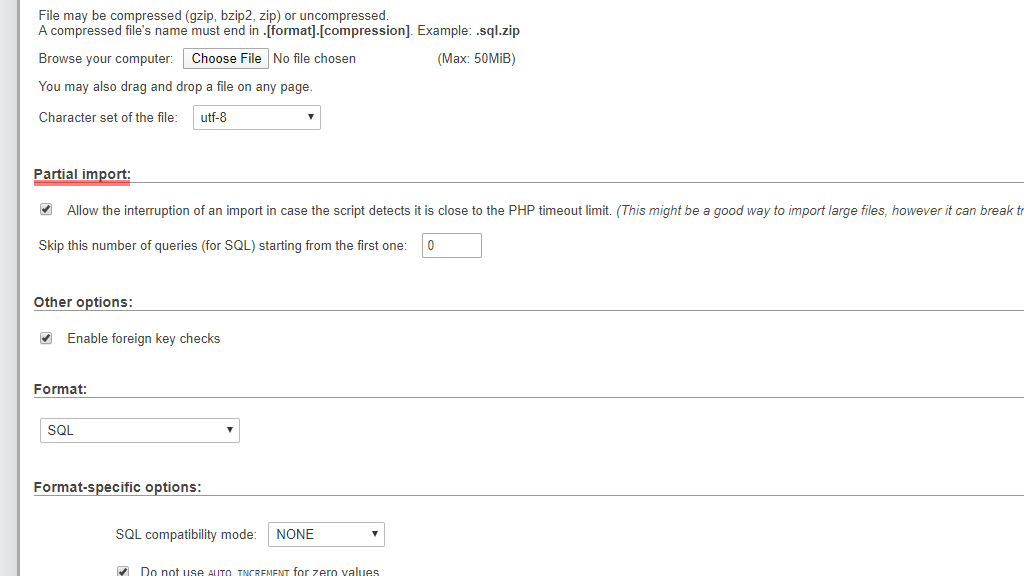
Putting a tick inside the checkbox allows phpMyAdmin to interrupt the import process if it detects that it is nearing the timeout limit. This is useful when uploading larger files. However, it can cause MySQL to store the results of partial operations(failed transactions).
The text field underneath lets you set a number of SQL queries you want phpMyAdmin to skip during the import process.
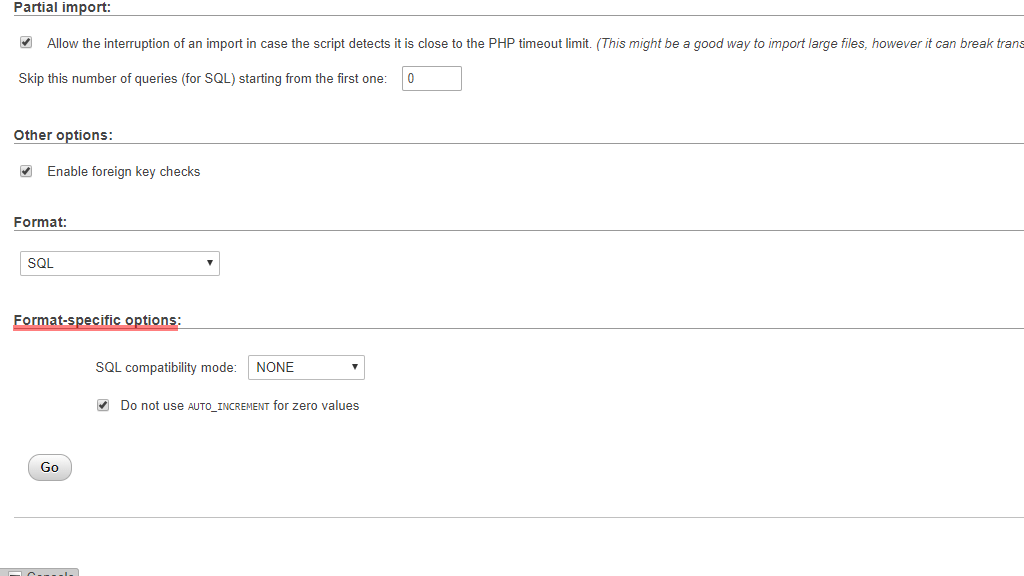
In the “Other options” section, you can see only one checkbox. It allows you to either enable or disable foreign key checks during the import.

In the “Format” section, you can select the format of the file you are about to import - for example - SQL, XML, or CSV.
The last section on this page is the “Format-specific options” section. This allows you an even deeper tunning on the format of the specific file you are about to import. Using the dropdown menu, you can select a specific SQL compatibility mode if you are importing a file generated on a server utilizing an older MySQL version, for instance.
Putting a tick inside the checkbox underneath this dropbox allows you to disable the AUTO_INCREMENT statement for zero values. Unticking it, enables the statement for zero values.
After you are done setting up the import settings, please press the “Go” button on the bottom left side of the screen.
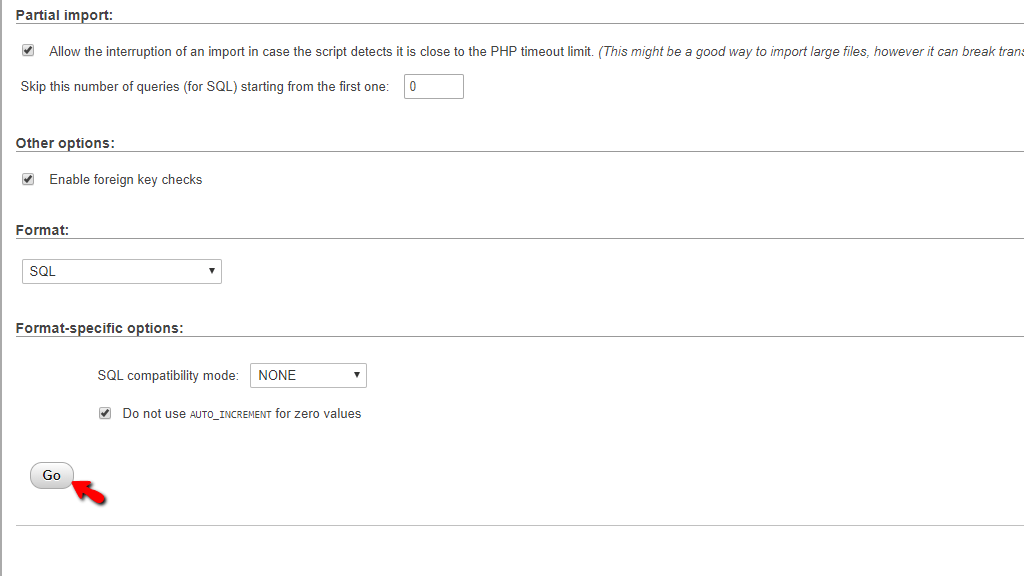
This starts the importation process. and when it is done, you are going to receive a success message.
There you have it! The import option inside the phpMyAdmin service simplified! If you are facing any technical issues with it or you are unable to import a specific file yourself, please feel free to contact our Support Team! They are 24/7 available at your disposal through the ticketing system on our website.

Nikola is an accomplished tech-savvy extraordinaire with over six years of experience in the web hosting field. He started as a customer care representative and quickly rose the ranks to become a support supervisor and, eventually - the head of the technical department in HostArmada. His deep understanding of the client's needs, combined with his technical knowledge, makes him the perfect man to create the ideal harmony between client satisfaction and professional problem-solving. You will often find him creating helpful tutorials, articles, and blog posts that help existing customers get around.
Learn more about cPanel in the other tutorials that we have: