
Product filters provide the option to relate products with similar specifications. Filters can be used in the navigation menus and they can be shown under your products. Labeling your products with filters is useful for increasing your end-users’ experience as they will be able to easily navigate through your store and quickly find what they are looking for. In this tutorial, we will guide you on how to set up Product Filters and Filter Groups in OpenCart 3.
The Product Filter module is integrated into OpenCart 3, however, it is not pre-installed. Therefore, it has to be manually installed first. The installation of the “Filter” module is exactly the same as the installation of any other OpenCart extension.
In order to install the module, please log in to your OpenCart Admin Dashboard and navigate through the left menu bar to Extensions > Extensions. When you access the “Extensions” page, select the “Modules” option from the “Choose the extension type” dropdown menu and the available modules will be listed below.
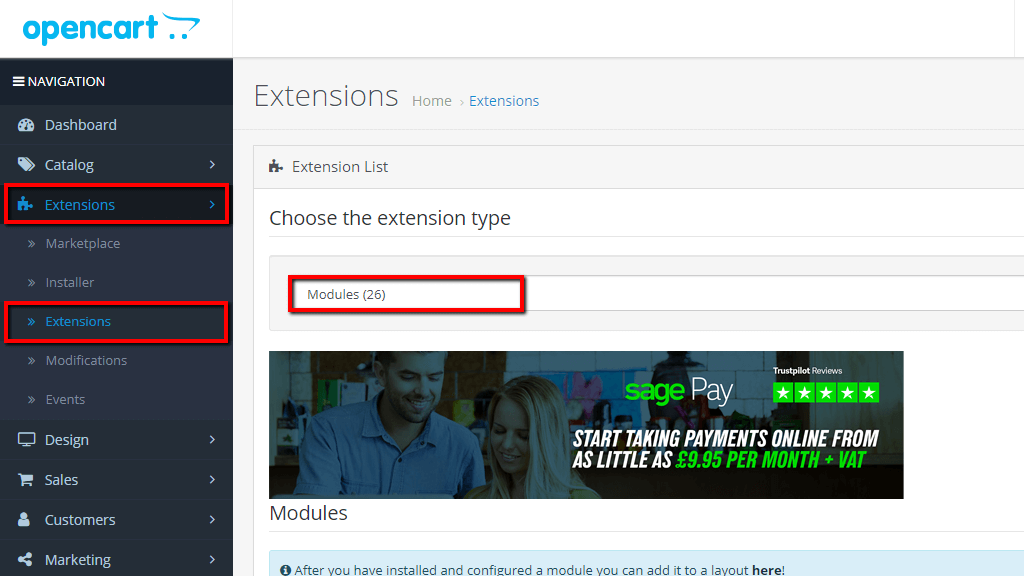
Once this is done, please scroll down through the list of results until you locate the “Filter” module. When you find it, just click on the green “Install” button.
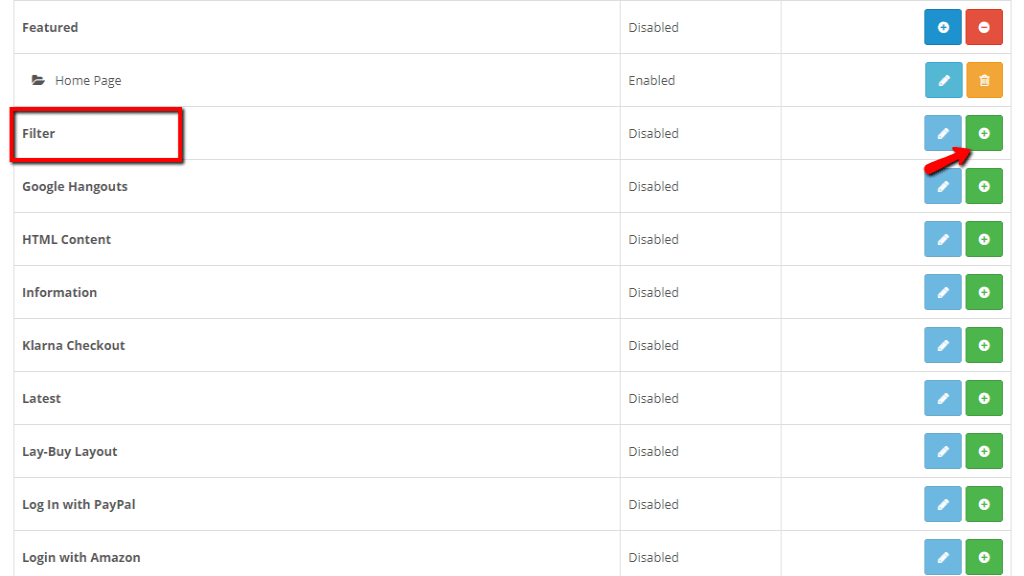
The installation should take only a few seconds. Once it is completed, please click on the blue “Edit” button in order to enable the module.
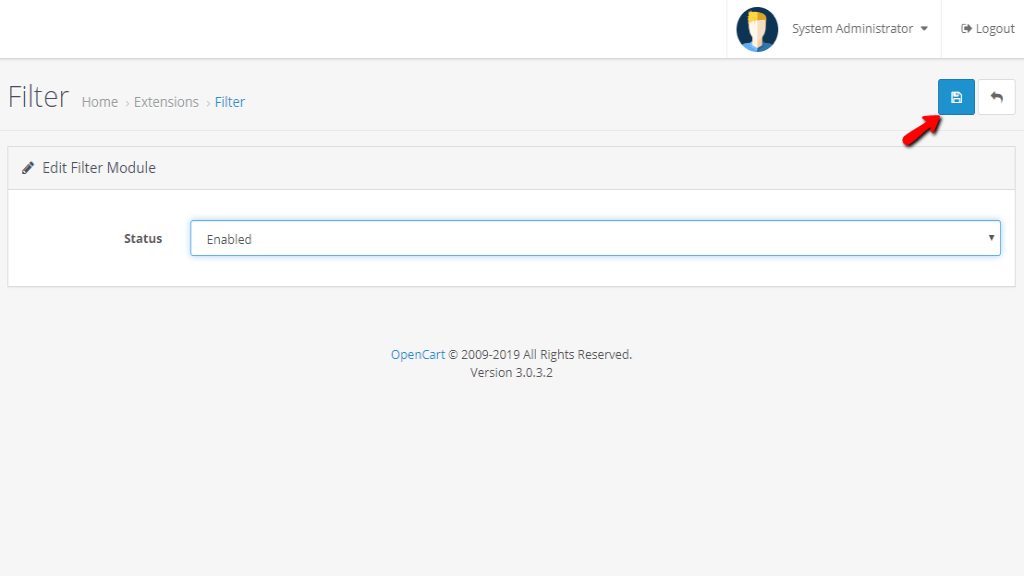
On the new page, please select “Enabled” from the “Status” dropdown menu and click on the blue “Save” button to record the change.
Once the module is successfully enabled you can step into creating your new filters and filter groups.
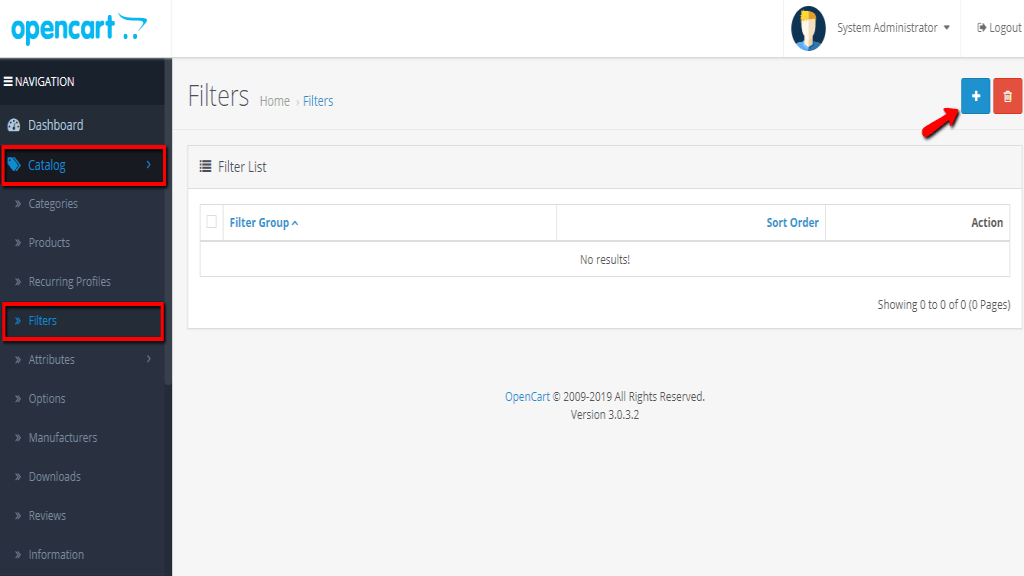
Now that you have the “Filter” module successfully installed and enabled, it is time to create your first Filter Group and assign filters to it. In order to do that, please head to Catalog > Filters and click on the “Add New” button at the upper-right corner of the page.
Once this is done you will be presented with the “Add Filter” page where you will need to enter the name of the Filter Group and enter the “Sort Order” value which will determine the position of the filter group compared to the rest of the filter groups configured in your store. If this will be the only filter group on your store you may leave this field blank.
By clicking on the blue “Add Filter” button available under the “Filter Values” section you will be able to create the required product filters and assign them to the filter group.
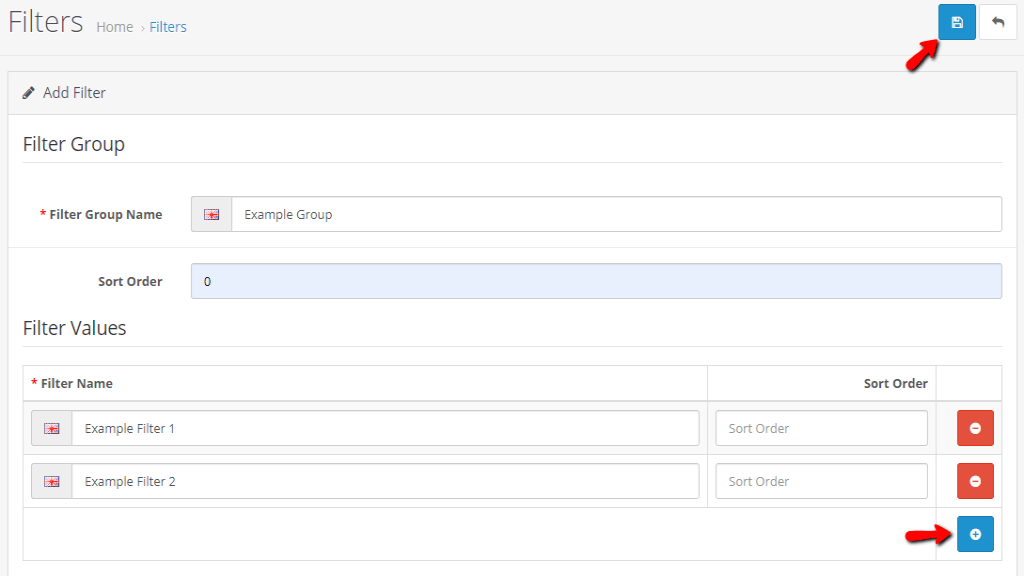
When you are done, please do not forget to click on the “Save” button in order to create the filters and the filter group.
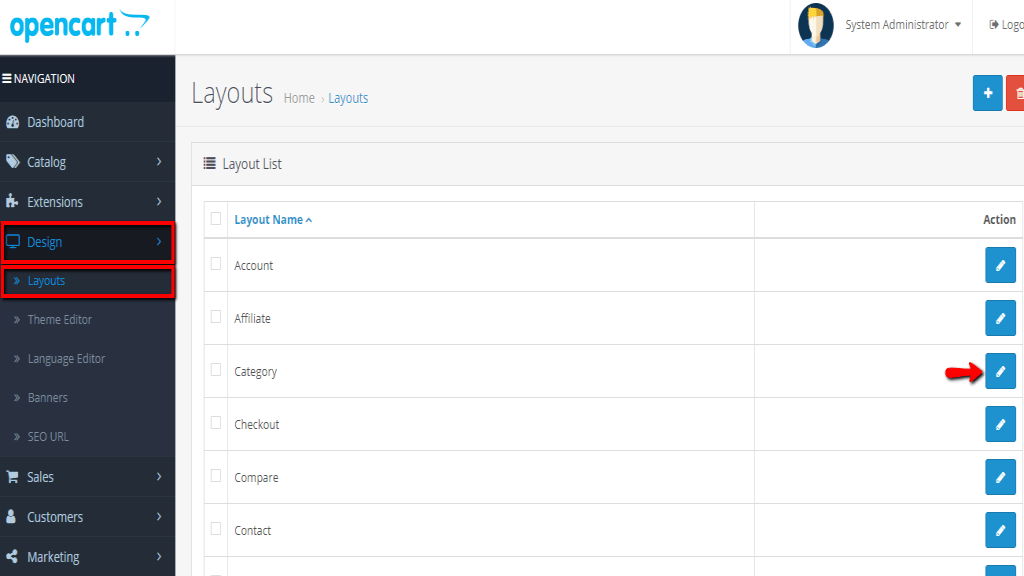
If you wish the filters to be displayed in the layered navigation bar on your store frontend you will need to enable the “Filter” module for the given category of pages.
You can do that by navigating to Design > Layouts through the left menu bar and clicking on the corresponding “Edit” button for the given pages. In our example, we will enable it on the Category pages.
Once you access the “Edit Layout” page, please scroll down to the “Choose the position of the modules” section. As you will notice there are four meta boxes that determine where exactly the selected modules will be displayed on the storefront. Depending on your preferences you will need to select the “Filter” module and click on the blue “Add Module” button in the corresponding meta box. In our case, we would like it to be displayed on the left-hand side, therefore we have added it under the “Column Left” meta box.
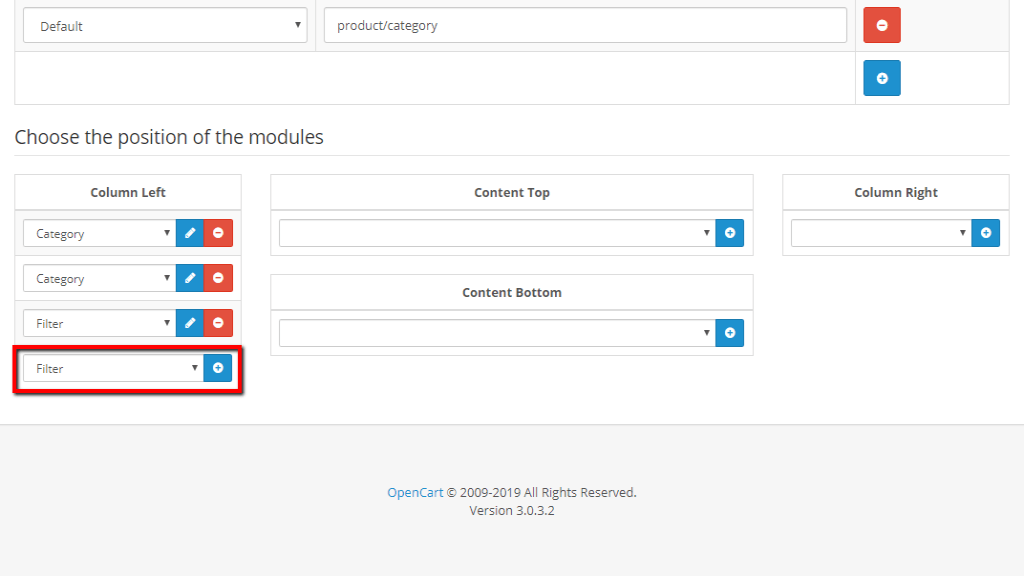
When you are ready, please make sure to click on the “Save” button positioned at the top right corner of the page in order to successfully record the changes you have made. Once the settings are saved, please go ahead and double-check how everything appears on the store frontend.
Well done! At this point, you already know how to manage product filters in OpenCart and effectively increase your users’ experience. We would like to thank you for trusting our guidance and welcome you to contact our Support Team in case you have any additional questions.

Sebahat is a young and bright woman who has become an invaluable part of our team. She started as a Customer Care Representative, mastering that role and, along the way, growing into a tech-savvy individual who is well acquainted with every support layer of the company. Driven by her aim to improve our customers’ experience constantly, she is committed to enhancing the extraordinary support we deliver.
Learn more about Opencart 3 in the other tutorials that we have:
