Introduction
The natural step you should take after installing Magento is configuring its settings. In this tutorial, we will showcase the “General” settings of your Magento store and we will guide you on how to set up and customize them.
Getting Started
In order to begin, please log in to your Magento Admin Dashboard and navigate through the left menu bar to Stores > Configuration.

Once you access the “Configuration” page the “General” settings tab will be automatically expanded displaying all the sections included. In order to be more consistent, we will review these sections under separate tutorials.
In this guide, our focus will be on the "General" section, where you will be presented with a few expandable subsections: “Currency Options”, “State Options”, “Locale Options”, “Store Information”, and “Single-Store Mode”.

By clicking on each of the subsections you will be able to expand it and configure your custom options.
Country Options
When you expand the section you will notice a “Use system value” checkbox enabled by default next to each of the options. Please make sure to untick the checkbox for those options which need custom values.
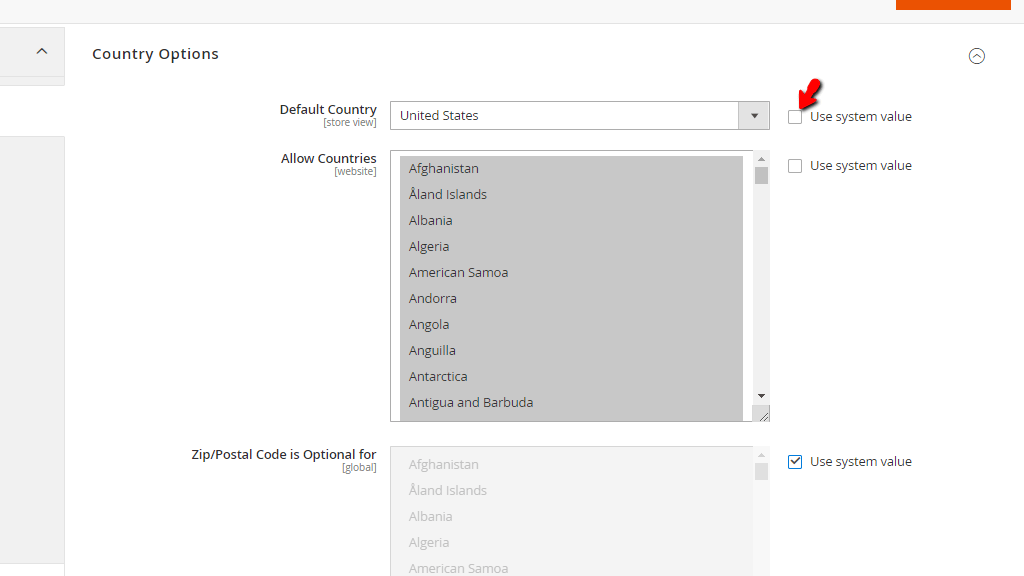
- Default Country - From this dropdown menu, you will need to select the country in which your store operates.
- Allow Countries - This list displays all the countries allowed to place orders in your store. By default, all countries are selected. In case you need to exclude certain country(ies), please mark all countries (“Ctrl” + “a”), then hold the “Ctrl” key and click on the country name you need to exclude. Please note that the countries included will appear in blue.
- Zip/Postal Code is Optional for - This option works exactly the same as the above-described one, but it determines if your visitors are required to enter a ZIP/Postal code. By default, all countries are selected.

- European Union Countries - From this list, you can exclude countries that will not be considered as members of the EU for the purposes of your store.
- Top destination - From this list, you can select counties that will be positioned at the top of any county list displayed to your customers before it gets to alphabetic order.
State Options
Now, please expand the next “State Options” subsection.
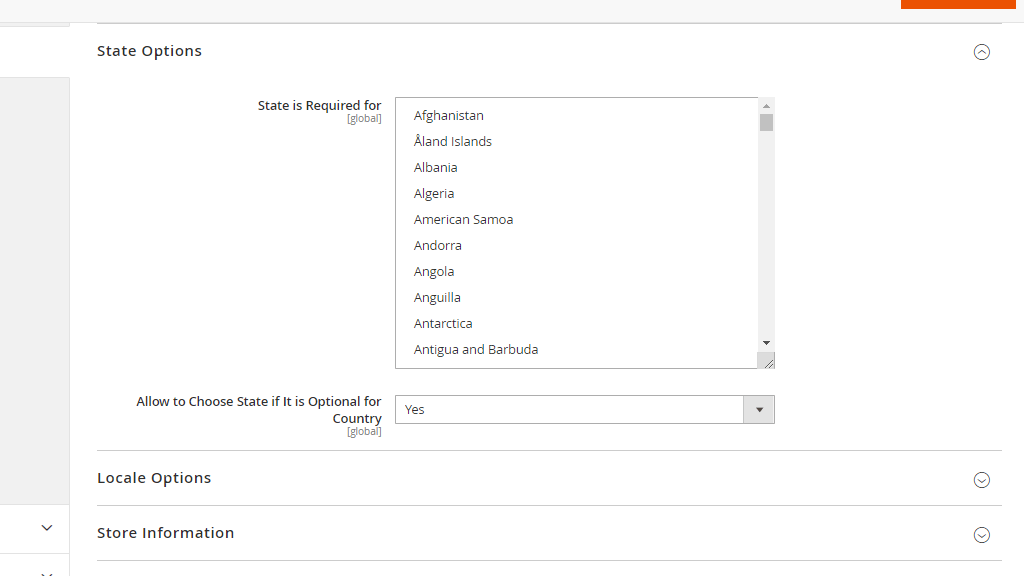
- State is required for - This option works the same way as the previous we have reviewed. Here you will need to select all the countries your visitors will be obliged to enter a state for.
- Allow to Choose State if it is Optional for - From this dropdown menu, you will be able to select whether your customers will be provided with an option to add their country state even if it is not required.
Locale Options
Please, expand the next “Locale Options” subsection.
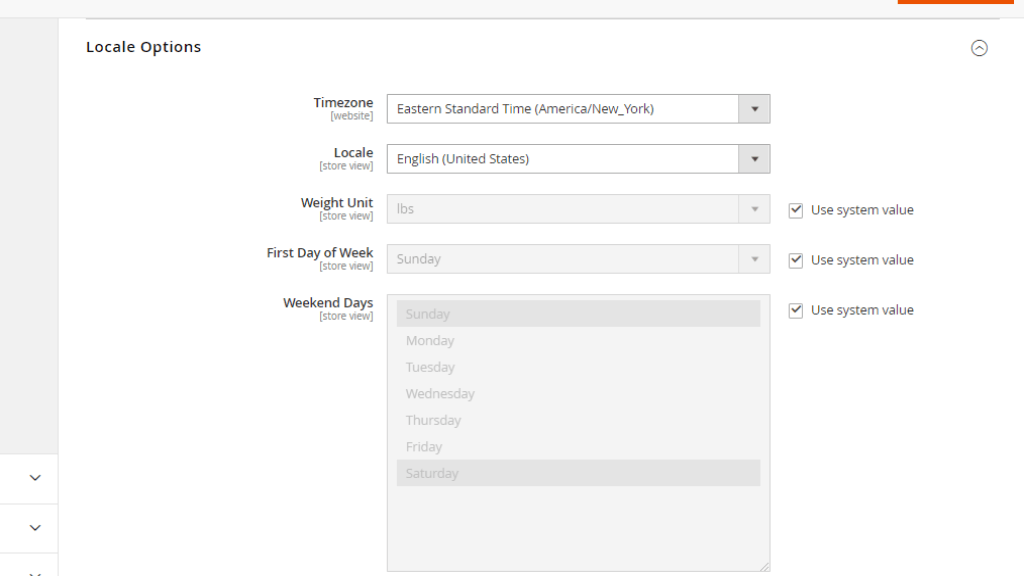
- Timezone - From this dropdown menu, you will have to select the timezone of your store.
- Locale - From this dropdown menu, you will be able to select your store’s default language.
- Weight units - This setting will determine the weight measurement unit. If you untick the “Use system value” you will be able to change it from pounds to kilograms.
- First Day of Week - This setting allows you to select which day of the week is considered as the first workday.
- Weekend Days - From this list, you can select which days are considered as weekend days for your store.
Store Information
Next, please expand the “Store Information” subsection.

- Store Name - Under this field, you will have to enter the official name of your Online Store.
- Store Phone Number - Under this field, you will have to enter your store’s contact phone number.
- Store Hours of Operation - Here, you will need to enter your store’s working hours.
- Country - From this dropdown menu, you will have to select the country of your store’s base address.
- Region/State - Here, you will have to specify the region/state of your store’s base address.
- ZIP/Postal code - Here, you will have to enter the ZIP or Postal code.
- City - Here, you will have to enter the city of your store’s base address.
- Street Address - Here, you will have to enter your store’s base address.
- Street Address Line 2 - This field is optional, so you can leave it blank if not necessary.
- VAT Number - Under this field, you will have to enter your VAT number if applicable.
- Validate VAT Number - This button will initiate verification on the entered VAT number. If you have entered your VAT number, please make sure to click on it.
Single-Store Mode
Finally, please expand the last “Single-Store Mode” subsection.
Here you will find only one setting which allows you to control whether the “Single-Store” mode is enabled or disabled. As you will notice, by default it is set to “No”, however, if you are planning to run only one store you can always select “Yes” from the dropdown menu.
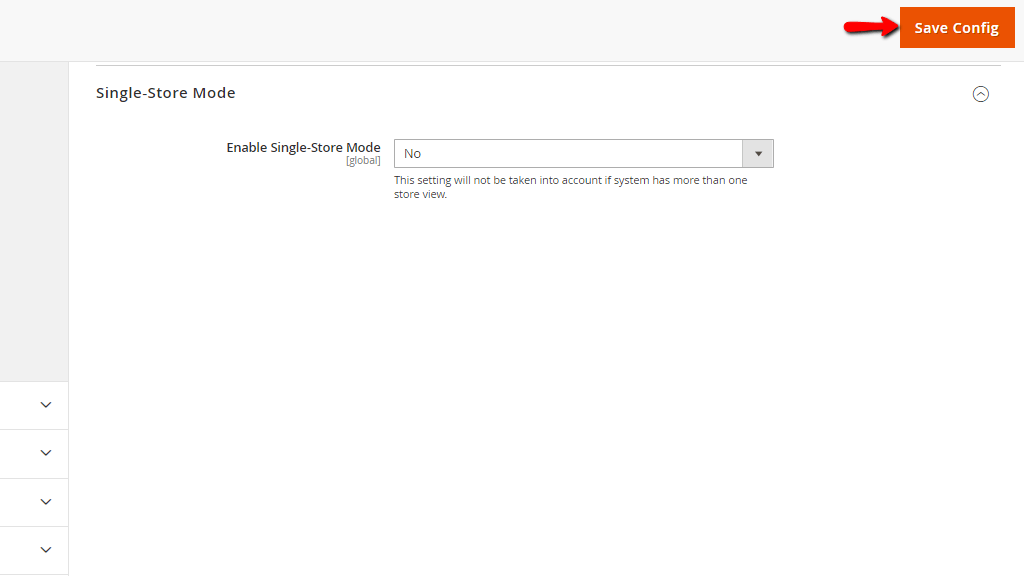
When you are ready, please do not forget to click on the “Save Config” button at the top of the page in order to record your preferences.
Well done! You have now configured the first part of your store’s main settings. As you have probably noticed all the settings are quite self-explanatory and easy to set up. We hope you have found our guide useful and managed to configure the settings without much of a hassle.


