Introduction
In this tutorial, we will guide you on how to configure your Magento Global Inventory settings. The settings we will be reviewing in this guide are considered as default and are applicable to all your products. You will be able to edit your inventory settings individually per product by overriding some of the settings we will cover here, but this is a topic we will be reviewing in another guide.
Getting Started
As usual, the first step we will need you to take is to log in to your Magento Admin Dashboard and navigate through the left menu bar to Stores > Configuration.
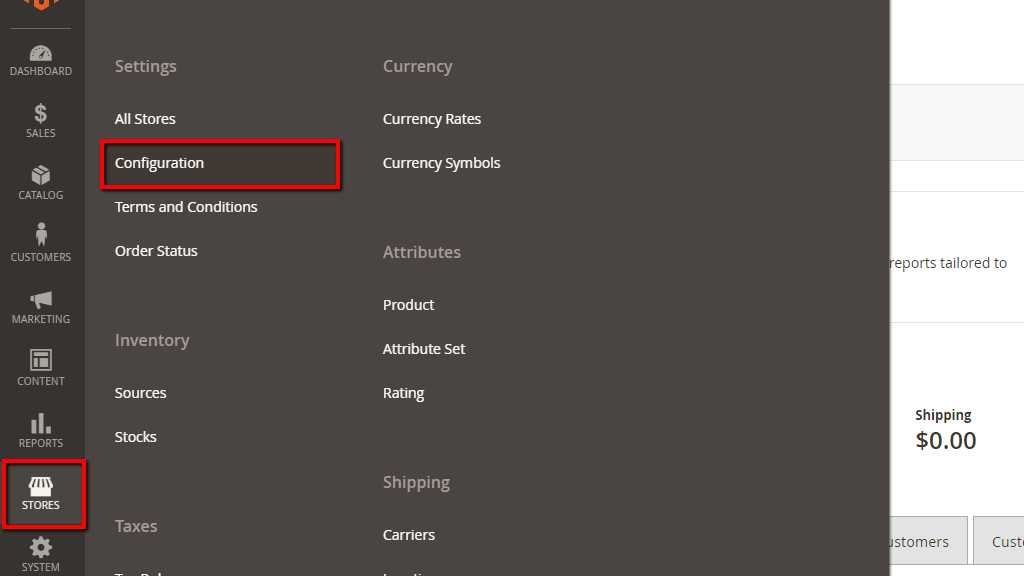
Once you access the “Configuration” page, please extend the “Catalog” tab and click on “Inventory” to open the section.
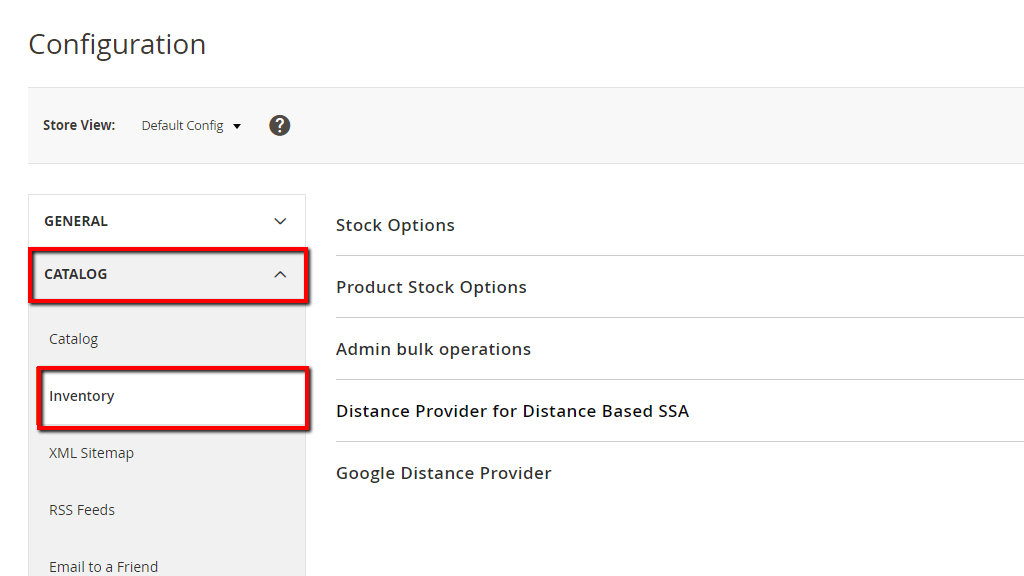
You will notice the “Inventory” section is split into a few subsections containing different settings. In the following lines, we will review each of them separately in order to keep it consistent.
Stock Options
Now, please click on the first “Stock Options” subsection in order to expand it. This subsection contains the settings that will determine the global mechanism for the stock management of your Magneto store. These settings are effective for the entire catalog of products and any changes performed will be automatically applied to the whole catalog.
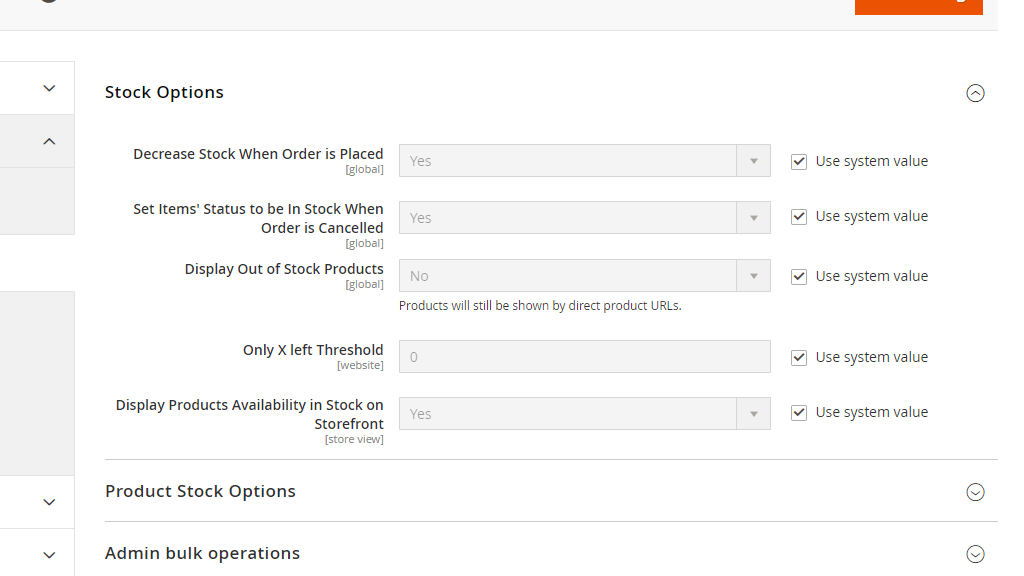
- Decrease Stock When Order is Placed - If you keep this setting enabled, your stock inventory will be automatically recalculated and decreased upon order submission. If you would like to manually keep track of your stock availability, please select “No” from the dropdown menu.
- Set Items' Status to be In Stock When Order is Cancelled - If you keep this setting enabled, whenever an order is set to canceled status the items included in that order will be automatically returned to your stock inventory and considered as available for purchase.
- Display Out of Stock Products - This setting determines whether “Out of Stock” status is displayed on your store’s frontend for currently unavailable products. By default, this setting is disabled. If you would like your visitors to be able to see which products are out of stock, please select “Yes” from the dropdown menu.
- Only X left Threshold - The value entered here determines the quantity under which products will be considered as low in stock. Whenever the quantity of particular product drops to the amount specified, “Only X left” notification message will be displayed under the product details page. Intuitively, the “X” stands for the value specified (e.g. “Only 2 left”).
- Display Products Availability in Stock on Storefront - By default, this setting is enabled - it will display “In Stock” or “Out of Stock” statuses on your store’s frontend based on your stock inventory availability. In case, you would like to disable it, please select “No” from the dropdown menu.
Product Stock Options
The second “Product Stock Options” subsection contains the settings that will allow you to determine the management mechanism on a product base level.

- Manage Stock - Magento includes functionality to automatically manage your stock inventory. If you keep this setting enabled your stock units will be tracked and decreased whenever an order is placed.
- Backorders - Backorders will allow you to go below 0 stock quantity. If you decide to enable this setting, your customers will be able to purchase products that are currently out of stock. You can choose between “Allow Qty Below 0” and “Allow Qty Below 0 and Notify Customer”. With both of the options, your customers will be allowed to place backorders. The main difference is that with the second one your customers will be notified about the possibility of placing a backorder.
- Maximum Qty Allowed in Shopping Cart - In this field, you will need to specify the maximum amount of units of a product your customer can purchase per order. Please note this setting applies on a product level, rather than the entire cart.
- Out-of-Stock Threshold - Under this field you will need to specify the threshold value which will indicate that your products are out of stock. Once this level is reached “Out of Stock” notification message will be displayed on your store’s frontend.
- Minimum Qty Allowed in Shopping Cart - This option allows you to specify the minimum quantity of units per stock required for submitting an order. From the dropdown menu under “Customer Group”, you can select a particular group to which the specified minimum amount will be applied. You can also set up different quantities for different groups by configuring them separately.
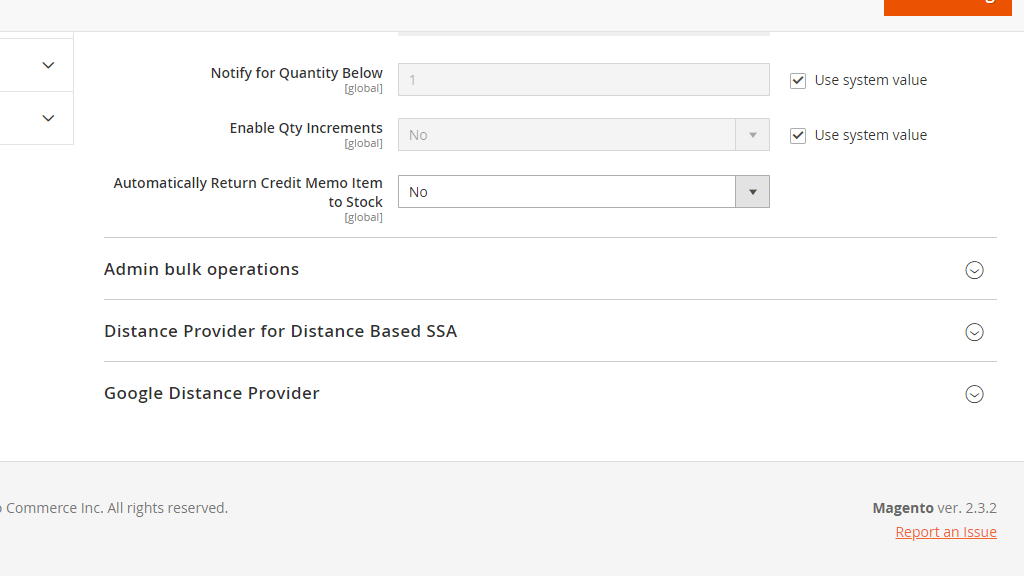
- Notify for Quantity Below - Here you can specify a threshold value for products being low in stock. Once this level is reached, it will trigger an email notification sent to your admin email address informing you regarding the stock availability.
- Enable Qty Increments - This setting will allow you to sell a specific quantity of products as one. If you enable it, an additional “Qty Increments” field will appear where you will need to specify the number of products required. For example, if you set it to 2, your customers will be able to purchase 2, 4, 6, etc. products, but they will not be allowed to purchase 1 or 3 products for instance.
- Automatically Return Credit Memo Item to Stock - If you enable this setting, products from refunded orders will be automatically returned back in stock.
Admin Bulk Operations
Under the “Admin Bulk Operations”, you will find only one setting which will allow you to control whether bulk operations are run asynchronously.

If this option is enabled, it will accumulate bulk actions up to the Asynchronous batch size, then run these actions. It is recommended to keep the option disabled and test how your website handles bulk actions before enabling it. Also, please note that in order to configure asynchronous queue managers you will need to feel comfortable working via command line.
Distance Provider for Distance Based SSA
Under this subsection, you will find only one “Provider” setting which will allow you to select the option that will be used to compare the shipping destination with the source destination in order to determine the closest source to accomplish shipments.

- Google MAP - This option is based on the Google Map Platform which is used to calculate the distance and time between the shipping destination and the source location. If you decide to use it, you will have to provide a Google API Key (additional details will be provided in the following section). Also, please note that some additional charges might be applied by Google.
- Offline calculation - With this option, the distance calculations will be based on downloaded and imported geocodes based on ZIP/Postal codes and GPS coordinates. Please note, those geocode must be imported via the command line either by you or your developer.
Google Distance Provider
Under this section, you will have to configure your Google MAP details. In case you have decided to use “Offline calculation” you can skip this part.

- Google API key - Here you will need to enter your “Google API key” which should have Geocoding API and Distance Matrix API enabled. The key must be obtained from the Google Maps Platform. In case you are not certain how to generate it, you can follow Google's official guide available HERE.
- Computation mode - This setting determines how the distance is calculated. You can choose between “Driving”, “Cycling”, and “Walking”.
- Value - From this setting. you will need to select the value for the calculation. The default option is “Distance”, you can also select “Time to destination”.
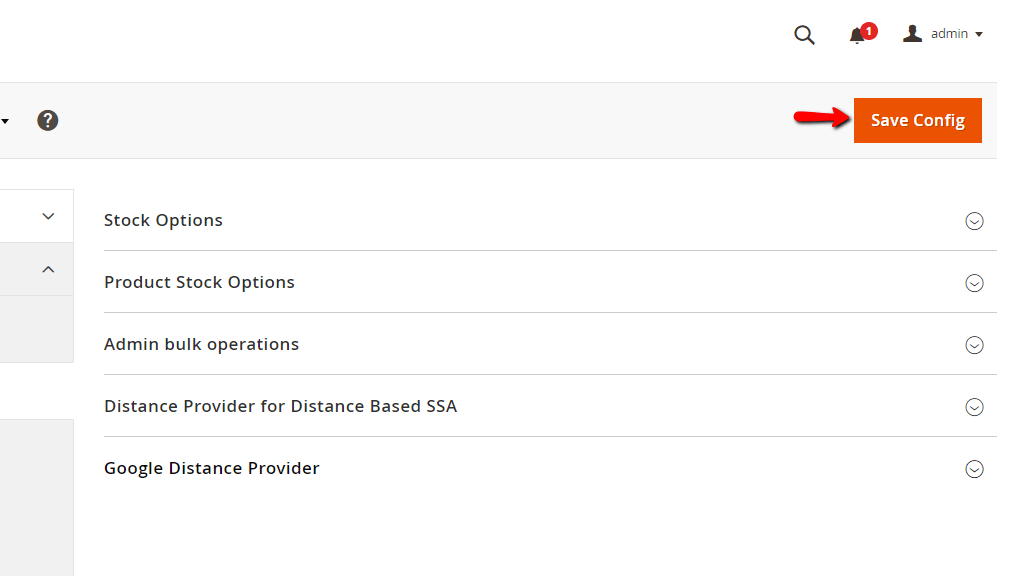
With that configured, you are all set. Please do not forget to click on the “Save Config” button in order to record your changes.
Congratulations! With the Inventory settings covered you have learned how to organize and manage your stocks in an efficient and convenient way. Now you have more control over the workflow of your Online Store. We would like to thank you for trusting our guidance and welcome you to contact our Support Team in case further instructions are needed.

