
In this tutorial, we will introduce the General Tax Settings of Magento and guide you on how to configure your preferences. Even though Magento comes with built-in tax management functionality before you move forward to configuring your tax settings it is strongly recommended to consider advising with a tax professional in order to ensure you are in full compliance in accordance with your local government law and regulations.
If you are ready to being, please log in to your Magento Admin Dashboard and navigate through the left menu bar to Stores > Configuration.
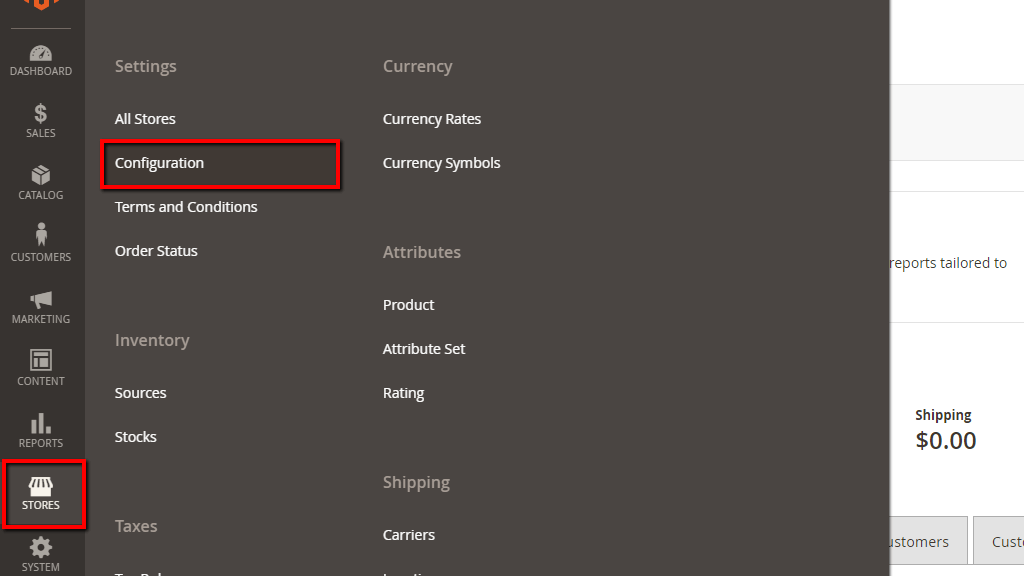
Once you access the “Configuration” page, please extend the “Sales” tab and click on “Tax” to open the section.

You will notice the “Tax” section is split into multiple subsections containing different settings. As some of these settings are considered advanced topics, our focus will be only on the main settings considered as important.
We will skip the first, “Vertex Settings” section. “Vertex” is a cloud platform that automates your sales and uses tax compliance. More information about the service, account creation process, configuration, and pricing you can find here.
Under this “Tax Classes” section you will be able to define the default tax classes for your Online Store.

In order to select your tax classes, please untick the “Use system value” checkbox. Then you will be able to select the “Tax Class for Shipping”, “Default Tax Class for Product”, and “Default Tax Class for Customer” from the corresponding dropdown menus. Once expanded, each of the dropdown menus will list all existing tax classes.
You will be able to create your custom tax classes by going to Stores > Tax Rules > Add New Tax Rule > Additional Settings. More information on this topic you can find in our guide based on How to setup Tax Rules in Magento 2.
From the following “Calculation Settings” section you will be able to control how Magento calculates your taxes.
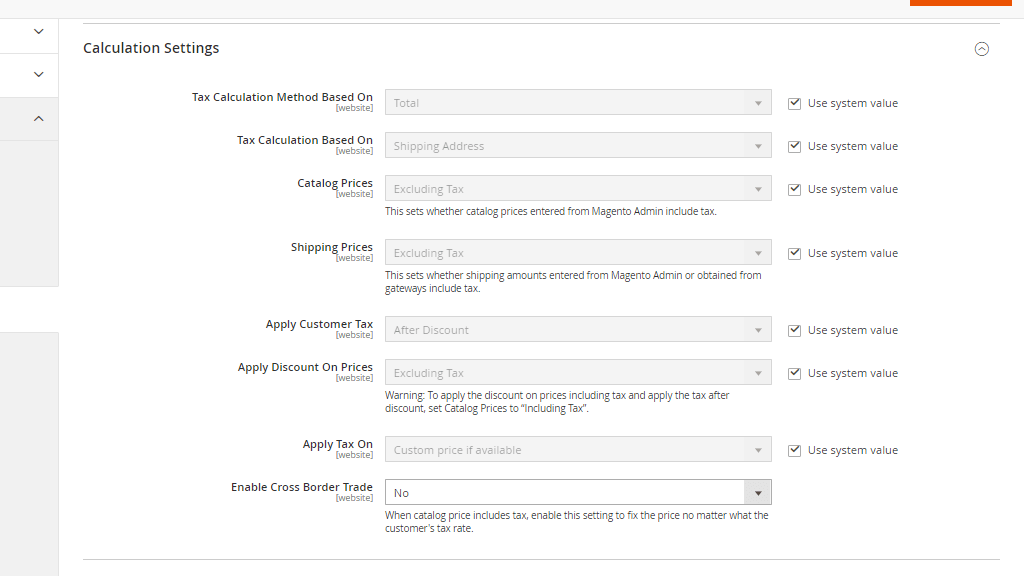
The first “Tax Calculation Method Based On” setting will allow you to select the default base on which the taxes will be calculated. You can choose between the “Total” amount, the “Unit Price” which means per each product, and the “Row Total” of the line, excluding discounts.
The “Tax Calculation Based On” setting determines the base location used to calculate taxes. You can choose between “Billing address” or “Shipping address” of your customer, or “Shipping Origin” specified for your store.
The following “Catalog Prices” and “Shipping prices” settings determine how you will be entering your product prices - including or excluding taxes.
The “Apply Customer Tax” setting will allow you to control whether the tax is applied before or after the discount is deducted from the regular price. Contrariwise, the “Apply Discount on Price” setting determines whether the discount is applied before or after taxes.
From the following “Apply Tax On” setting you can select if the taxes will be applied on custom prices or only on original prices.
The last “Enable Cross-Border Trade” setting should be enabled in case your catalog prices are displayed including taxes. It will fix the prices regardless of the customer’s tax rate.
Under the “Default Tax Destination Calculation” section you will be able to configure the main country where your business operates which will be used as a base for tax calculations.

You will need to specify the country, state, and postcode. The wildcard sign (*) entered under “Default State” includes all states for the selected country.
Under the “Price Display Settings” section you will be able to determine how your prices will be shown on your store’s frontend.
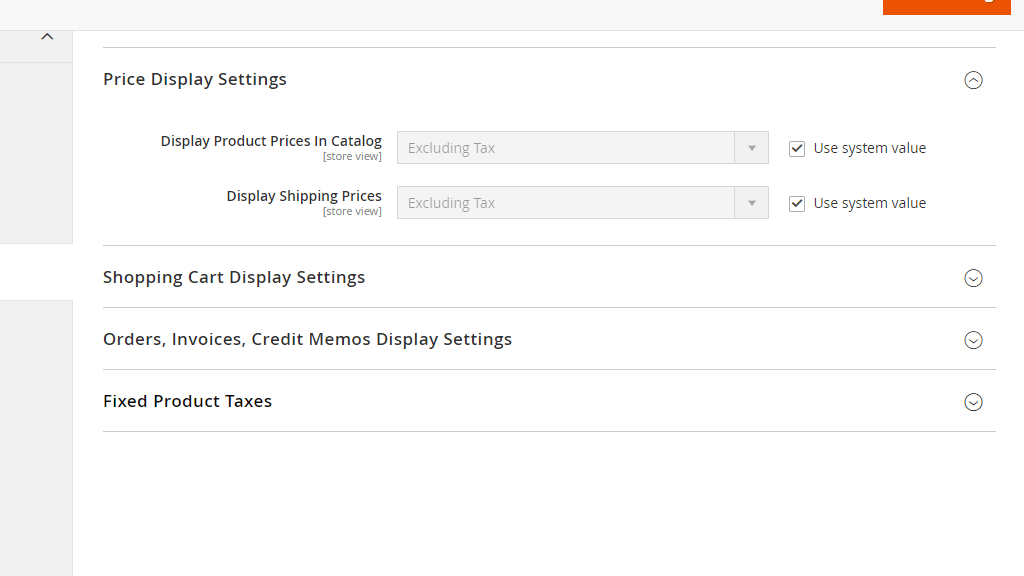
From the following “Shopping Cart Display Settings” section you will be able to control how the prices are displayed in your customers’ shopping carts.

You can determine whether the product “Prices”, cart “Subtotal”, and “Shipping Amount” will be displayed “Excluding tax”, “Including Tax” or “Including and Excluding Tax”.
You can set the following three “Include Tax In Order Total”, “Display Full Tax Summary”, and “Display Zero Tax Subtotal” to “Yes” or “No” according to your requirements.
The settings under this field are exactly the same as under the previous section with the main difference that they do apply to the prices displayed under your orders, invoices, and credit memos.
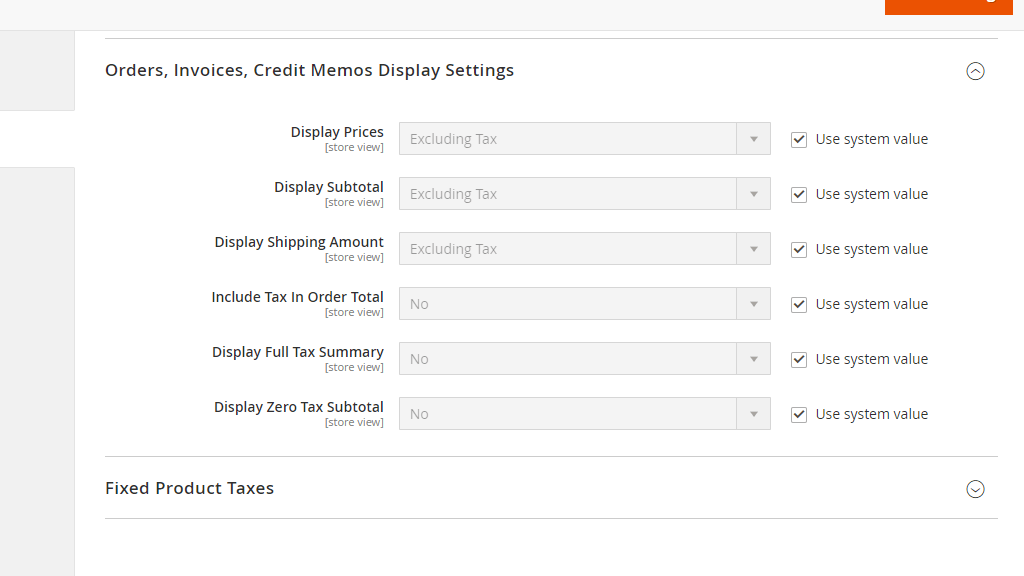
Please set them up according to your needs by following the instructions available under the previous section.
Some tax jurisdictions have fixed taxes that sellers are obligated to apply to certain products. Fixed Product Taxes (FPT) are based on a fixed amount, rather than a percentage and are applied on a product level.

Please make sure to set “Enable FPT” to “Yes” if required.
The following four display options can be set to “Including FPT and FPT description”, “Excluding FPT. Including FPT description and final price”, “Including FPT only”, and “Excluding FPT”.
The “Appy Tax To FPT” setting will allow you to control whether taxes will be applied to FPT.
Finally, set “Include FPT In Subtotal” to “Yes” if needed.
Lastly, please make sure to click on the “Save Config” button in order to record your changes.

Well done! You have now successfully configured the General Tax Settings of your Magento Online Store. We hope that learning the tax fundamentals will lead to the efficient tax management of your store. We would like to thank you for trusting out guidance and welcome you to reach our Support Team in case you have experienced any difficulties.

Sebahat is a young and bright woman who has become an invaluable part of our team. She started as a Customer Care Representative, mastering that role and, along the way, growing into a tech-savvy individual who is well acquainted with every support layer of the company. Driven by her aim to improve our customers’ experience constantly, she is committed to enhancing the extraordinary support we deliver.
Learn more about Magento 2 in the other tutorials that we have: