
Since their creation, the Open source E-Commerce platforms such as Prestashop 1.7 are introducing a way of grouping the uploaded products. The best way of handling this task is typically by choosing a common characteristic that а group of product shares. In the E-Commerce field, this so-called characteristic grouping is also known as a Product Category and in the next lines of this tutorial, we will show you how to completely manage those for the Prestashop 1.7 E-Commerce platform.
When you login to the PrestaShop admin area, on the left vertical navigation menu look for the “Catalog” option. After you find it, please, click on it. A drop-down menu will appear with a lot of options, such as: “Products”, “Categories”, “Monitoring”, “Discounts” and so on.
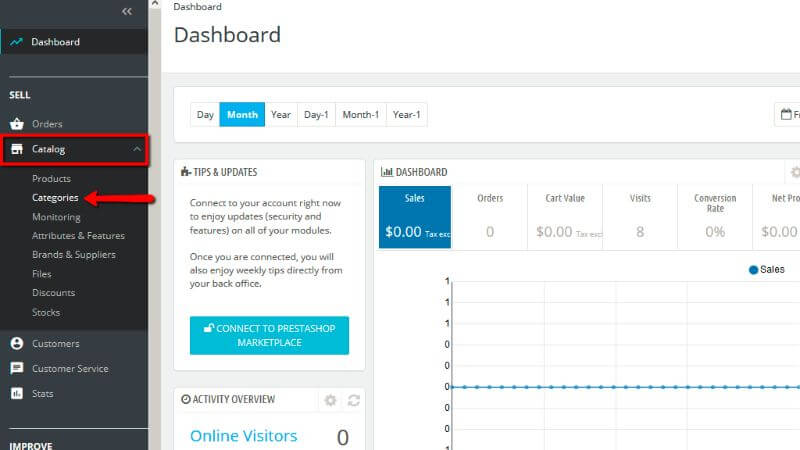
Finally, please, click on the “Categories” link to access the page where you will be managing all the existing categories.
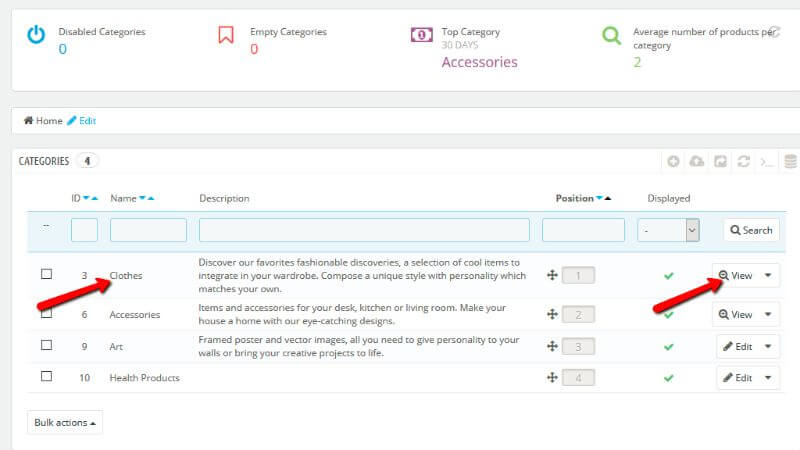
When you click the “Categories” link you will be redirected to a page called “Categories”. There, in a conveniently structured table view, you will be provided with a list of all the already created top-level categories in your Online Store.

Another term that is used for the top-level categories is “Parent” categories. Now, if you want to see the subcategories (child categories) of these top-level categories, please, click on the parent category, itself, or click the “View” button displayed for each category on the right side of the page.
That action will load for you all the subcategories for the specific category again in a conveniently structured table view with the following columns:
and a final column that you may consider as “Available Actions”.
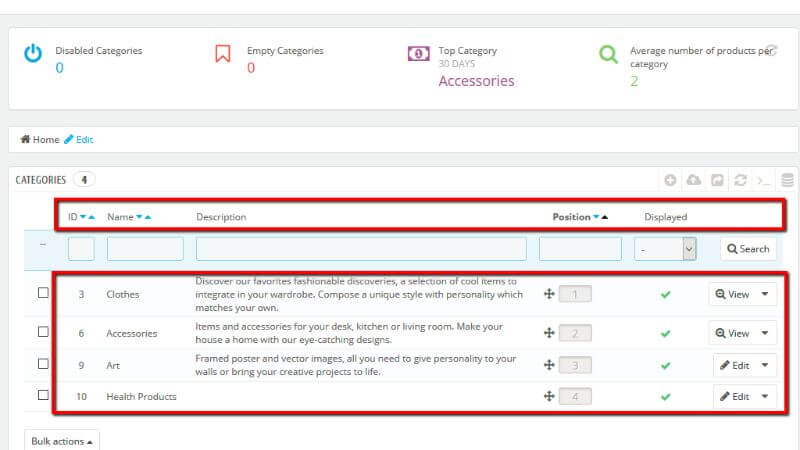
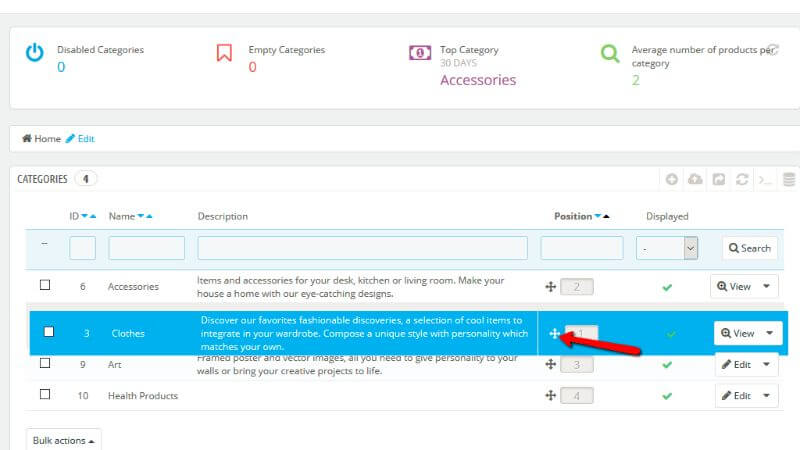
The Id, Name, and Description are basically self-explanatory. On the other hand, the Position column is there for allowing you to change the category position by moving the category up or down depending on the ordering you would like the categories to be displayed in.
Thanks to the column, that goes by the name “Displayed”, you can hide a category from users by clicking on the green check-mark icon. That action will turn the green check-mark into a red “x” mark.

This basically sums up the table view with all the existing top-level categories. Let’s see what else the categories page has to offer.
All categories that you create and manage are actually sub-categories of the “Home” category. Think of this as a tree type of structure - the root of the tree are the so-called parent categories and the branches are the child categories.
Let’s continue by creating a new Category. To do that, please click on the “Add new category” button positioned on the top-right of the page.

Please, bear in mind, that creating a new category in an existing one will make it a subcategory of that category. In other words, if you have navigated inside a Parent Category, by clicking on the “Add New Category” button you will start adding a new category of the one you already have selected.
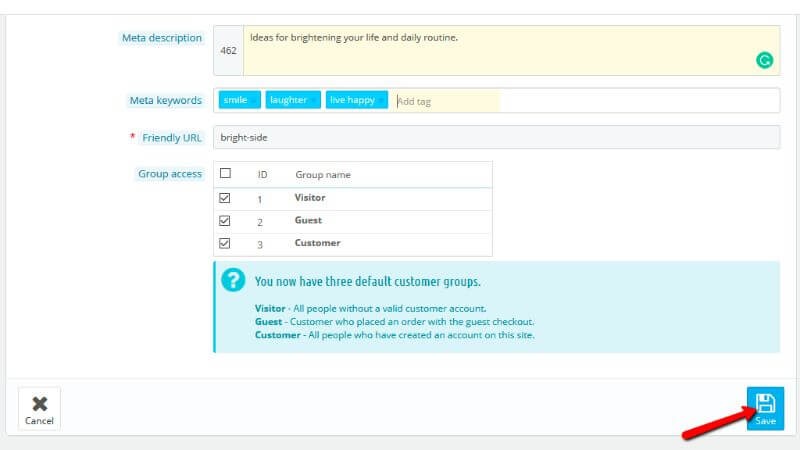
Once you click on the “Add new category” button, you will be redirected to a new page, that is called “Add new”. On that page, you will be asked to fill in some general information about your category.

The required category information on the “Add new” page is as follows:
Please, keep in mind, once done filling all the fields, to click on the “Save” button, to actually create this category.
You are now ready to add products to this category.
Managing the categories of your Online Store is very simple. Now that you know how to add a category the only remaining actions for wrapping up the management of product categories are editing and deleting a category. You can find both of these actions next to every category in the table view of the “Categories” home page. If you click on the “View” drop-down menu for each category the actions will appear immediately.
Let’s start by editing a category. As we explained already you will need to click the “View” drop-down button, which is on the right side of every category in the table view.
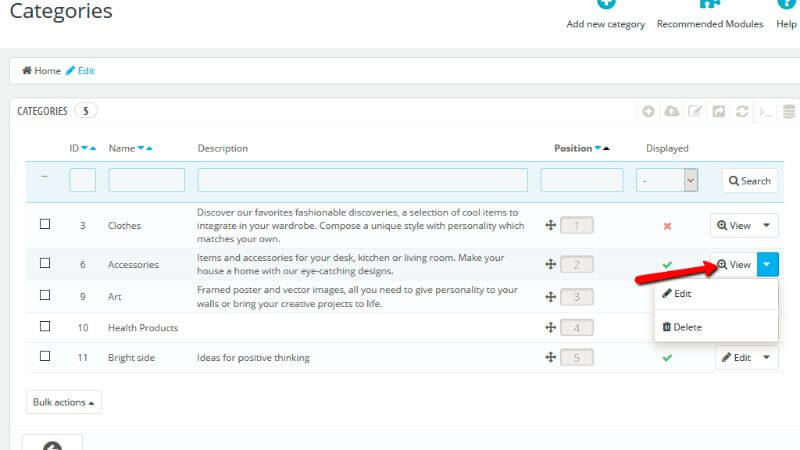
When you click the arrow from the drop-down menu, two options will appear: “Edit” and “Delete”. Please, click the “Edit” option. That action will redirect you to a page which is exactly the same as the page for adding a category, however, with the only difference that now all the fields will be already filled out.

Once you are done with the edits simply press the “Save” button at the bottom of the page so your changes can be saved and you can be brought back to the categories home page.
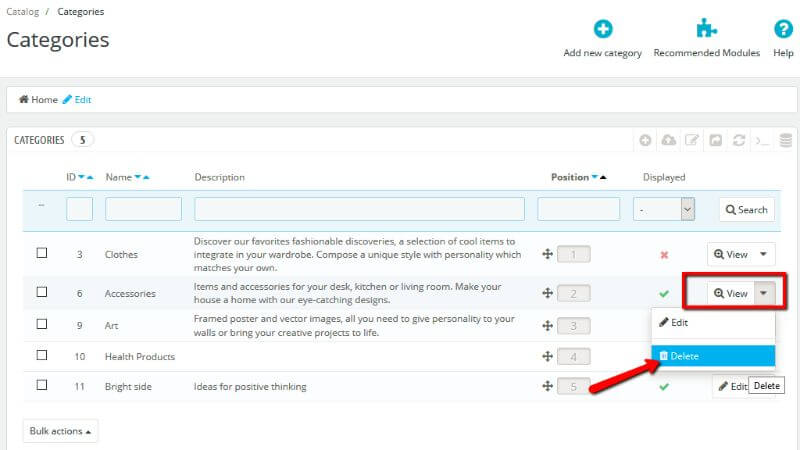
Now, if you want to delete a category, please click the same drop-down menu button, but this time from the two options that appear, click the “Delete” option.
After that, you will be redirected to a page where you will be asked to choose one out of three actions.
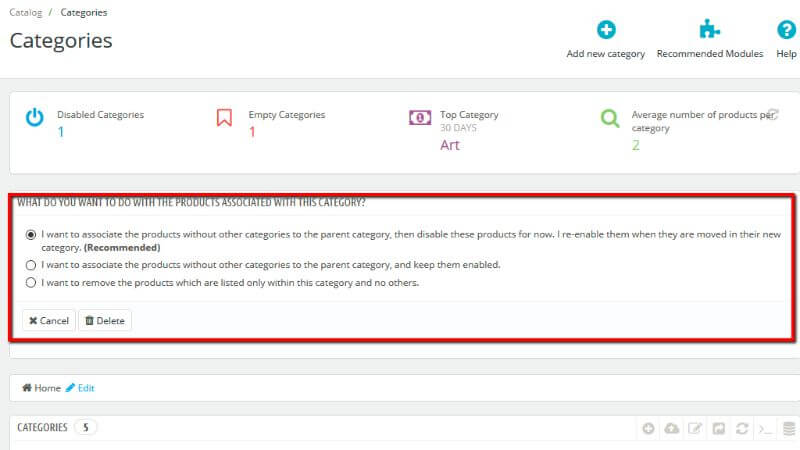
“I want to associate the products without other categories to the parent category, then disable these products for now. I re-enable them when they are moved in their new category. (Recommended)”
“I want to associate the products without other categories to the parent category, and keep them enabled.”
“I want to remove the products which are listed only within this category and no others.”
Please choose the option that will suit your needs the most and click on the Delete button so you can be able to finalize the process.

After the category is deleted you will be redirected back to the page with all the categories your Online Store maintains.
Please, bear in mind, that by creating a category, that does not make it visible in the frontend of your Online Store. To be able to make the category visible on the frontend you will have to add the category to a menu. To do that, please, go to the main admin page of your Online Store and from the left vertical menu look for the “Modules” option. When you find it, please, click on it. Then a drop-down menu will appear with two options: “Module Catalog” and “Module Manager”, click the “Module Manager” option.

You will be redirected to a page called “Module Manager”. There you will see different options.
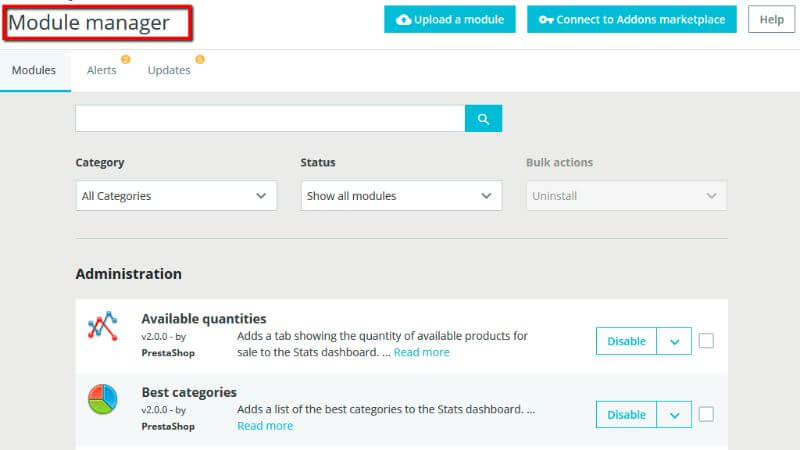
In the search bar on the top of the page, please, search for the “Main menu” and click on the “Configure” button to edit it.

That action will open the “Main menu” module page.
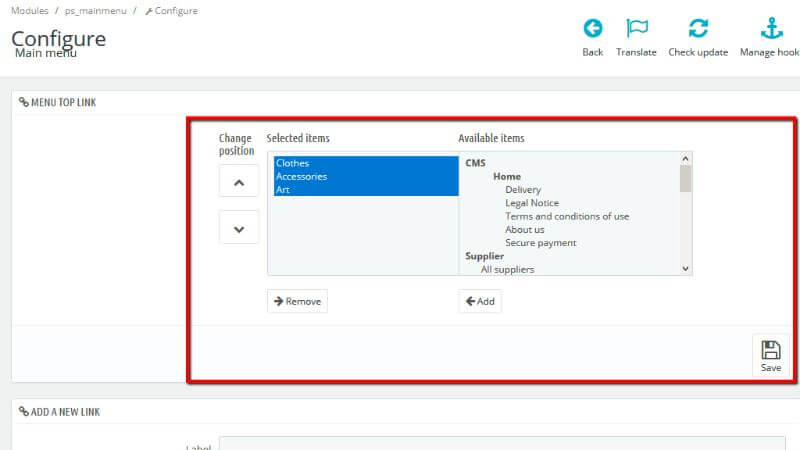
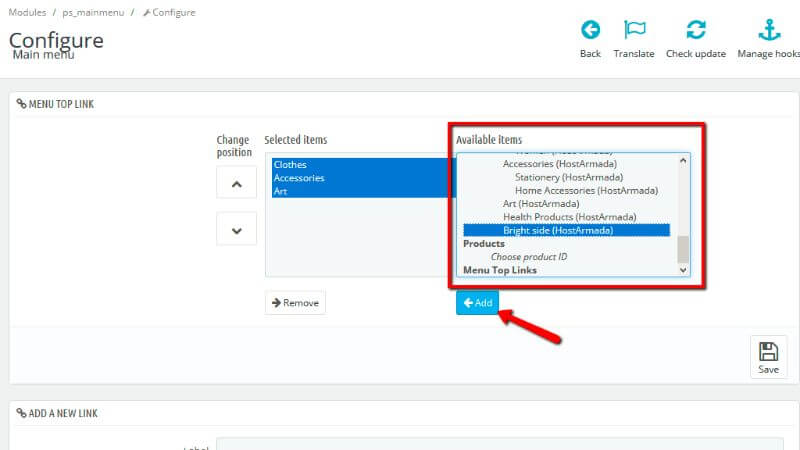
To add the newly created category to the menu, select it from the “Available items” box and click on the “Add” button.
Please, do not forget to click the “Save” button after adding the category to the selected menu.
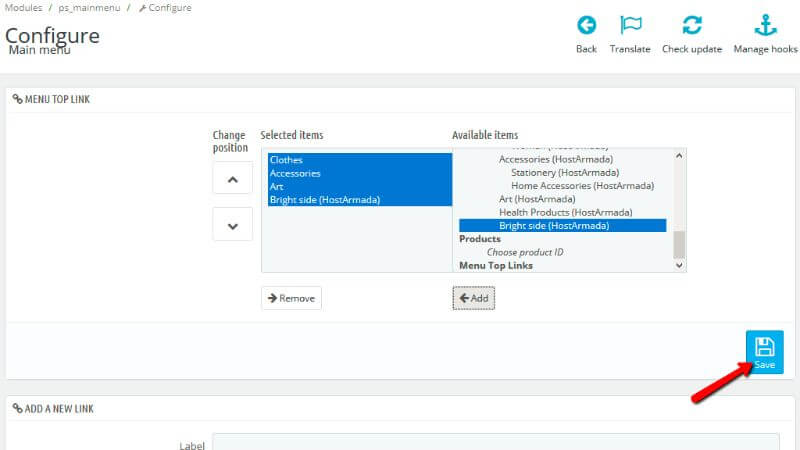
Now, the category that you created will be visible in the frontend of your PrestaShop Online Store.
Congratulations! Today, you learned what product categories are and how to fully manage those.

Simeon is an experienced System Administrator with over 10 years of experience in the Web Hosting field. He is recognized unanimously as the man behind every technical innovation or improvement that HostArmada introduces. Adaptable and responsible, he solves every technical issue that we or our clients throw at him. Every so often you will find him publishing technical content on our website.
Learn more about Prestashop 1.7 in the other tutorials that we have: