
Tax rules are used to apply a certain tax rate for a single country on any of the products in your Prestashop based Online Store. By default, PrestaShop does not have the option to directly apply taxes to a product. However, it can apply tax rules instead. If you want to apply certain taxes to a product easily, according to the country where the customer lives, you will need to use a functionality called Tax Rules. Also, you may use a single tax rule to apply different taxes to a product for customers from several different countries. In the next few easy to follow steps, you are going to learn how exactly to apply already defined Tax Rule to a product.
To begin the journey of adding a tax to a product you will first have to access the “Pricing” section. To do that you have to login to the PrestaShop admin area, go to the admin panel on the left vertical navigation menu and look for the “International” option. Once you find it, please, click on it. A drop-down menu will appear with the options “Localization”, “Locations”, “Taxes” and “Translations”.

From the drop-down menu, please, click on the “Taxes” link to access the “Taxes” page. Once redirected to the “Taxes” page you will be presented with a complete list for all the available taxes you have for your products on your Online Store.
When you click the “Taxes” link you will be redirected to a page called “Taxes”. There, in a conveniently structured table view, you will be provided with a list of all the already created taxes for the products in your Online Store. You are also able to create new taxes if needed.

The table containing all the taxes is structuring the information in the following columns:
and a final column that you may consider as “Available Actions”.
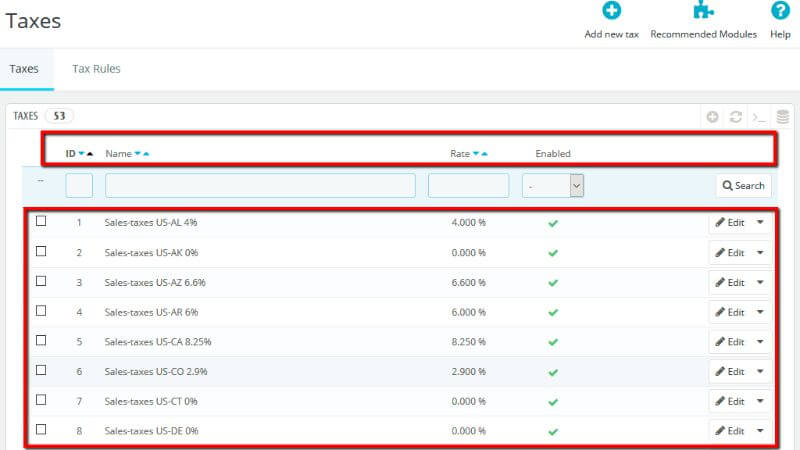
The Id and Name are basically self-explanatory. The tax rate is the ratio (usually expressed as a percentage) at which a business or person is taxed. With the “Enabled” column you can either enable or disable the tax.
As you scroll down the page and at the bottom, you will see the "Tax Options" section. These options apply to the whole shop and to all of the orders.

In that section you will be presented with the following options:
Once you enable the use of ecotax, all your products' back office page will feature an "Ecotax (tax incl.)" field in their "Pricing" tab. You should fill that field with the exact value of the tax, which depends on your country's tax laws (it is probably based on the product's price).
If you decide to enable the ecotax after having added products, you will have to edit them all in order to set the tax properly for each product.
Please, bear in mind, that if you have set ecotaxes for your products already, and you decide to disable them, then all your products will lose their ecotax settings. Re-enabling the eco-taxes will mean having to set all your products' ecotaxes again. The ecotax will also appear to the customer, on the product's page.
Now, since you learned the details around the “Taxes” page, let’s learn how to create a tax. Adding a new tax is very easy because the tax rules basically take out all the burden of having to specify the countries where the tax applies. To start creating a tax, please, click the “Add new tax” button at the top right of the “Taxes” page.

You will be redirected to a page called “Add new”. There you will be presented with the tax creation form.

The tax creation form is very short. It only contains 3 options:
Once you are done filling out the fields, please, click the “Save” button.

By taking that action you just created a tax. Now, let’s see how the tax rules are being created.
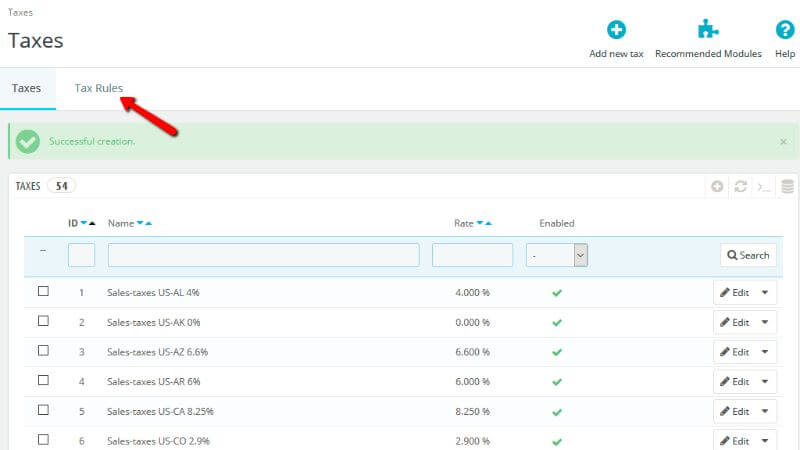
When you save the newly created tax you will be redirected to the “Taxes” page with a label of successfully added tax. To create tax rule, please, click the “Tax Rules” tab next to the “Taxes” tab. You will find it right above the conveniently structured table where all the already created taxes are positioned.
When you click it only one thing will change on that page. At the very top of the page now instead of having the “Add new tax” button there will be another one called “Add new tax rules group” button. Click on it.
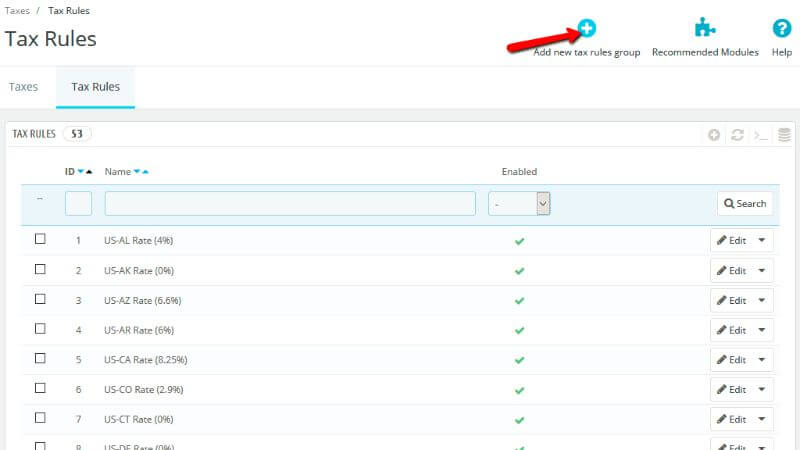
You will be redirected to a page called “Add new”.

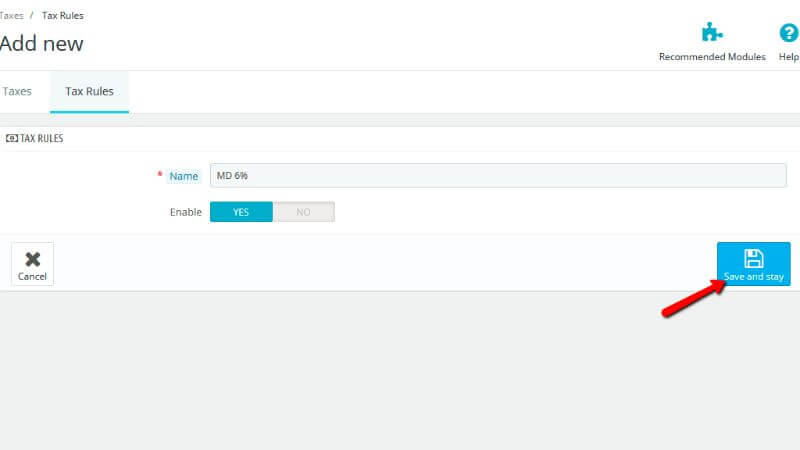
Two options will be shown there. Please, enter a “Name” for the tax rule, but, bear in mind, that it is good to use a name that contains a country code or tax rate because it will help to find out tax rule easily. After that either “Enable” or leave the tax rule Disabled, until you need it. Please do not forget to click the “Save and stay” button.
That action will reload the page for you and additional fields will appear below the form you have just filled. The fields will be as follows:
After that simply click the “Save and stay” button and the country will be added to the list. Now, you can continue adding price rules for other countries.
Since you already know how to create a tax rule, let’s learn how to apply this tax rule to any product in your store.
Tax rules and Taxes are a different thing. If you want to apply certain taxes to any of the products, based on the country, you need to use Tax Rules. You can use a tax rule to apply different taxes for different countries (or states). You can use a single tax rule to apply different taxes to a product for different countries(or states).
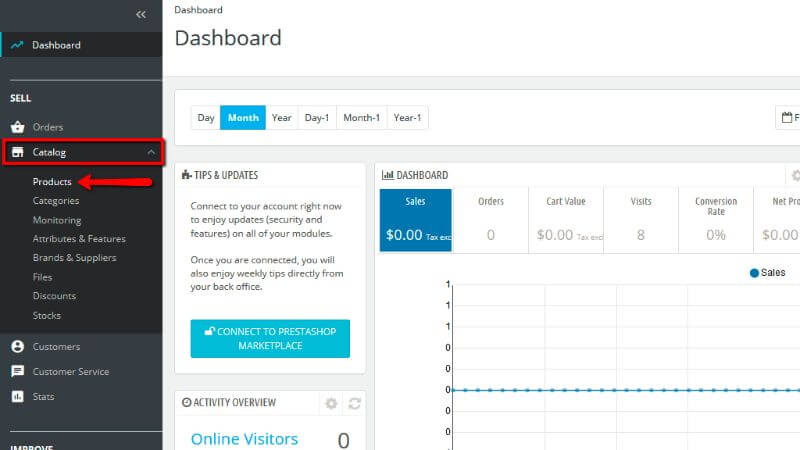
To apply the tax rule to any of the products in your Online Store you have to go to the PrestaShop admin panel, search in the left vertical menu for the “Catalog” option and when you click it from the drop-down menu click the “Products” link.
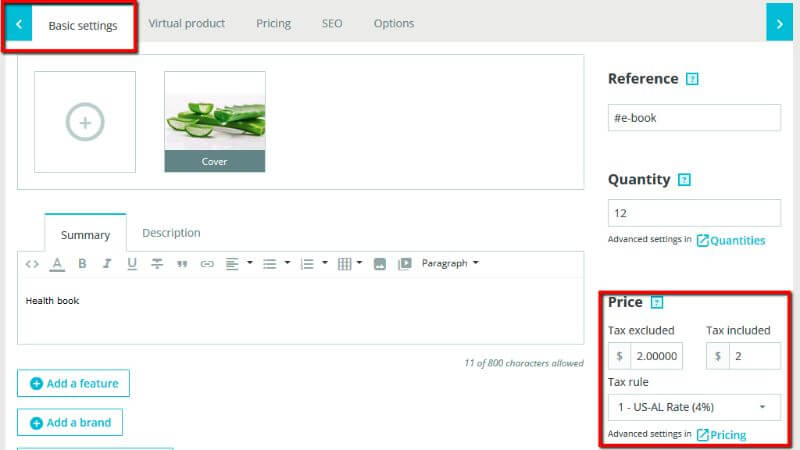
You will be redirected to a page with all the already created products in your store. There you can either select the listed product or add a new product and in the “Basic Settings” tab go to the “Price” section.
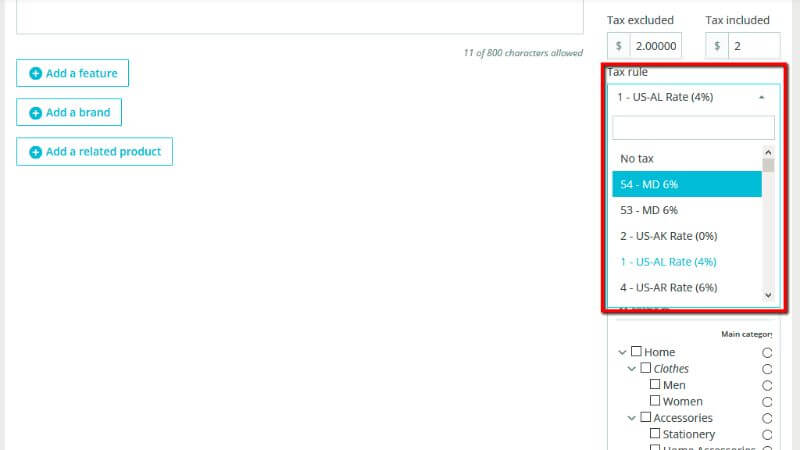
From the drop-down menu of the “Tax rule”, please, specify the tax rule for the product.
When you do that, please, click the “Save” button at the very bottom of the page.
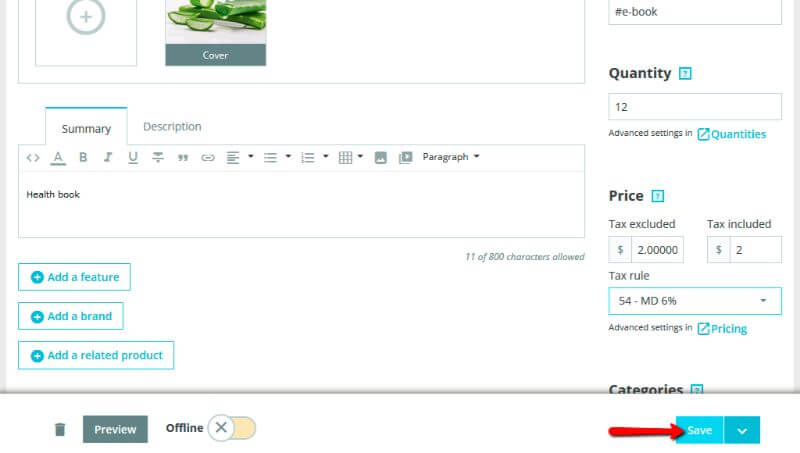
That will add the tax rule to the desired product.
Congratulations! Today you just learned the difference between a tax and a tax rule, how to create such and how to apply them to a product in your PrestaShop Online Store.

Simeon is an experienced System Administrator with over 10 years of experience in the Web Hosting field. He is recognized unanimously as the man behind every technical innovation or improvement that HostArmada introduces. Adaptable and responsible, he solves every technical issue that we or our clients throw at him. Every so often you will find him publishing technical content on our website.
Learn more about Prestashop 1.7 in the other tutorials that we have: